Preparing to Print
14
2
Setting custom size paper
Note
Custom sizes can also be set using
the printer driver. The following
procedures are not necessary
when setting custom sizes using
the printer driver.
Custom size settings set using the
printer driver have priority over
those set using the machine's dis-
play panel.
When the printer driver is not used,
make settings using the display panel.
Reference
For printer driver settings, see the
printer driver Help.
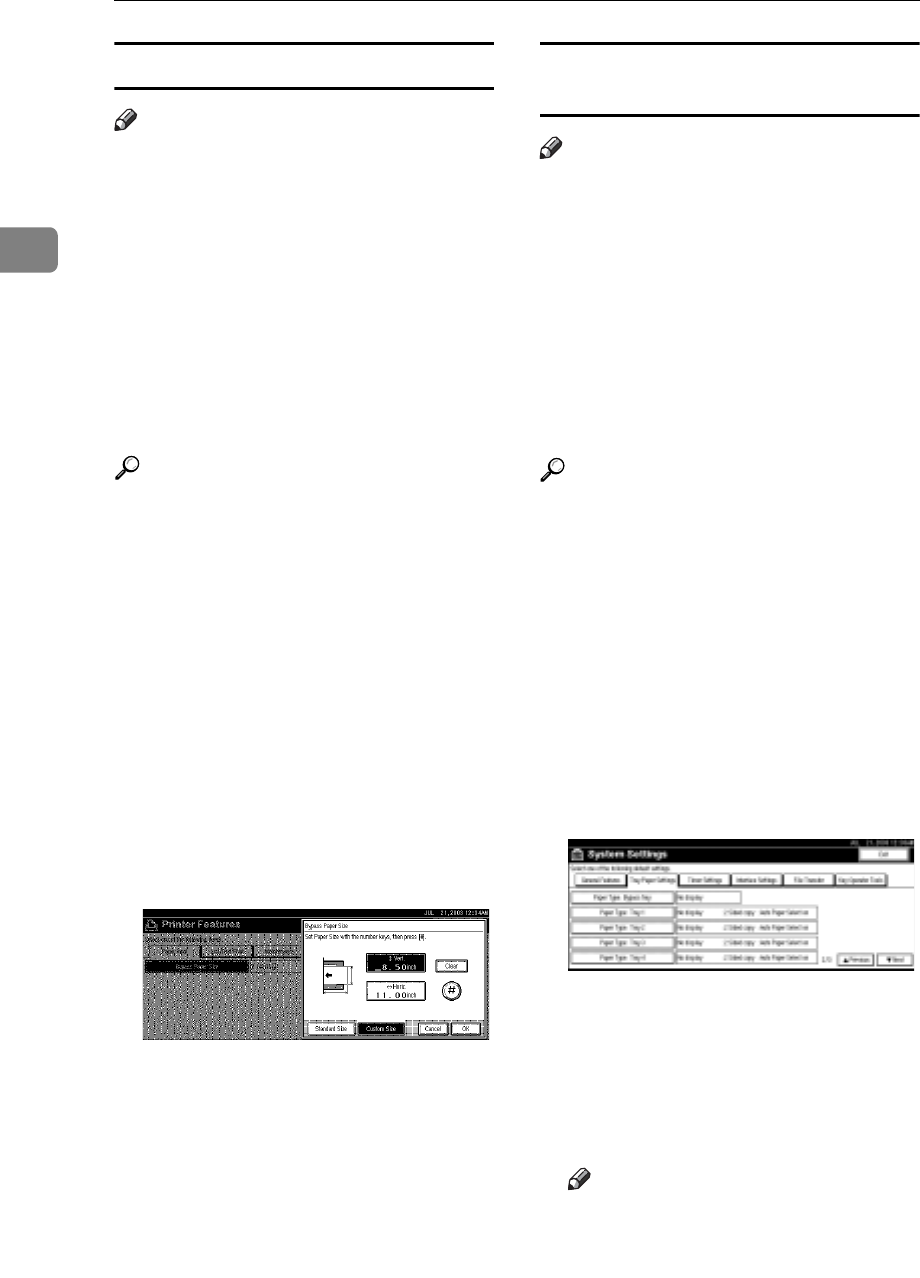
A Press the {User Tools/Counter} key
on the control panel.
B Press [Printer Features].
C Press the [Paper Input] tab.
D Press [Bypass Paper Size].
E Press [Custom Size].
F Enter the vertical size of the paper
using the number keys, and then
press [#].
G Enter the horizontal size of the
paper using the number keys, and
then press [#].
H Press [OK].
The paper sizes entered are dis-
played.
I Press the {User Tools/Counter} key.
Setting thick paper or OHP
transparencies
Note
Paper settings can also be set using
the printer driver. The following
procedures are not necessary
when setting paper sizes using the
printer driver.
Paper size settings set using the print-
er driver have priority over those set
using the machine's display panel.
When the printer driver is not used,
make settings using the display panel.
Reference
For printer driver settings, see the
printer driver Help.
A Press the {User Tools/Counter} key
on the control panel.
B Press [System Settings].
C Press the [Tray Paper Settings] tab.
D Press [TNext.] to scroll through the
list.
E Press [Paper Type: Bypass tray].
F Select [OHP] or [Thick Paper]
G Press [OK].
The paper type selected is displayed.
H Press the {User Tools/Counter} key.
Note
The settings made will remain
valid until they are reset again.
After printing on OHP transpar-
encies or thick paper, make sure
to clear settings for the next user.


