Chapter 13 — The Toolbar | Red-Eye Control Point 107
Advanced
The Advanced method provides superior results when lightening shadows or working with images with a
high level of noise or grain.
Click on the Advanced show/hide triangle to display the additional controls for the color control point step.
The values set for the selected color control point are displayed enabling you to enter a new value directly
to adjust the effect of the control point.
Click on the Reset button to reset the selected color control point to the default values.
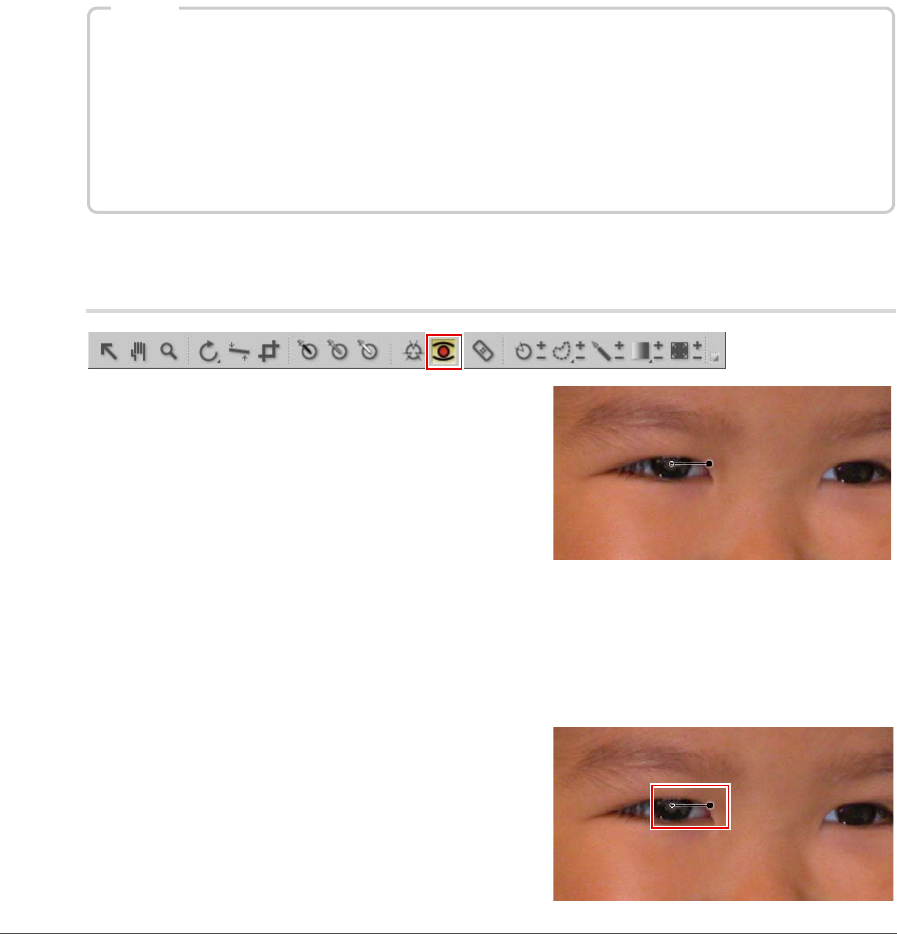
Red-Eye Control Point
The red-eye control point enables you to manually remove
the red-eye effect sometimes caused by flash photography.
To remove red-eye from an image using the red-eye control point tool, follow these steps:
1
Click on the red-eye control point icon in the toolbar. The cursor will change into a crosshair.
2
Click on the red portion of the eye that contains red-eye to place a Red-Eye Control Point.
3
Control the red-eye control point’s effect using the
size slider.
Shortcut
Add a Color Control Point: Ctrl + Shift + A (Windows)
command + shift + A (Macintosh)
Duplicate a Color Control Point: Hold the Alt button while selecting and dragging a color control point to
duplicate and place the duplicated color control point in a new location
(Windows)
Hold the option button while selecting and dragging a color control point
to duplicate and place the duplicated color control point in a new location
(Macintosh)


