


37
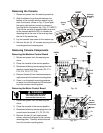
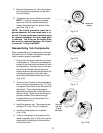
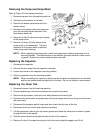
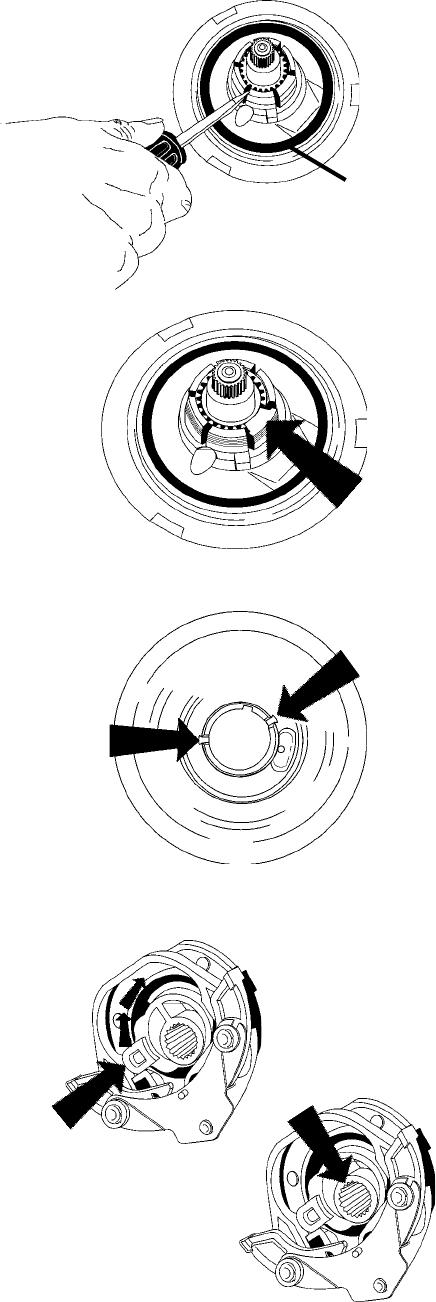
11. Remove the spanner nut. Once this is done,
the universal joint assembly can be lifted
from the basket.
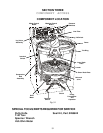
12. The basket can now be lifted from the tub.
NOTE: It may be necessary to spread
apart one of the drive block sections to
loosen the basket from the splines of the
spin tube. (Fig. 3-15)
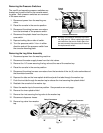
NOTE: The U-joint grommets must be re-
placed whenever the outer wash plate is re-
moved. The seal on the inner wash plate must
be replaced whenever the inner wash plate
is removed. The O-ring on the basket drive
hub must be replaced whenever the U-joint
is removed. O-ring kit #285842.
Reassembling Tub Components
When reassembling the components in the bas-
ket, take note of a number of alignment keys pro-
vided to assure proper reassembly.
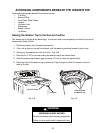
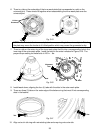
1. One portion of the spin tube does not have
vertical splines. There is a corresponding
portion of the drive block that does not have
vertical splines. The top surface of the por-
tion of the drive block without splines is
slightly wider and should be aligned with the
corresponding portion of the spin tube
when setting the basket back into the tub.
(Fig. 3-16)
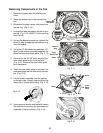
2. There are two (2) slots on the underside of
the universal joint assembly (Fig. 3-17) that
correspond to two tabs on the drive block of
the basket. These should be properly
aligned when placing the universal joint on
the drive block. When the universal joint is
properly installed, there will be enough
threads showing on the drive block to in-
stall the spanner nut.
3. Install the spanner nut. The proper torque
setting is 75 ft.-lbs. Do not overtighten.
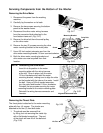
4. Level the leveler before it is installed.
(Fig. 3-18a)
5. There is a flat portion in the splines of the
leveler assembly (Fig. 3-18b), that must be
aligned with the flat portion of the splines
on the drive shaft.
Fig. 3-15
Fig. 3-16
Fig. 3-17
Fig. 3-18a
Fig. 3-18b
Turn this
hub 180°
to level
the leveler
Drive Hub
O-Ring