


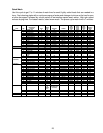
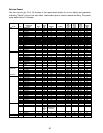
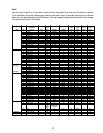
33
Removing the Console
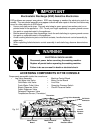
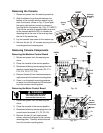
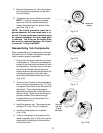
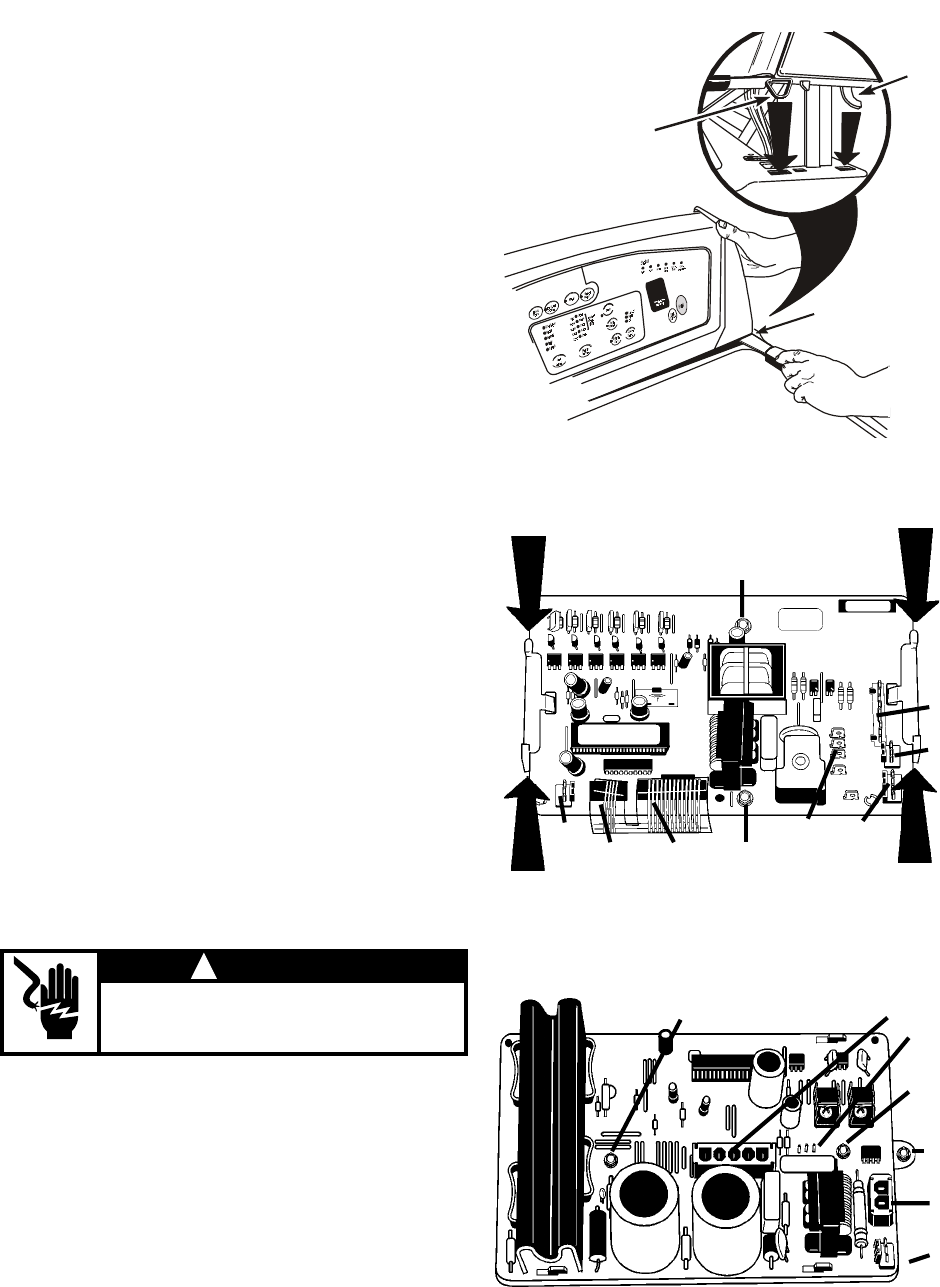
1. Disconnect power from the washing machine.
2. Slide the blade of a putty knife between the
bottom of the console and the washer top at
each front corner (Arrow in Fig. 3-3) and push
the spring clip back far enough to release it
from the slot in the washer top. (Fig. 3-3, INSET)
Then lift the console up approximately one inch,
tip the console back and lift it to release the
mounting tab at the rear of the end cap from
the slot in the washer top.
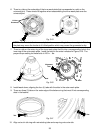
3. Lay the console face down on the washer top.
4. Remove the six (6) 1/4” screws securing the rear
console panel and remove panel.
Removing Console Components
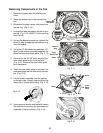
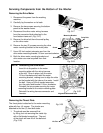
Removing the Machine Control Board
1. Disconnect power from the washing ma-
chine.
2. Place the console in the service position.
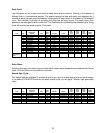
3. Disconnect all wiring harness plugs from the
machine control board terminals (P4, P11,
P12, P13, P16, P17, P19).
4. Remove the two (2) hex-head screws secur-
ing the board to the console mounting plate.
5. Press in on the plastic mounting brackets
on each end of the board and lift the board
from the console mounting plate.
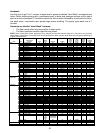
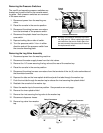
Removing the Motor Control Board
1. Disconnect power from the washing ma-
chine.
2. Place the console in the service position.
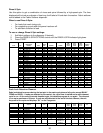
3. Disconnect all wiring harness plugs from the
control board terminals (P1, P2, P5, P6).
4. Remove the two (2) hex-head screws
shown, securing the board to the console
mounting plate. Carefully slide the board
from the console mounting plate.
P4
P12
P11
P16 P19
P17
P13
Screw
PRESS
IN
PRESS
IN
PRESS
IN
PRESS
IN
P5
P1
P6
P2
Screw
Screw
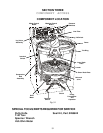
Fig. 3-4
Fig. 3-5
Putty Knife Here
INSET
Fig. 3-3
Spring
Clip
End Cap
Mounting
Tab
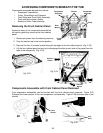
High voltage may be present
even after power has been
disconnected from the unit.
! WARNING
Screw
Do Not
Remove
This Screw