


Operation Manual Appendix B: Extractor tool pre-use and post-use inspection checklist
3-9000-744 Rev F September 2013
Inspection checklist 39
B1TOP (14)
Appendix B: Extractor tool pre-use and post-use
inspection checklist
B.1 Inspection checklist
Use the following checklist prior to and after using the extractor tool and to ensure the tool is in
good working condition.
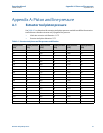
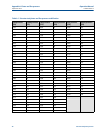
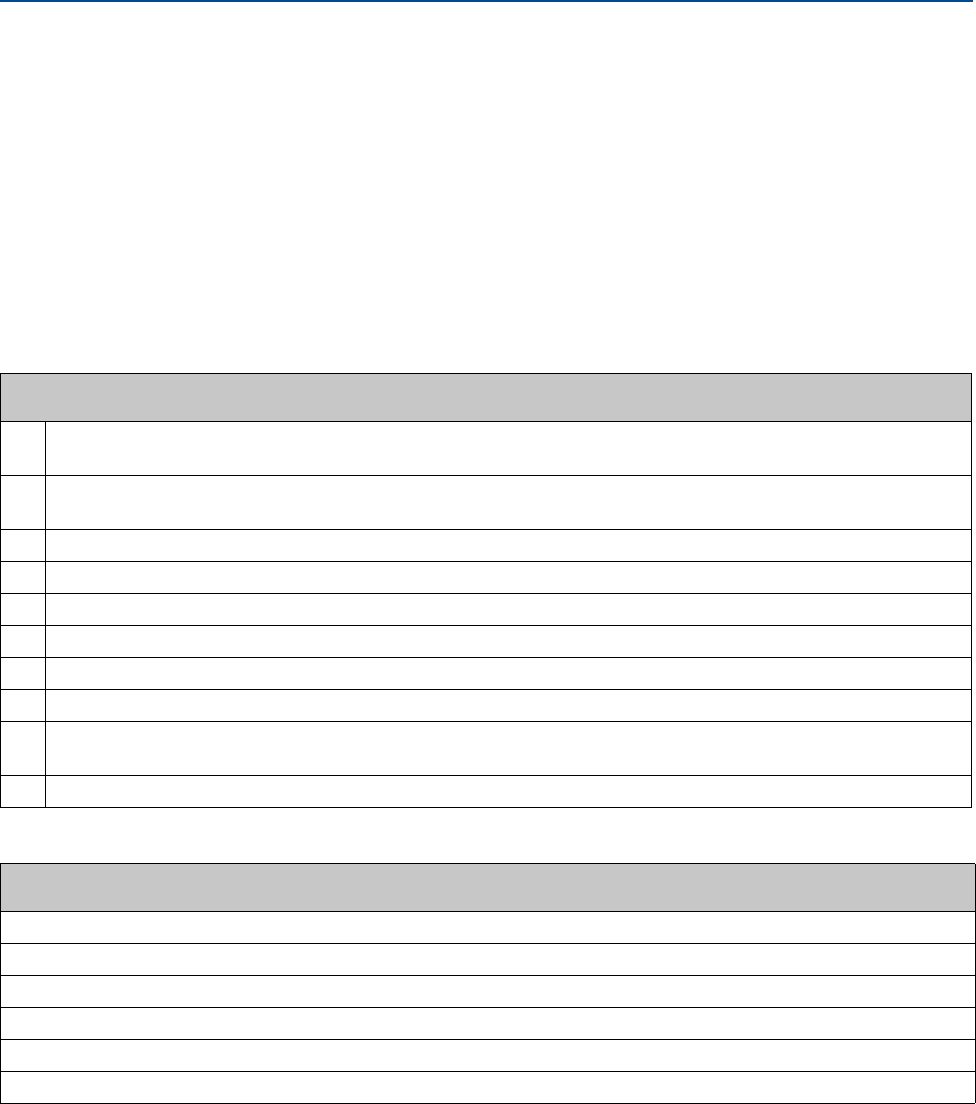
Table B-1 Inspection checklist
Extractor tool pre-use and post-use inspection checklist
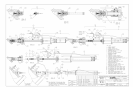
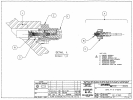
Verify the shaft on the Lubricator Chamber Assembly is clean and free of dirt, can be smoothly pulled out and pushed
back in and that the scribe mark can be easily seen.
Visually inspect and make sure the four bolts that hold the Piston Assembly onto the Lubricator Chamber Assembly are
clean and threads not galled or damaged.
Visually verify that all hoses are intact with no kinks or tears.
Verify that the Piston Assembly pressure hose is attached and tight.
Visually verify that there are no leaks at the NPT thread connections.
Verify pressure gauge on the Lubricator Chamber Assembly is indicating the correct pressure (300psi).
Visually verify the regulator on the Lubricator Chamber Assembly is functioning properly.
Verify that the Piston Assembly pressure gauge indicates the correct pressure (300 psi)
Make sure that there are at least eight (8) O-rings, backup O-rings and lubricant to replace all transducers extracted.
Order a sufficient quantity of O-rings and lubricant for the transducer swap-out procedure and enough for next time use.
Contact Daniel Customer Service for any replacement parts or if any failures occur during this inspection.
Comments: