


36
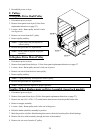
2. Remove the front panel. Follow front panel removal instructions on page 27 for removal.
3. Remove thruster wheel assembly.
4. Remove the wheel from thruster wheel bracket.
5. Reverse steps 1 through 5 for installing the new thruster wheel.
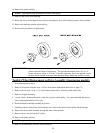
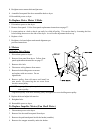
To Replace Rear Thruster Wheels on Bolted Brackets Front Access
1. Discontinue power to the dryer.
2. Remove the front panel. Follow front panel removal instructions on page 27.
3. Remove the two (2) front thruster wheel brackets.
4. Remove the basket (tumbler) from the dryer.
IMPORTANT: Be careful of the rotational sensor located underneath the basket. I the basket hits this
sensor it will break. You may want to remove this sensor first.
5. Remove the rear thruster wheels.
6. Reverse steps 1 through 6 for installation of the new thruster wheels.
Rear Access
1. Discontinue power to the dryer.
2. Remove thruster wheel cover.
3. Remove the two (2) bolts securing the thruster wheel bracket to the rear of the machine.
4. Remove the nut securing the thruster wheel to the bracket and remove the thruster wheel.
5. Reverse steps 1 through 4 for installation of the new thruster wheel.
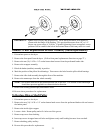
To Replace Rear Thruster Wheels on Welded Thruster Wheel Bracket Models
1. Discontinue power to the dryer.
2. Remove the front panel. Follow front panel removal instruction on page 27.
3. Remove the two (2) front thruster wheel brackets.
4. Remove the basket (tumbler) from the dryer.
IMPORTANT: Be careful of the rotational sensor located underneath the basket. If the basket hits
this sensor, it will break. You may want to remove this sensor for extra caution.
5. Remove the rear thruster wheels.
6. Reverse steps 1 through 6 for installation of the new thruster wheels.
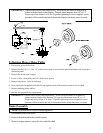
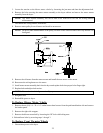
K. Impeller
1. Discontinue power the dryer.
2. Remove the perforated basket (tumbler) panel.
3. Remove right wrapper assembly.
4. Remove v-belts from blower motor and impeller assembly.