


31
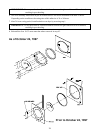
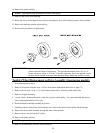
IMPORTANT: Tighten screws evenly and progressively. Never allow the sheave to be drawn in
contact with the flange of the bushing. This gap should measure from 1/8" to 1/4".
Proper cap screw torque is 30 ft-lbs. If greater tightening forces are applied, excess
pressures will be created in the hub of the mounted sheave which may cause it to crack.
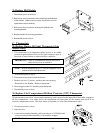
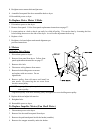
Tumbler Wheel Replacement on Idler Assembly (trantorque models)
1. Discontinue power to the dryer.
2. Remove the front panel form the dryer. (Follow front panel replacement directions on page 27.)
3. Remove the ten (10) 1/4-20 x 1/4" socket button head screws from the perforated basket side.
4. Remove the wrapper assembly.
5. Block the basket (tumbler) assembly in position.
6. Mark the position of the pillow block bearings. Then remove the bolts from the pillow block bearings.
7. Remove the idler shaft assembly through the front of the machine.
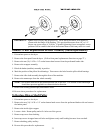
8. Remove the transtorque from the wheel assembly.
NOTE: One wrench must be on the transtorque and one on the axle. The wrench on the transtorque
should have pressure applied in a counterclockwise direction.
9. Remove the bushing (transtorque) and tumbler wheel.
10. Reverse these procedures for replacement.
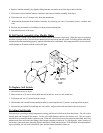
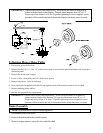
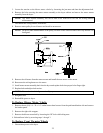
To Replace Blower Shaft Pulley
1. Discontinue power to the dryer.
2. Remove the ten (10) 1/4-20 x 1/4" socket button head screws from the perforated basket side and remove
the basket panel.
3. Remove the inside right wrapper.
4. Loosen v-belts. Rotate pulley and roll v-belts out of the groove.
5. Remove cap screw from bushing.
6. Insert cap screws in tapped removal holes and tighten evenly until bushing becomes loose on shaft.
7. Remove bushing, pulley and key.
8. Reverse this procedure for replacement.