Installation
21
M414905
© Copyright, Alliance Laundry Systems LLC – DO NOT COPY or TRANSMIT
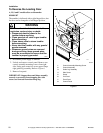
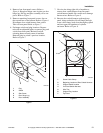
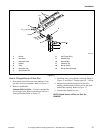
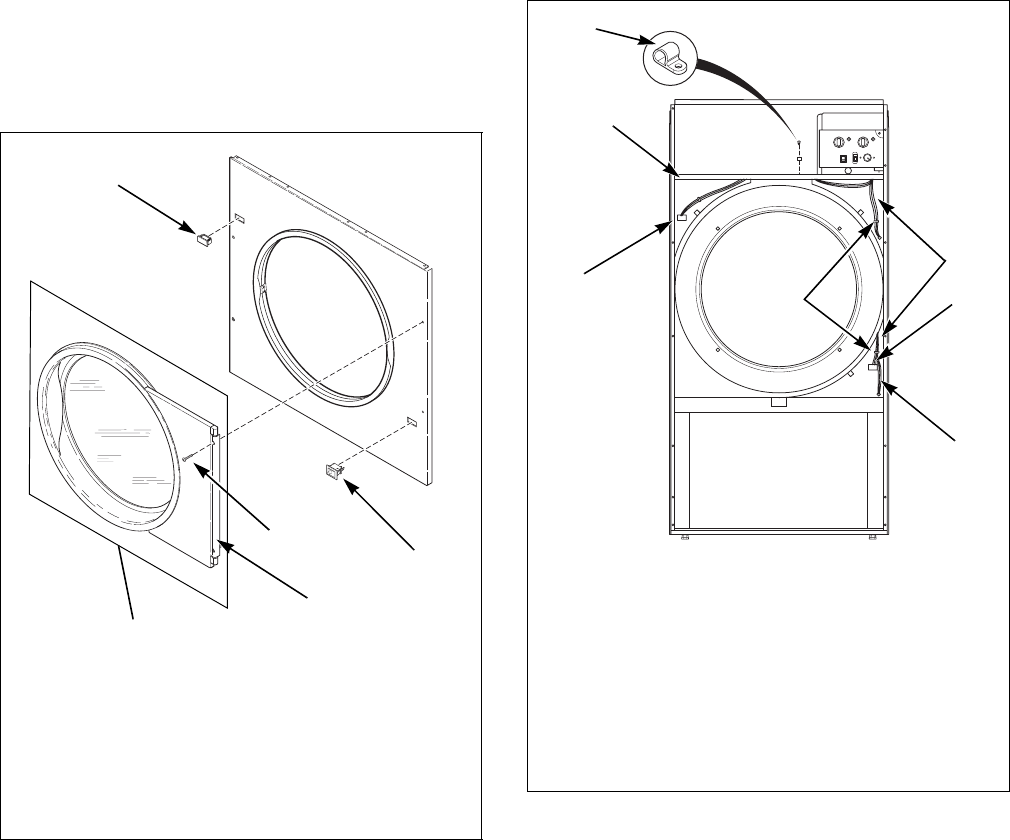
4. Remove four front panel screws. Refer to
Figure 6. Keep door hinge cams in place on door
hinge lug. Pull lug and door assembly off as one
piece. Refer to Figure 7.
5. Remove remaining front panel screws. four on
the top and four on the bottom. Refer to Figure 6.
Disconnect door switch harness from switch.
Take off front panel. Refer to Figure 7.
6. Exchange switch and plug locations. Depress
tabs with an adjustable pliers to remove plug and
switch from front panel. Reinstall switch,
orienting button toward center of machine.
Reinstall plug in switch’s previous location.
Refer to Figure 7.
Figure 7
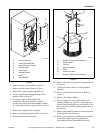
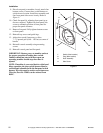
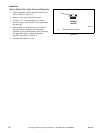
7. Cut wire ties along right side of machine to
remove door switch harness from lint panel
switch harness bundle. Be careful not to damage
harness wires. Refer to Figure 8.
8. Reroute door switch harness up through top
panel, along underside of front flange, through
screw cable clamp, back down through top panel
and into upper left quadrant of cylinder
enclosure. Refer to Figure 8.
Figure 8
TMB1995N
1 Plug
2 Switch
3 Side Screw
4 Door Hinge Lug
5 Door Assembly
TMB1995N
1
2
3
4
5
TMB1996N
1 Screw Cable Clamp
2 Beginning Location of Door Switch Harness
3 Original Switch Location
4 Lint Panel Switch Harness
5 Wire Ties
6 Original Plug Location
7 Top Panel
1
2
3
4
5
6
7


