


3
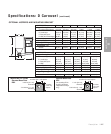
Description
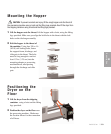
Mounting the Dryer and Hopper on
a Processing Machine (continued)
The drying hopper, slide gate, support frame, and discharge assembly may have
been shipped fully assembled. You can remove the hopper from the support frame,
if you find it easier to lift and bolt the frame and then the hopper to the throat of
the processing machine.
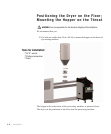
1 Lift the hopper, support frame, and discharge assembly onto the process-
ing machine throat. Use a hoist to lift the support frame and hopper. Position
the frame and discharge assembly so that its bolt holes line up with the holes
drilled in the throat. If hole patterns do not match, you can place a mounting
adapter between the throat and the support frame.
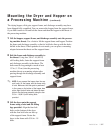
2 Bolt the frame and discharge assembly to
the throat. Using four 3/8 in. -16 (M 10)
self-locking bolts, fasten the support frame
and discharge assembly to the throat. The
bolts must be long enough to reach at least
1/2 in. (1.25 cm) into the processing
machine throat or mounting adapter after
passing through the discharge assembly and
support frame.
NOTE: If you removed the hopper from the sup-
port frame, lift the hopper onto the frame using
a hoist. Make sure the slide gate is positioned
in the recess on the bottom of the hopper base
plate. Align the bolt holes and fasten the base
plate to the discharge assembly using the four
3/8 in. -16 (M 10) self-locking bolts
provided.
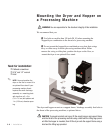
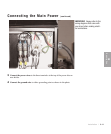
3 Lift the dryer onto the support
frame using a hoist and the lifting
lugs provided. Align the four bolt
holes on the bottom of the dryer
with the four bolt holes on the top
of the support frame. Fasten the
dryer to the frame with 5/16 in. -18
bolts.
✐
Installation l 3-7