


31
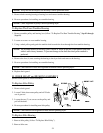
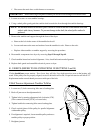
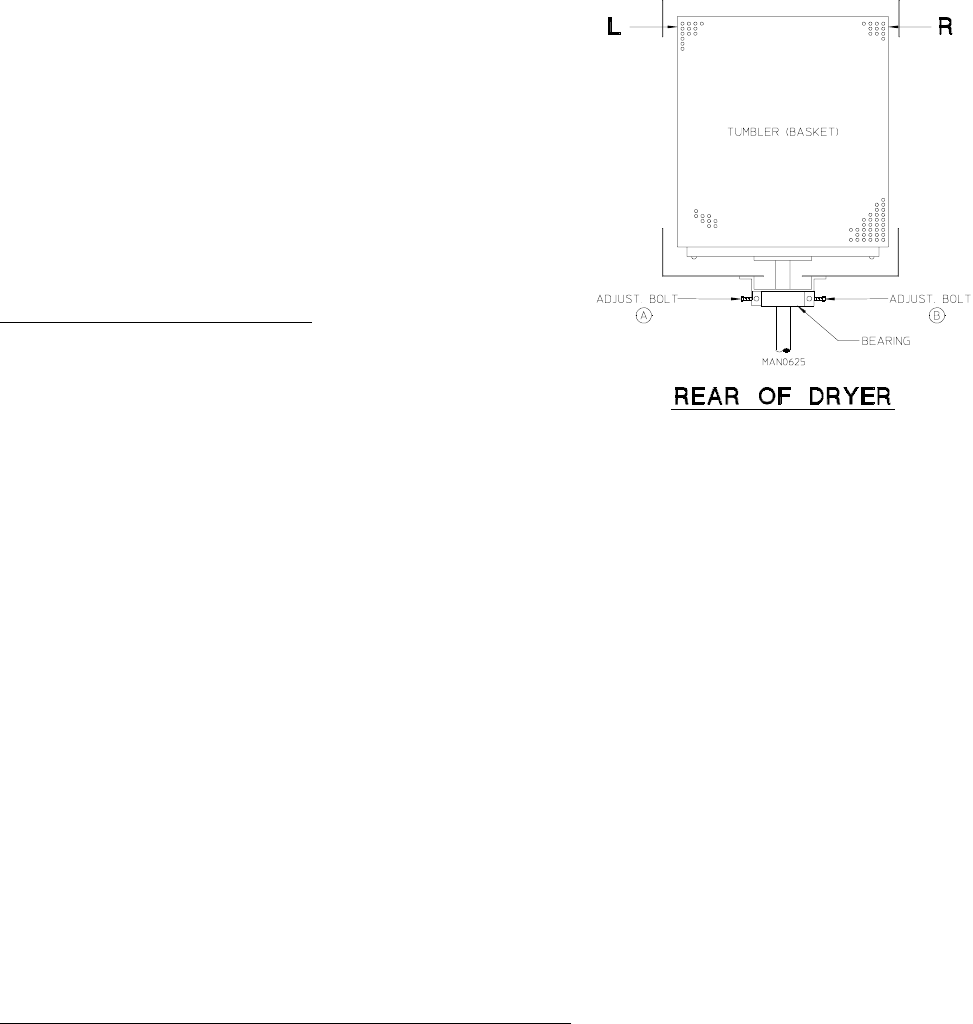
7. Leave a larger gap from the inside ring on the top of the front
panel opening to the tumbler, and a smaller gap on the bottom
to compensate for the weight of the clothes being dried.
8. Tighten the four (4) hex head bolts on the sides of the bearing
box, and the two (2) Allen head adjustment screws.
9. Replace back guard.
10. Reestablish electrical power to the dryer.
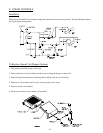
Tumbler Alignment (Lateral)
1. Discontinue electrical power to the dryer.
2. Remove back guard.
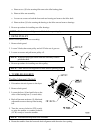
3. Loosen the two (2) hex head bolts, (one turn is enough), that holds the pillow block bearing to the bearing box.
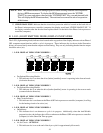
4. Back off the two (2) jam nuts on the side adjustment bolts. Now rotate the tumbler from the front of the dryer,
checking the space between the tumbler and the front panel. This should be equal on the left hand and right
hand side.
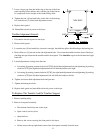
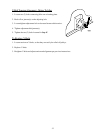
5. Lateral adjustment (viewing from the rear)
a. Loosening (by turning counterclockwise [CCW]) the left hand adjustment bolt and tightening (by turning
clockwise [CW]) the right hand adjustment bolt will shift the basket to the right.
b. Loosening (by turning counterclockwise [CCW]) the right hand adjustment bolt and tightening (by turning
clockwise [CW]) the left hand adjustment bolt will shift the basket to the left.
6. Tighten and secure both adjustment bolts and jam nuts.
7. Tighten the bearing box bolts.
8. Replace back guard and reestablish electrical power to the dryer.
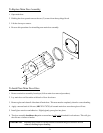
To Replace The Tumbler And/Or Tumbler Support
1. Remove tumbler pulley.
2. Remove front panel assembly.
a. Discontinue electrical power to the dryer.
b. Open control (service) door.
c. Open lint door.
d. Remove the screws securing the front panel to the dryer.
e. Gently remove the top right hand corner of the front panel assembly from the dryer.