


30
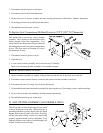
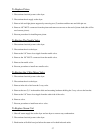
a. Remove two (2) bolts securing idler arm to the idler backup plate.
b. Remove idler arm assembly.
c. Loosen set screws on both the front and rear bearing and remove the idler shaft.
d. Remove three (3) bolts securing the bearing to the idler arm and remove bearings.
3. Reverse procedure for installing new idler bearings.
NOTE: Check tension and alignment of belts before operating dryer.
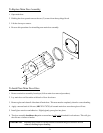
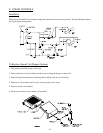
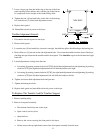
I. DRIVE PULLEY
(Remove back guard to access assembly)
1. Remove back guard.
2. Loosen V-belts, then rotate pulley and roll V-belts out of grooves.
3. Loosen set screws and pull motor pulley off.
NOTE: If rust has developed on the shaft use an emery cloth to
polish the shaft.
4. Reverse procedure for installing new drive pulley.
NOTE: Check tension and alignment of belts before operating dryer.
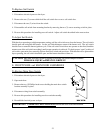
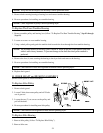
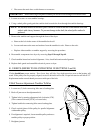
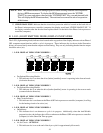
J. TUMBLER (BASKET)
Tumbler Alignment (Vertical)
1. Discontinue electrical power to the dryer.
2. Remove back guard.
3. Loosen the four (4) hex head bolts on the
sides of the bearing box (2 on each side).
4. Back off jam nuts on the two (2) Allen head
adjustment screws at the top of the bearing
box.
5. Turn the screws clockwise (CW) evenly
to raise the tumbler or counterclockwise
(CCW) evenly to lower the tumbler.
NOTE: V-belt tension may need to be loosened.
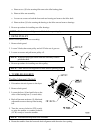
6. Rotate the tumbler from the front and check alignment with the main door opening.