


4 - 9
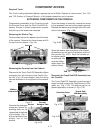
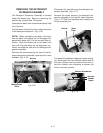
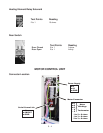
At the back of the tub assembly, remove the belt
from the basket and motor pulleys.
(Fig. 4-34 -1)
To remove the pulley from the basket, place the
handle of a crescent wrench through the pulley
and into the steel bearing hub to keep the pulley
from turning.
(Fig. 4-34-2)
Use a 21-millimeter socket wrench to remove the
nut securing the pulley to the basket.
(Fig. 4-34 -
3)
Disconnect the ground wire from the bearing hub
with a T-25 Torx driver.
(Fig. 4-34 -4)
1
2
3
4
Fig. 4-34
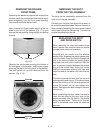
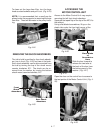
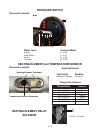
Remove the screw securing the left end of the
pressure tube connector to the tub. Then, press
down on the plastic tab securing the right end of
the pressure tube connector and pull it from the
tub.
(Fig. 4-35)
Pressure Tube Connector
Removed
Fig. 4-35
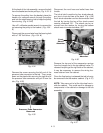
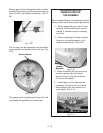
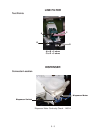
Remove the top end of the suspension springs
from the hanger slot in the top cabinet frame. To
release the spring at the right side of the cabinet,
it may be necessary to remove the wiring har-
ness retainer from the cabinet.
Once the final spring is released the tub is free to
be removed from the washer cabinet.
(Fig. 4-37)
NOTE: Take care not to let the tub drop free in-
side the cabinet. This could result in damage to
components in the cabinet or damage to the tub
assembly.
Fig. 4-37
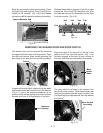
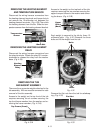
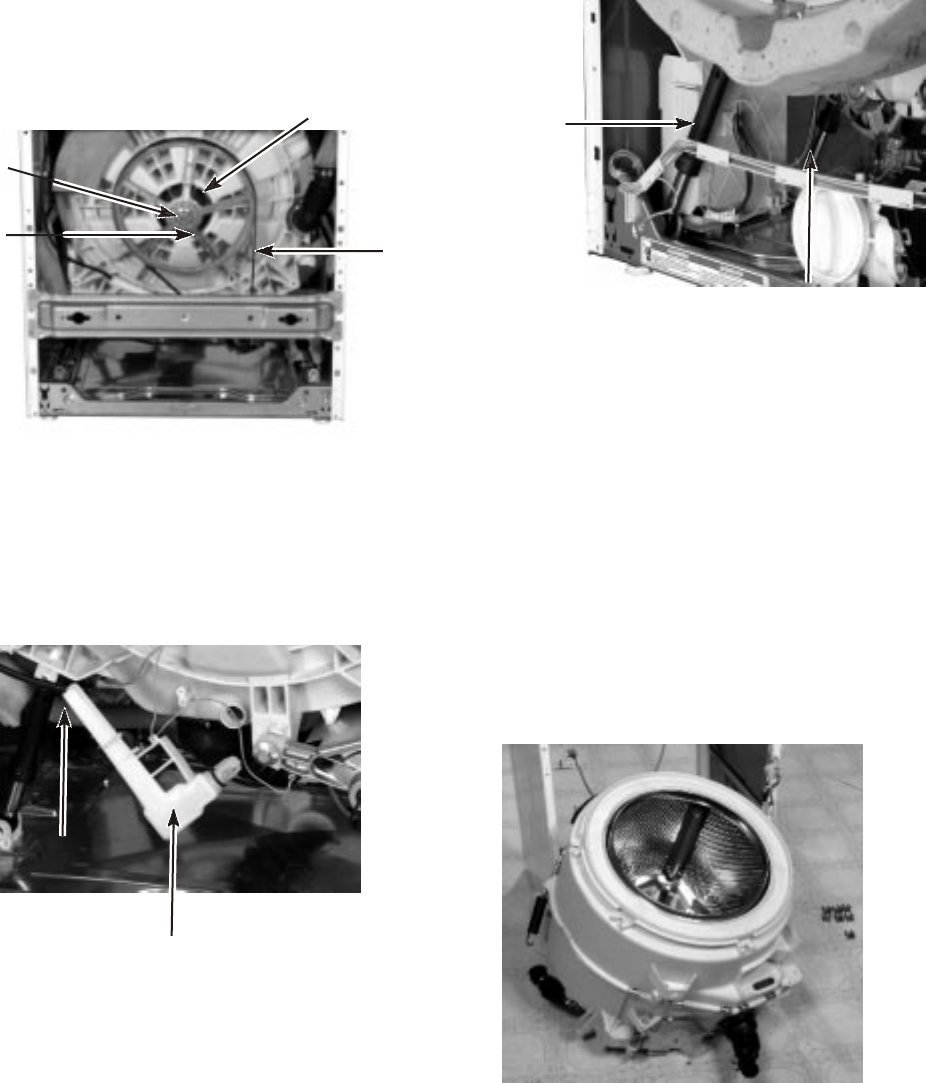
The tub is held in position by four shock absorb-
ers, two in front and two at the back.
(Fig. 4-36)
Each shock absorber can be disconnected from
the tub by turning the top of the shock mount
counter clockwise, 90°. The shock can be re-
moved from the washer by turning the bottom
shock mount counterclockwise, 90°.
Disconnect the vent hose and outlet hose from
the tub.
Fig. 4-36
Rear Shock
Absorber
Front
Shock
Absorber