


4 - 8
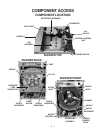
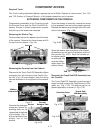
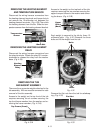
REMOVING THE TUB
AND BASKET ASSEMBLY
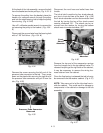
There are three concrete weights attached to the
tub assembly. All three must be removed for safe
removal of the tub assembly.
Access to the weight on the top front of the tub
requires removing the six screws securing the
top front frame member from the washer and re-
moving the frame member.
(Fig. 4-31A)
Top Frame (Front)
Fig. 4-31A
Access to the weight on the top back of the tub
requires removing the two screws securing the
upper transport brace to the washer and remov-
ing the brace.
(Fig. 4-31B)
Fig. 4-31B
Upper
Brace
(Back)
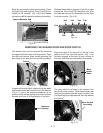
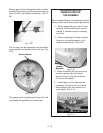
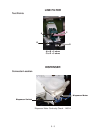
Each weight is secured to the tub by three 13-
millimeter bolts.
(Fig. 4-32)
Remove the three
bolts and lift the weight from the tub.
Bolts
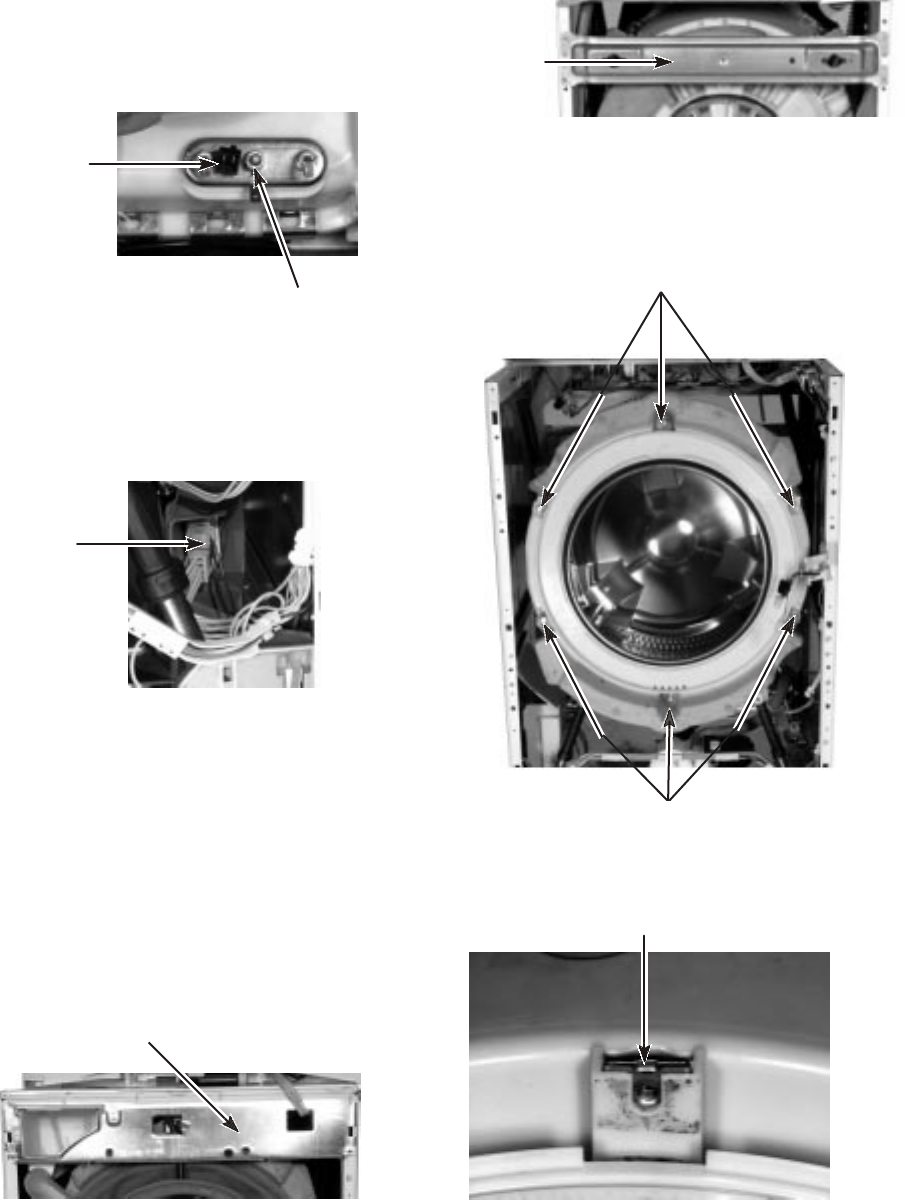
Remove the flat nuts from the tub for safekeep-
ing.
(Fig. 4-33)
Fig. 4-33
Flat Nut
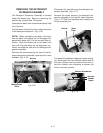
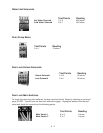
REMOVING THE HEATING ELEMENT
AND TEMPERATURE SENSOR
Disconnect the wiring harness connectors from
the heating element terminals and loosen but do
not remove the 10-millimeter nut between the
heating element terminals.
(Fig. 4-29)
Then slide
the heating element from the tub. Slide the tem-
perature sensor from the heating element bracket.
Fig. 4-29
10mm Nut
Temperature
Sensor
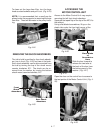
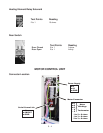
REMOVING THE HEATING ELEMENT
RELAY
Disconnect the wiring harness connectors from
the relay terminals. Rotate the relay 90° counter-
clockwise to release the relay from the washer
base.
(Fig. 4-30)
Heating
Element
Relay
Fig. 4-30
Bolts
Fig. 4-32