


24
Adjusting 45° and 90° Positive Stops
The stops have been adjusted at the factory. After
a period of use, or, after moving the saw to another
location, the stops may no longer be set properly.
To check and adjust the stops:
Tool: 12mm Wrench,
Combination Square
1. Disconnect saw from power source, unplug.
2. Raise the saw blade to its maximum height
using the handwheel.
3. Set the blade at 45° or 90° to the table by
turning the blade tilting handwheel clockwise
as far as it will go.
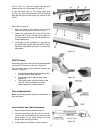
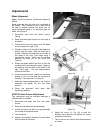
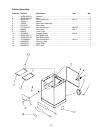
4. Place a square on the table and check to see
that the blade is at a 45° or 90° angle to the
table, see Figure 44. Make sure square is not
touching a blade tooth.
If blade is not at 90°
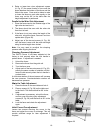
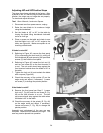
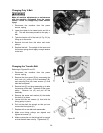
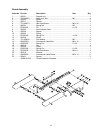
5. Referring to Figure 45, remove the front panel
(D) by unscrewing the lock knob (A), pulling off
the handwheel (B) and removing five pan head
screws (C) that hold the front panel.
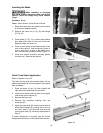
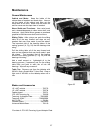
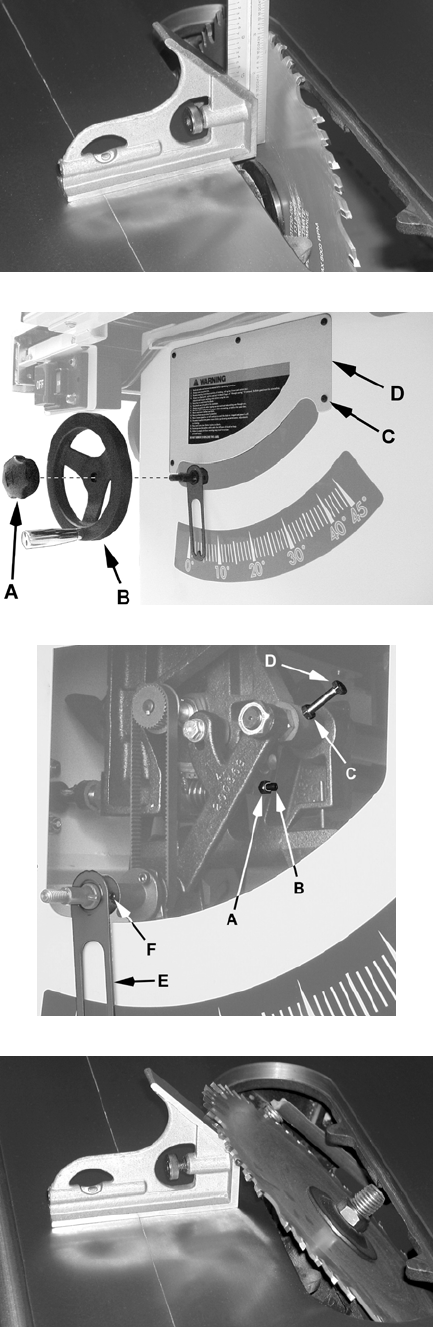
6. Referring to Figure 46, loosen the lock nut (A)
and turn set screw (B) on the front trunnion in
or out. The set screw should stop against the
front trunnion bracket when the blade is 90° to
the table.
7. Tighten the lock nut (A) and recheck the blade
with a square (Figure 44).
8. Check the accuracy of the pointer (E) on the
angle scale and adjust, if necessary. Loosen
set screw (F) to change the pointer position.
If the blade is not 45°
9. Remove the front panel per Step 5. Loosen
lock nut (C, Fig. 46) and turn set screw (D, Fig.
46) on the front trunnion in or out. The hex
cap screw should stop against the table when
the blade is 45° to the table.
10. Check the accuracy of the pointer (E. Fig. 46)
on the angle scale and adjust, if necessary.
Loosen set screw (F, Fig. 46) to change the
pointer position.
Assembly and adjustment of the saw are now
complete. Make sure all fasteners are tight. The
saw may now be placed into operation.
Figure 44
Figure 45
Figure 46
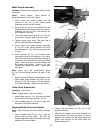
Figure 47