


13
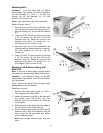
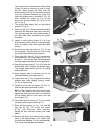
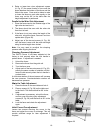
The support plate underneath the sliding table
(Figure 10) has an inner tab (A) and an outer
tab (B). When placing the table onto the
leveling bracket (D, Fig. 8), the leveling bracket
must be positioned between the inner and
outer tabs and the slots in the tabs (C, Fig. 10)
must straddle the screws (A, Fig. 8) that
secure the leveling bracket (D, Fig. 8) to the
rail (C, Fig. 8).
7. The sliding table should rest on the jacking
screws (G, Fig. 8).
8. Place two 90° 0.02” shims between the sliding
table and the table saw table near each end.
This will help keep the sliding table parallel to
the table saw table maintaining the proper
clearance.
9. Lower, or raise jacking screws (G, Fig. 8) so
that the sliding table surface is approximately
flush, or slightly lower than table saw table
surface.
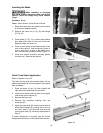
10. Snug the four hex cap screws (A, Fig. 11) but
do not tighten. This will allow you to fine tune
the sliding table with the jacking screws.
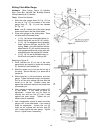
11. Place a flat 0.02” shim (C, Fig. 11) on the table
saw tabletop for the straight edge (B, Fig. 11)
to rest on. This will help keep the sliding table
the right height above the top of the table saw.
12. Use two jacking screws (G, Fig. 8) to raise the
sliding table until it contacts the straight edge.
The straight edge should rest flat on sliding
table and shims.
13. Move straight edge to the other end of the
table saw tabletop and repeat step 12.
14. Tighten hex nuts (F, Fig. 8) against the leveling
bracket tabs while keeping jacking screws
(G, Fig. 8) from turning.
15. Tighten the four hex cap screws (A, Fig. 11)
that hold the leveling brackets in place.
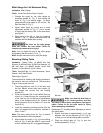
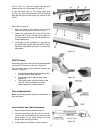
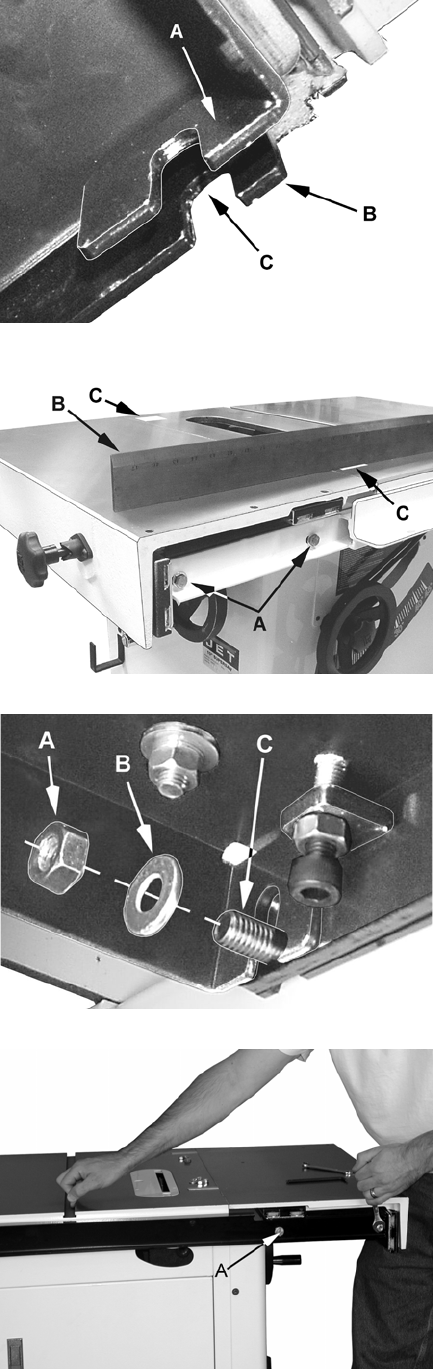
Note: When tightening the screws on the rear
rail you may need to hold the sliding table
against the shims because there is a tendency
for the sliding table to move away from the
shim (Figure 12).
16. Verify that the jack screws (G, Fig. 8) contact
the sliding table support plate (Fig. 12).
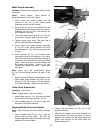
17. Place M8 flat washers (A, Fig. 11A) and M8
hex nuts (B, Fig. 11A) on the four screws
(C, Fig. 11A). Using two 13mm wrenches,
tighten the hex nuts while holding the screw
heads.
18. Remove the shims and make sure the sliding
table is still approximately 0.02” higher than
the table saw tabletop; it is still approximately
0.02” away from the table saw tabletop.
Figure 10
Figure 11
Figure 11A
Figure 12