


19
Installing the Blade
When installing or changing
saw blade, always disconnect saw from power
source! Failure to comply may cause serious
injury!
Hardware: Blade
Tools: Arbor Wrench, Scrap Piece of Wood
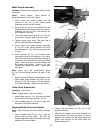
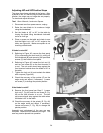
1. Raise the blade arbor and make sure the arbor
is at the zero degree position.
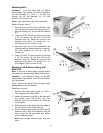
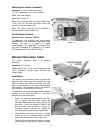
2. Remove the arbor nut (A, Fig. 30) and flange
(B, Fig. 30).
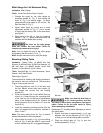
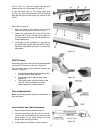
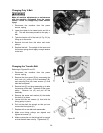
3. Place blade (C, Fig. 31) on arbor shaft making
sure teeth point down at the front of the saw.
Replace flange and arbor nut.
4. Place a wood scrap in the blade's teeth at the
rear of the machine. Hold the block of wood in
such a way that if it slips or the blade turns,
your hand will not contact the blade, Figure 31.
5. Using the wrench provided, securely tighten
the arbor nut. Remove the wrench.
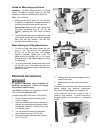
Guide Tube Scale Application
Refer to Figures 32 and 33.
The scale for the guide tube comes rolled, with an
adhesive backing and must be applied to the guide
tube as follows:
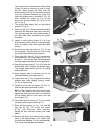
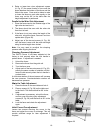
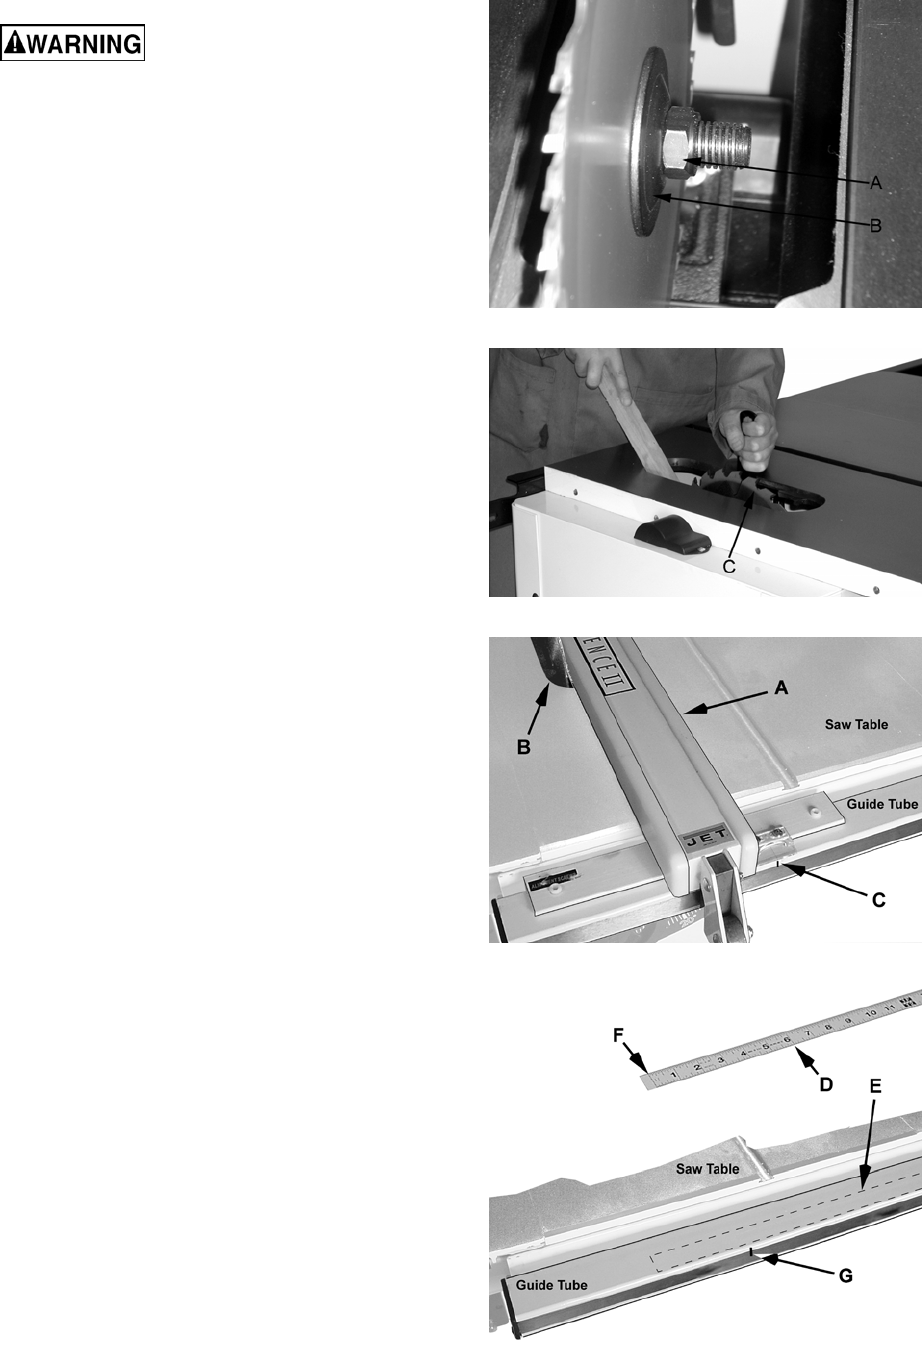
1. Place the fence (A) so it is flush against the
right side of the saw blade (B) and lock it.
2. Using a fine marker, place a mark on the guide
tube at the cursor hairline (C).
3. Remove the fence (A).
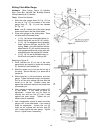
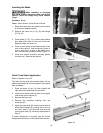
4. Remove the protective backing from the
scale strip (D).
5. Apply the scale strip (D) onto the guide tube at
the outlined location (E), making sure to line up
the "zero" mark (F) on the scale with the mark
on the guide tube (G) previously determined in
Step 2.
If further adjustment is required, see the Cursor
Adjustment instructions in the Adjustments section.
Figure 30
Figure 31
Figure 32
Figure 33