


10
Assembly
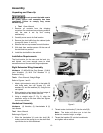
Unpacking and Clean-Up
Do not connect the table saw to
the power source until assembly has been
completed! Failure to comply may cause
serious injury!
• Tool: 12mm Wrench
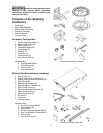
1. Remove all contents from the shipping
container. Do not discard any shipping material
until the saw is set up and running
satisfactorily.
2. Carefully move saw to its final location.
3. Remove the dust baffle from the cabinet (refer
to page 30, Items 11 and 12).
4. Remove the hex cap screws from skid bottom.
5. With help from another person lift the saw off
the skid and into position.
6. Install the dust baffle in the cabinet.
Installation Requirements
The final location for the saw must be level, dry,
well lighted, and have enough room to allow
movement around the saw with long workpieces.
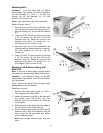
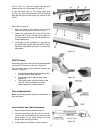
Right Extension Wing Assembly
Hardware: (3) M10x30 Hex Cap Screws, (3) M10
Lock Washers, (3) M10 Flat Washers & (1)
Extension Wing
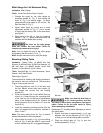
Tools: 17mm Wrench, Straight Edge
Refer to Figures 1 and 2:
1. Attach right extension wing (A) to the table (B)
with three each hex cap screws (C), lock
washers (D) and flat washers (E). Snug but do
not tighten.
2. Slide extension wing toward the front edge of
the saw table until two faces are flush.
3. Using a straight edge (F, Fig. 2), align the
extension wings to the saw table and tighten
the hex cap screws.
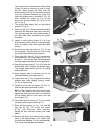
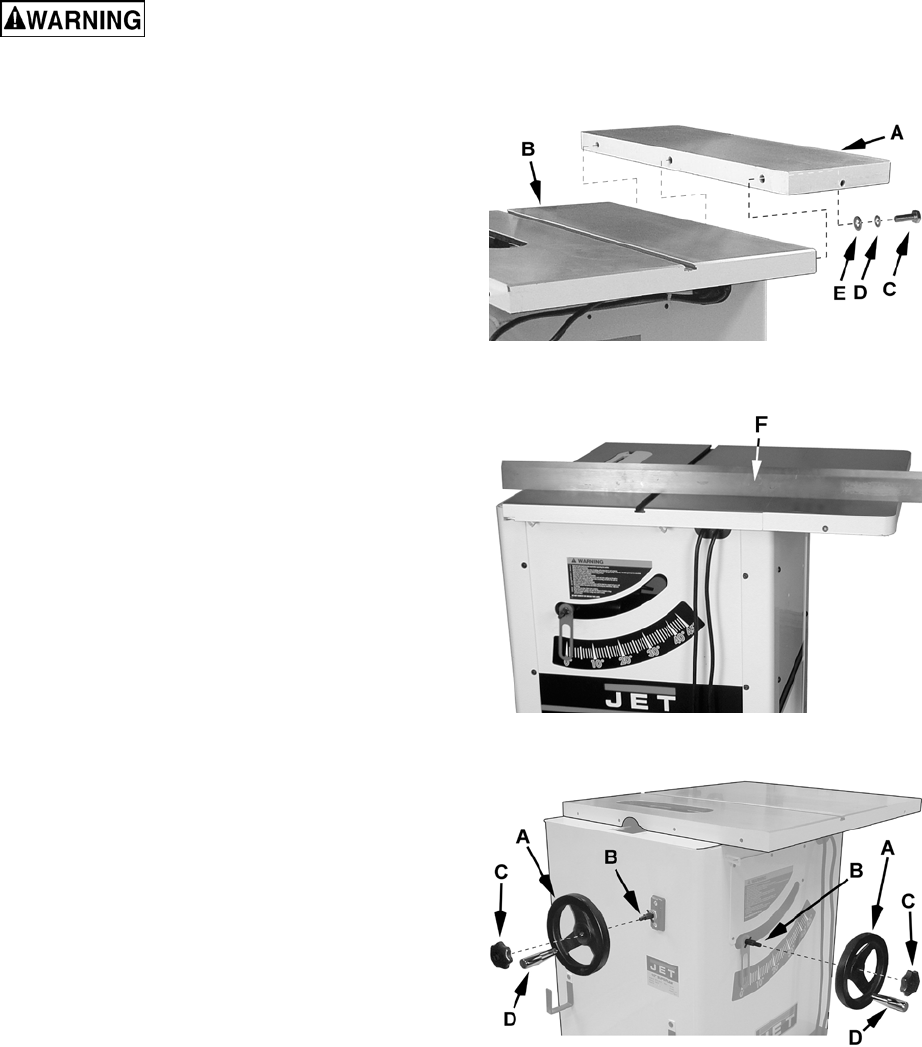
Handwheel Assembly
Hardware: (2) Handles, (2) Handwheels & (2)
Lock Knobs
Tool: 14mm Wrench
Referring to Figure 3:
1. Slide the handwheel (A) onto the shaft (B);
make sure that the spring pin on the shaft lines
up with the slot on the handwheel.
Figure 1
Figure 2
Figure 3
2. Thread center lock knobs (C) into the shaft (B).
Note: The knobs will allow you to lock the
blade into a certain height, or angle.
3. Thread the handles (D) into the handwheels
and tighten with a wrench.