


23
Adjustments
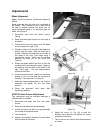
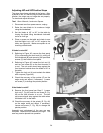
Blade Alignment
Tools: 8mm Hex Wrench, Combination Square &
Marker
Blade alignment with the miter slot is adjusted at
the factory. After a period of use, or after moving
the saw to another location, the blade may no
longer be aligned properly. To check and align the
blade, see Figure 41.
1. Disconnect saw from the power source,
unplug.
2. Raise the blade guard up and out of the way of
the blade.
3. Unlock fence and move away from the blade
so as to expose the right T-slot.
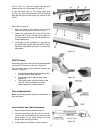
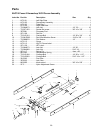
4. Choose a tooth on the far side of the blade and
directly over the insert. Mark the tooth with a
marker. Measure the distance from the side of
the blade to the right T-slot edge using a
combination square. Make sure to measure
between the teeth not on the tooth, see
Figure 41.
5. Rotate the blade toward the front so that the
marked tooth is just above the insert. Measure
the distance from the side of the blade to the
right T-slot edge. The two measurements
should be the same.
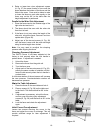
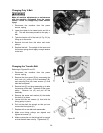
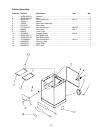
6. If they are not the same, loosen four hex head
screws (A, Fig. 42) that hold the trunnions to
the table. Two are shown in Figure 42.
7. Make the needed adjustments to the trunnion
assembly and tighten the four hex head
screws.
8. Check the alignment once again after
tightening hardware.
XACTA Fence Cursor Adjustment
This adjustment must be checked whenever a
different blade is installed.
1. Disconnect the table saw from the power
source.
2. Raise the saw blade above the tabletop.
3. Unlock the fence and slide it to approximately
four inches from the saw blade.
4. Lock the fence.
5. Measure the distance between the saw blade
and the inside of the fence.
Figure 41
Figure 42
Figure 43
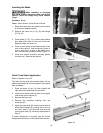
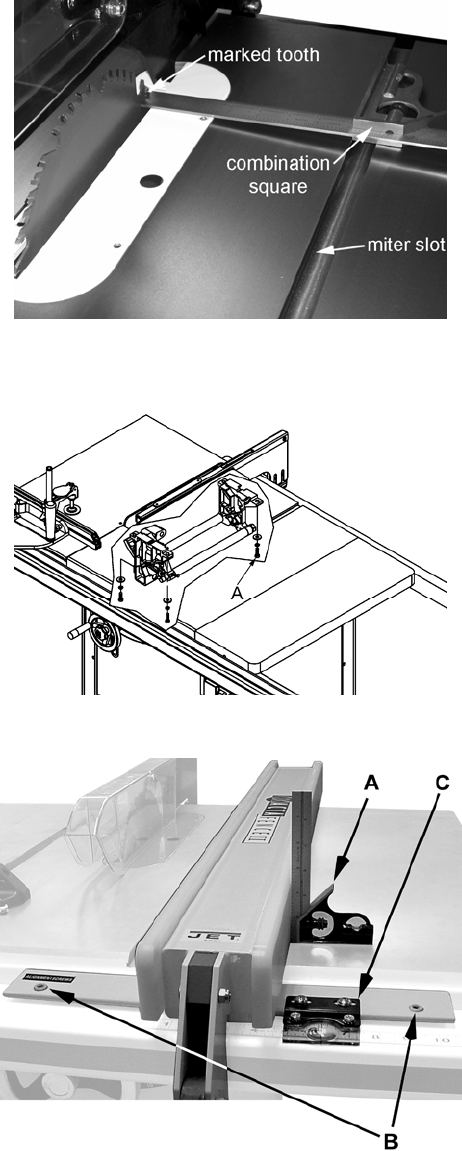
6. Adjust the cursor (C, Fig. 43) to read the
distance just measured and tighten the cursor
assembly to the fence.
7. Take a test cut and confirm that the adjustment
is correct.