


Installation
F232135
28
© Copyright, Alliance Laundry Systems LLC – DO NOT COPY or TRANSMIT
Installing With J-Bolts
1. Verify the floor meets the requirements given in
the Machine Foundation section.
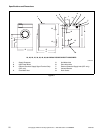
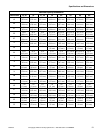
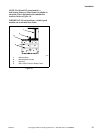
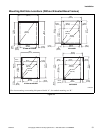
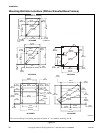
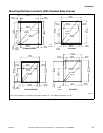
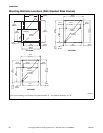
2. Install J-bolts in concrete as shown in the
mounting bolt layouts (Figure 18 and Figure 19)
following these instructions.
NOTE: If replacing a 35 pound machine with a
40 pound machine, note differences in cabinet size.
Refer to pages 20, 21 and 32.
NOTE: If replacing a 50 pound machine with a
60 pound machine, note differences in cabinet size.
Refer to pages 20, 21 and 32.
NOTE: There are two different mounting bolt
layouts which may be used for the 80 pound
capacity machine. Refer to Figure 19. The bolt holes
marked “A” are to be used for close mounting –
machines installed with a 1 inch (25.4 mm)
clearance between machines. The bolt holes marked
“B” are to be used for standard mounting –
machines installed with a minimum clearance of
8 inches (203 mm) between machines.
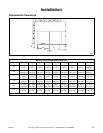
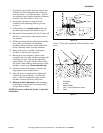
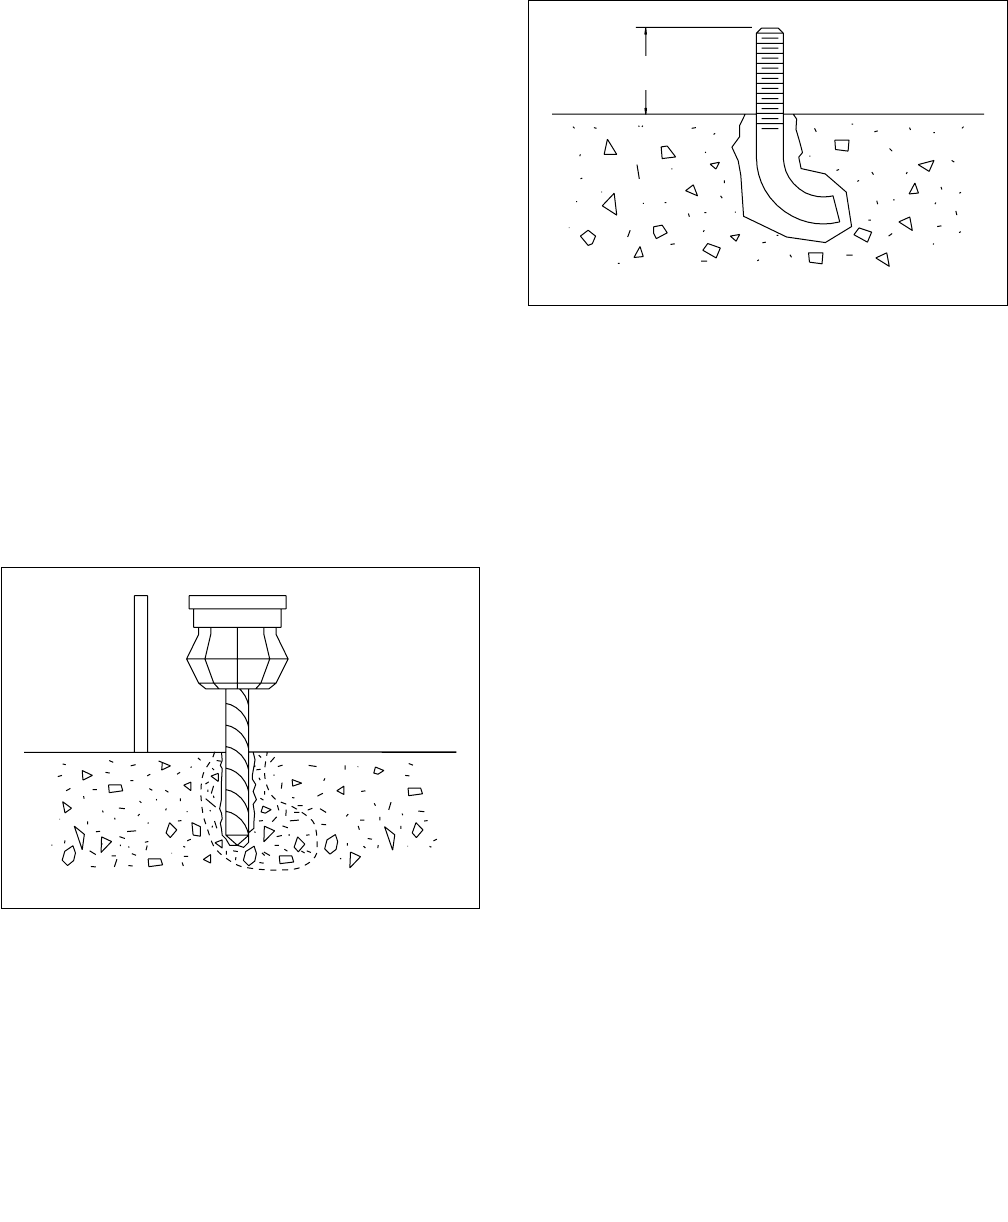
3. Adjust the drill depth gauge to match the length
of the J-bolt, minus 1-1/2 inches (38 mm).
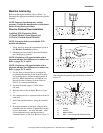
4. Drill and chisel out a conical hole large enough to
accept the J-bolt. Refer to Figure 14.
Figure 14
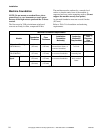
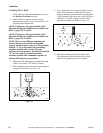
5. Use compressed air or a squeeze bulb to remove
debris from each hole. Anchor J-bolt in place,
using an industry-accepted anchoring compound.
Verify that the J-bolts are in the correct locations
and that 1-1/2 inches (38 mm) of each J-bolt
protrude from the floor. Refer to Figure 15.
Figure 15
6. Place the machine carefully over the J-bolts.
Never attempt to lift the machine by the door
handle or by pushing on the cover panels.
H031I
H031I
H032I
HI
1-1/2 in.
(38 mm)