


74 9001900
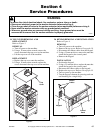
Section 4 Service Procedures
© Copyright, Alliance Laundry Systems LLC – DO NOT COPY or TRANSMIT
To reduce the risk of electrical shock, fire, explosion, serious injury or death:
• Disconnect electrical power to the washer-extractor before servicing it.
• Close the gas shut-off valve to the washer-extractor (when applicable) before servicing it.
• Never start the washer-extractor with any guards/panels removed.
• Whenever ground wires are removed during servicing, these ground wires must be
reconnected to ensure that the washer-extractor is properly grounded.
W461R1
WARNING
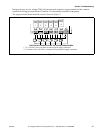
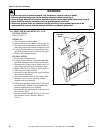
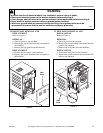
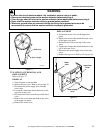
28. DRAIN VALVE
Refer to Figure 13.
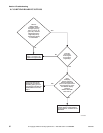
If the washer-extractor doesn’t drain within 30
seconds, perform the following check:
a. Turn off power to the machine.
b. Remove any panels necessary to access the
drain valve and drain plumbing.
c. Check for a clog in the drain line.
d. Verify that the drain valve is opening.
(1) The drain valve is normally open (i.e., it
requires voltage to close).
(2) When power is removed from the machine,
the drain valve should open.
e. If the drain is not opening, check for the
following:
(1) Check the motor winding for continuity, a
short circuit or an abnormal drop in
voltage. Replace the drain valve as needed
(consult the machine’s parts manual for
drain valve part numbers).
(2) Check that the shaft and rotor of the drain
motor turns freely.
(3) Check that the internal drain valve is
closing and does not bind. A clog within
the drain valve may be preventing the drain
valve from closing. Replace the drain valve
as needed (consult the machine’s parts
manual for drain valve part numbers).
f. Check the wire continuity from the drain valve
to the plug on the computer board.
g. Re-install any panels removed in Step b.
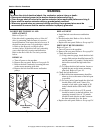
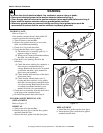
29. DOOR GASKET REMOVAL AND
REPLACEMENT
Refer to Figure 14.
REMOVAL
a. Turn power off to the machine.
b. Remove the door glass (with the door gasket
attached) from the door.
c. Remove the door gasket from the door glass.
REPLACEMENT
a. Install the door gasket onto the door glass.
b. Insert the door glass (with the door gasket
attached) into the door.
Figure 13
Figure 14
CFD16S
Drain
Valve
CFD17S
Door
Gasket