3. Getting Started
GT-541
20
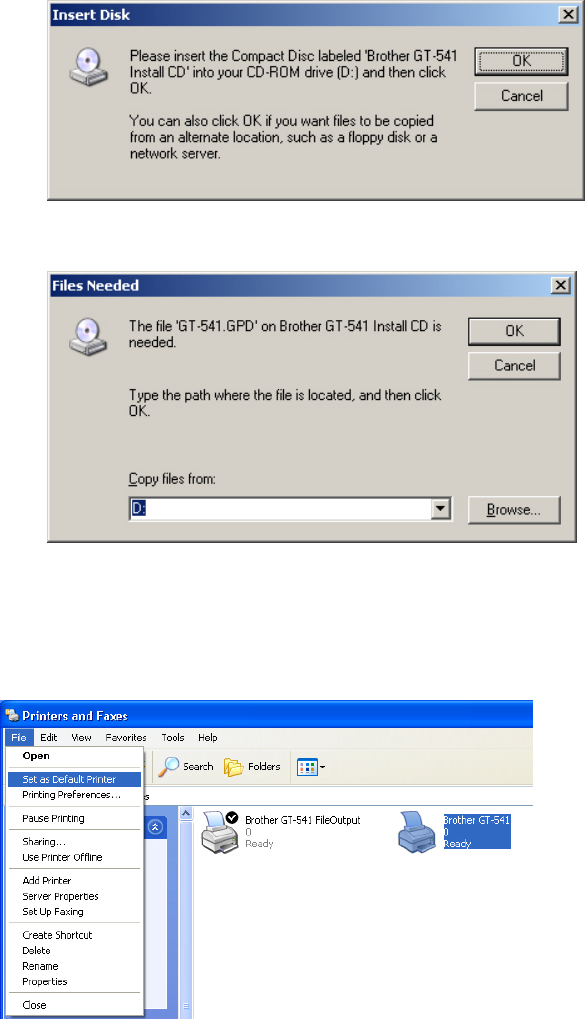
(1) Confirm that the Install CD is inserted properly, and then click “OK”.
The following window appears.
(2) If install CD is not in drive [D:], the following window appears. Click “Browse…” to select the
CD drive, and then click “OK”. The installation continues.
(6) Click "Finish" when "Completing the Found New Hardware Wizard" dialog.
(7) Open "Printers and Faxes" in "Control Panel".
(8) Click either "Brother GT-541" or Brother GT-541 FileOutput icon and select "Set as Default Printer"
on “File” menu. “Brother GT-541” icon is checked and Brother GT-541 is set as the default printer.
This will help to do the layout with your application software.
The PC setup is now completed.
<Note> for installations of more than one GT-541 printer.
To connect another GT-541 to the PC, repeat the steps of 3-3-2. Connection with USB 2.0 Cable:
for Windows XP. From the second GT-541, the printer names automatically become
“GT-541(copyX)”. You can change the names as "GT-541 xxx" in the “Printer and Faxes” in the
“Control Panel” for your workability.
