


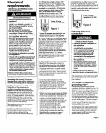
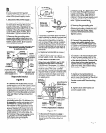
Each exhaust duct should enter
the maln duct at an angle
pointing In the dlrectlon of the
airflow. Ducts enterlng from the
opposlte side should be staggered
to reduce the exhausted air from
lnterferlng with the other ducts.
The maxlmum angle of each duct
entering the main duct should be
nc more than 30”.
Prod?! Damage
Keep air openings free of
dry-cleaning fluid fumes. Fumes
create acids whtch,when drawn
through the dryer heating units,
can damage dryers and loads
being dried.
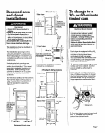
A clean-out cover should be
located on the main exhaust duct
for periodically cleaning the exhaust
system.
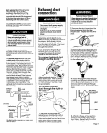
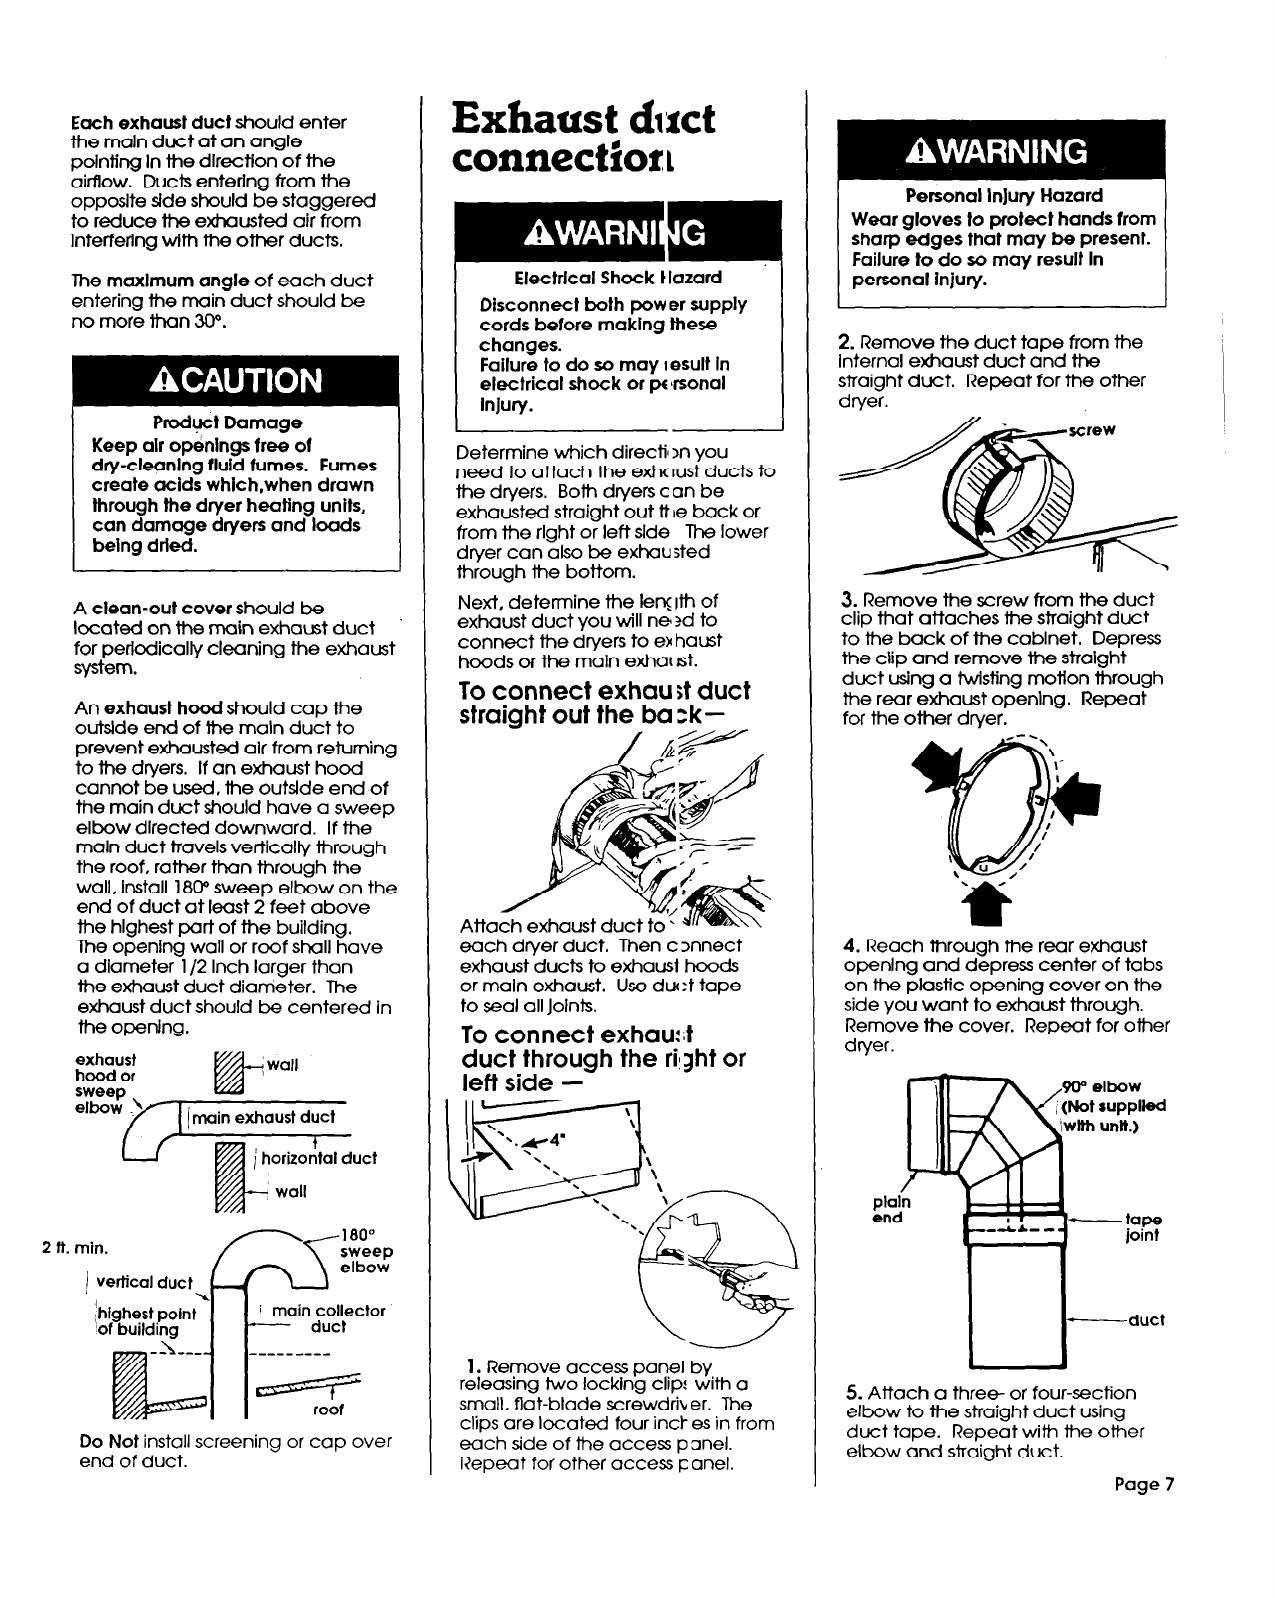
An exhaust hood should cap the
outside end of the maln duct to
prevent exhausted air from returning
to the dryers. If an exhaust hood
cannot be used, the outslde end of
the main duct should have a sweep
elbow dlrected downward. If the
maln duct travels vertlcaliy through
the roof, rather than through the
wall, Install 180” sweep elbow on the
end of duct at least 2 feet above
the hlghest part of the building,
The opening wall or rcof shall have
a dlameter l/2 Inch larger than
the exhaust duct diameter. The
exhaust duct should be centered in
the opening.
exhaust
hood or
If&
; wall
1 main exhaust duct
2 ft. min.
R
180”
sweep
j vertical duct ~
elbow
‘highest point
i main collector
‘of
building
duct
-L--
--- ---- --
m=Ql -
roof
Do Not install screening or cap over
end of duct.
Exhaust duct
connectSor:
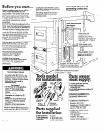
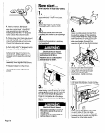
Electrical Shock t lazard
Disconnect both power supply
cords before maklng these
changes.
Failure to do so may I esult In
electrical shock or personal
injury.
I
Determine which directi In you
need
to attach the eti rust ducts to
the dryers. Both dryers can be
exhausted straight out tt be back or
from the rlght or left slde The lower
dryer can also be exhausted
through the bottom.
Next, determine the leq
iih
of
exhaust duct you will ne ?d to
connect the dryers to exhaust
hoods or the maln exhal st.
To connect exhau St duct
straight out the ba zk-
Atta
exhaust duct
each dryer duct. Then connect
exhaust ducts to exhaust hcods
or maln exhaust. Use due:! tape
to seal all Joints.
To connect exhau?
duflc;lttlh~ugh the qht or
-
I
I
\
&zJ
;“.y4
-\
\
\
\
\
.\
\
‘.
‘.
%
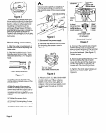
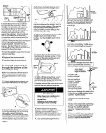
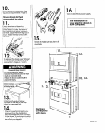
1. Remove access panel by
releasing two locking clip! with a
small, flat-blade screwdrib er. The
clips are located four inct es in from
each side of the access panel.
Repeat for other access canel.
2. Remove the duct tape from the
Internal exhaust duct and the
straight duct. Repeat for the other
dryer.
3.
Remove the screw from the duct
clip that attaches the straight duct
to the back of the cabinet. Depress
the clip and remove the straight
duct using a twisting motlon through
the rear exhaust openlng. Repeat
for the other dryer.
4. Reach through the rear exhaust
openlng and depress center of tabs
on the plastic opening cover cn the
side you want to exhaust through.
Remove the cover. Repeat for other
dryer.
5. Attach a three or four-section
elbow to the straight duct using
duct tape. Repeat with the other
elbow and straight duct.
Page 7