13
L. TO REMOVE DUAL MICROPROCESSOR CONTROLLER (DMC)
COMPUTER PANEL ASSEMBLY
1. Discontinue power to the dryer.
2. Remove the lint drawer and the control door from the dryer (follow Lint Drawer and Control/Lint Door
Removal Procedures in
Section A and Section B).
3. Remove screw in the lower right hand corner of the control panel, securing the panel to the control box.
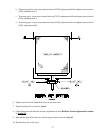
4. Open the control panel and disconnect ALL the harnesses (the two [2] 9-pin wire harness connectors and
the 4-pin connector wiring harness) that are connected to the DMC computer.
5. To remove the control panel assembly from the control box, gently tap the bottom edge of the control panel
while lifting panel upward off hinges.
6. Reverse procedure to reinstall the control panel assembly.
7. Reestablish power to the dryer.
M. TO REPLACE DMC COMPUTER
1. Discontinue power to the dryer.
2. Remove the lint drawer and the control door from the dryer (follow Lint Drawer and Control/Lint Door
Removal Procedures in Section A and Section B).
3. Remove screw in the lower right hand corner of the control panel, securing panel to control box.
4. Open control panel and disconnect ALL the harnesses (the two [2] 9-pin wire harness connectors, the
3-pin connector wiring harness coming from coin acceptor optic switch[es], and the one [1] 4-pin power
wire harness connector) that are connected to the DMC computer.
NOTE: These connectors can be removed from the DMC computer by squeezing the side tabs while
pulling the connector outward.
5. Depending on the service function to be performed, the control panel assembly can be left on the control
box or removed entirely from the dryer. To remove the control panel, follow Control Panel Removal
Procedure in Section L, Step #5.
6. Disconnect the keyboard (touch pad) ribbon connector by holding onto the blue ribbon connector and
pulling outward.
7. Remove the two (2) screws securing the DMC computer to the metal control panel and gently disassemble
the DMC computer from the panel.
8. Install the new DMC computer by reversing the procedure in Step #7.


