8
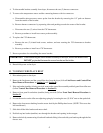
4. To disassemble bracket assembly from dryer, disconnect the two (2) harness connectors.
5. To remove the temperature sensor and the connecting harness with its connectors:
a. Disassemble microprocessor sensor probe from the bracket by removing the 1/4” push on fastener
from the outside of the bracket.
b. Remove harness connectors by squeezing sides and pushing towards the center of the bracket.
c. Disconnect the two (2) wires from the 170º thermostat.
d. Reverse procedure to install new sensor probe assembly.
6. To replace the 170º thermostat:
a. Remove the two (2) slotted head screws, washers, and nuts securing the 170º thermostat to bracket
assembly.
b. Reverse procedure to install new 170º thermostat.
7. Reverse procedure for reinstalling the sensor bracket.
IMPORTANT: When reinstalling the sensor bracket assembly to the dryer, be sure the internal wires
DO NOT get pinched between the sensor bracket and the holder.
8. Reestablish power to the dryer.
H. TO REMOVE/REPLACE BELT
1. Discontinue power to the dryer.
2. Remove the lint drawer and the control/lint door from the dryer (follow Lint Drawer and Control/Lint
Door Removal Procedures in
Section A and Section B).
3. If the top basket (tumbler) is being serviced, remove the control box assembly and belt guard from idler arm
(follow Control Box Removal Procedure in
Section D).
4. Remove front panel from basket (tumbler) being serviced (follow Front Panel Removal Procedure in
Section E).
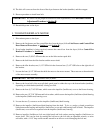
5. Loosen the tension on the idler arm adjusting spring by loosening the two (2) 9/16” nuts on the spade bolt.
6. Remove the front motor bushing from the motor shaft by the Phillips head screw. (NOTE: This screw has
left hand thread.)
7. Slide belt off the idler bracket and motor shaft.
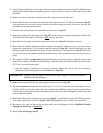
8. Push belt up into basket (tumbler) area through the brushes and opening in the wrapper.
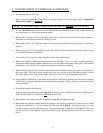
9. Remove the belt by maneuvering it back and forth and sliding it forward with your hands up through the lint
drawer area.


