


35
Telephone: (508) 678-9000
Fax: (508) 678-9447
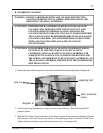
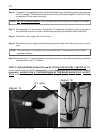
Step 3: Clean the quartz window of the U.V. sensor
probe with a commercial scale remover (such as
Lime-Away or CLR) on a high quality lint-free cot-
ton swab. When using an acidic solution (scale re-
mover) for cleaning, follow the manufacturer’s direc-
tions for safety. Inspect the window visually to en-
sure that it is clean, clear and dry.
Step 4: Inspect the rest of the U.V. sensor probe and the metal
fitting it inserts in to. Perform any required cleaning.
DO NOT ATTEMPT TO TIGHTEN, LOOSEN,
or OPEN THE SEALED U.V. SENSOR
PROBE. CONTAMINATION or LOSS OF
FUNCTION MAY RESULT.
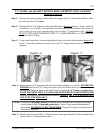
Step 5: Inspect the O-ring seal on the U.V. sensor probe and
replace it if damaged or deterioration it found. A
NEW O-RING (original manufacturer’s replace-
ment) IS STRONGLY RECOMMENDED.
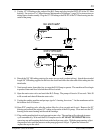
Step 6: Assemble the U.V. sensor probe into the U.V. chamber. Tighten the brass nut finger tight, then
using a wrench, tighten an additional 1/4 turn may be necessary.
DO NOT OVERTIGHTEN, AS DAMAGE TO THREADS MAY RESULT. USE OF PLIERS,
PIPE WRENCH, CHANNEL LOCKS, OR VISE GRIPS MAY DAMAGE THE BRASS NUT
AND THE THREADED PROBE PORT IN THE REACTOR CHAMBER. (SUCH DAMAGE
IS NOT COVERED UNDER WARRANTY.)
Step 7: Restore the water supply and check for leaks.
Step 8: Reestablish power to the unit, check the green monitor light on the side of the case for a steady glow.
removal of the U.V. sensor probe
THE U.V. SENSOR PROBE IS FRAGILE and MUST BE HANDLED VERY CAREFULLY. The
quartz window in the end of U.V. sensor probe is made of high quality glass and may break or chip if
mishandled. HANDLE THE U.V. SENSOR PROBE BY THE BRASS PARTS ONLY. DO NOT
PULL on the attached cord or the useful life of the U.V. sensor probe may be shortened.
U.V. SENSOR PROBE CLEANING INSTRUCTIONS
Step 1: Disconnect the power and shut off the water supply to the U.V. sterilizer. Drain the water from the
U.V. chamber.
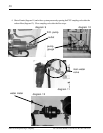
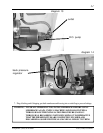
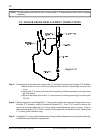
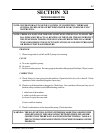
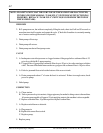
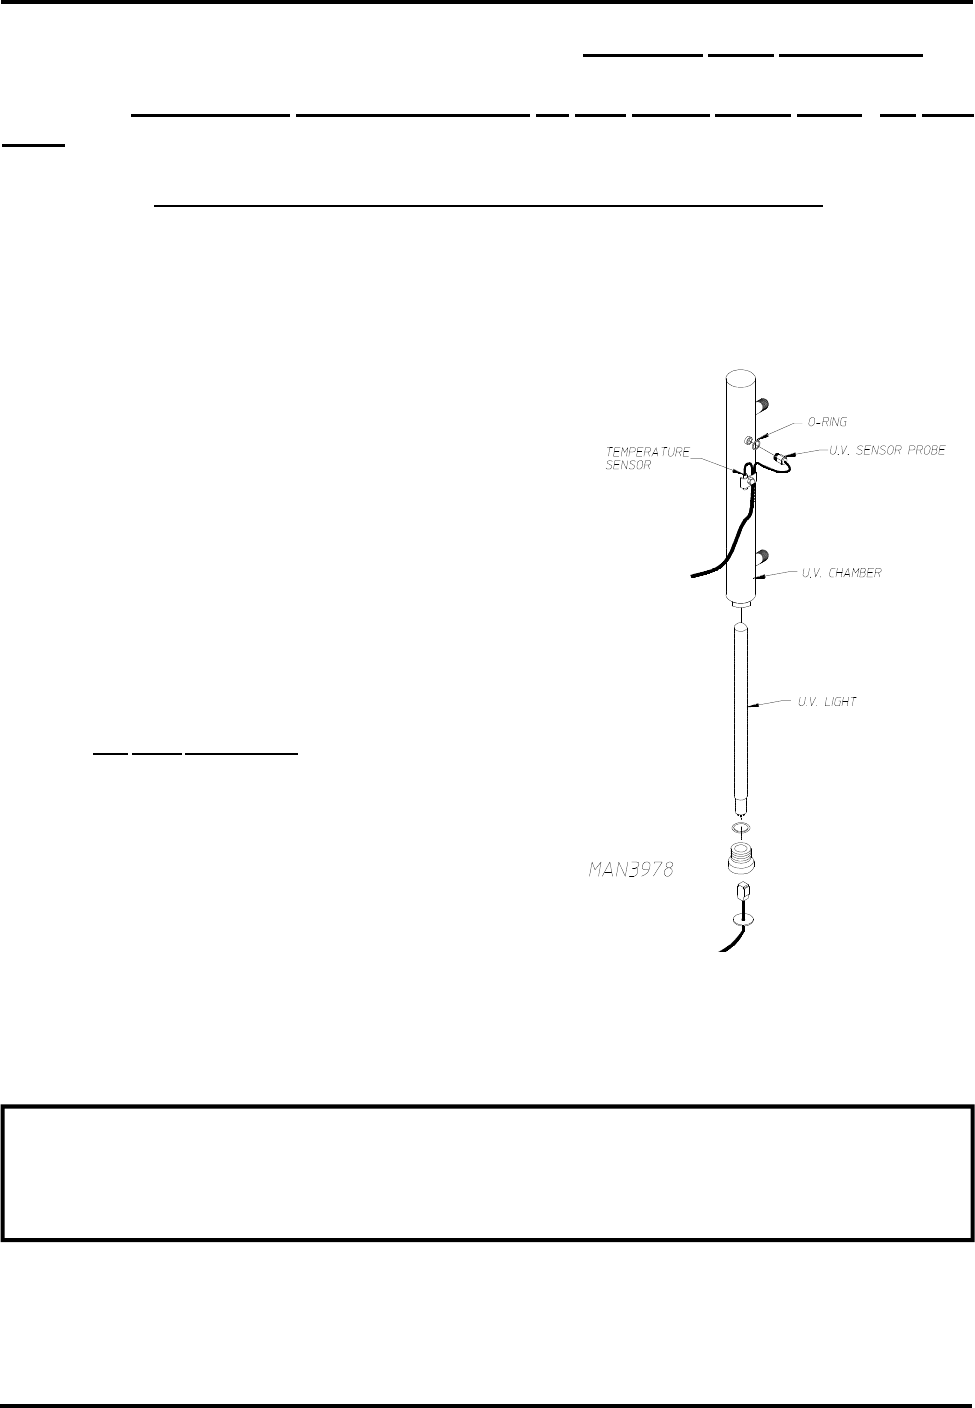
Step 2: Undo the large brass nut holding the U.V. sensor
probe in place. A wrench will be required to loosen
the nut. Remove the probe with the o-ring. (refer to
diagram 20)
diagram 20