


American Dispensing Company
88 Currant Road / Fall River, MA 02720-4781
34
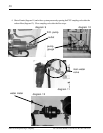
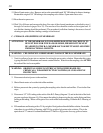
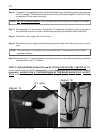
Step 6: Align the U.V. lamp and quartz sleeve into the black plastic sleeve bolt locking position, then insert into
the U.V. chamber. Thread the black plastic sleeve bolt by hand until it begins to seat on the O-ring,
an additional 1/4 turn may be necessary.
NOTE: DO NOT OVERTIGHTEN, as over-compression of the O-ring will not improve the seating.
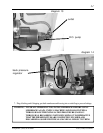
Step 7: Reconnect the U.V. lamp harness. Secure the U.V. lamp harness in place by applying pressure to
the rigid black snap-in cover disk so that the disk snaps fully into the black plastic sleeve bolt.
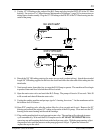
Step 8: Restore the water supply and check for leaks.
Step 9: Reconnect the power supply, and check the green monitor light on the side of the case for a steady
glow.
NOTE: The alarm buzzer will sound for a few seconds until the U.V. lamp and quartz sleeve reaches
operating conditions.
Step 10: Enter the new U.V. lamp and quartz sleeve replacement date on the replacement label provided and
attach the label to the U.V. chamber.
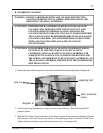
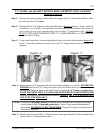
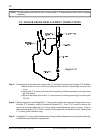
THE U.V. SENSOR PROBE IS FRAGILE and MUST BE HANDLED VERY CAREFULLY. The
quartz window in the end of U.V. sensor probe is made of high quality glass and may break or chip if
mishandled. HANDLE THE U.V. SENSOR PROBE BY THE BRASS PARTS ONLY. DO NOT
PULL on the attached cord or the useful life of the U.V. sensor probe may be shortened.
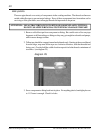
U.V. lamp
diagram 18
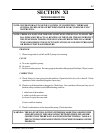
diagram 19