


To avoid risk of electrical shock, personal injury, or
death, disconnect power to unit before servicing.
Disassembly Procedures
21 RS3100007 Rev. 0
WARNING
!
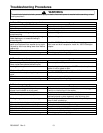
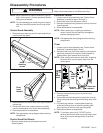
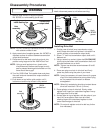
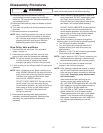
7. Apply a small amount of supplied grease,
No. 36765P, to inside sealing lips of seal.
Apply grease to
inside sealing lips
Transmission
output shaft
Seal
Hub
assembly
NOTE: DO NOT allow any lubricants to come in contact
with outside surface of seal
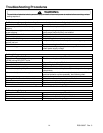
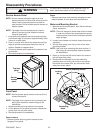
8. Apply remainder of supplied grease, No. 36765P, to
exposed surface of washer between transmission
output shaft and seal.
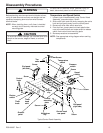
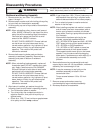
9. Place new drive bell seal onto hub and push into
position using large end of No. 293P4 Seal Tool.
NOTE: Using a small pocket mirror, check entire
circumference of bottom seal flange to verify
seal is pressed down against shoulder on hub;
there should be no gap!
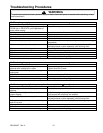
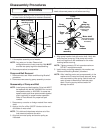
10.Turn No. 293P4 Seal Tool upside-down and place
the small end over transmission output shaft and
onto the seal.
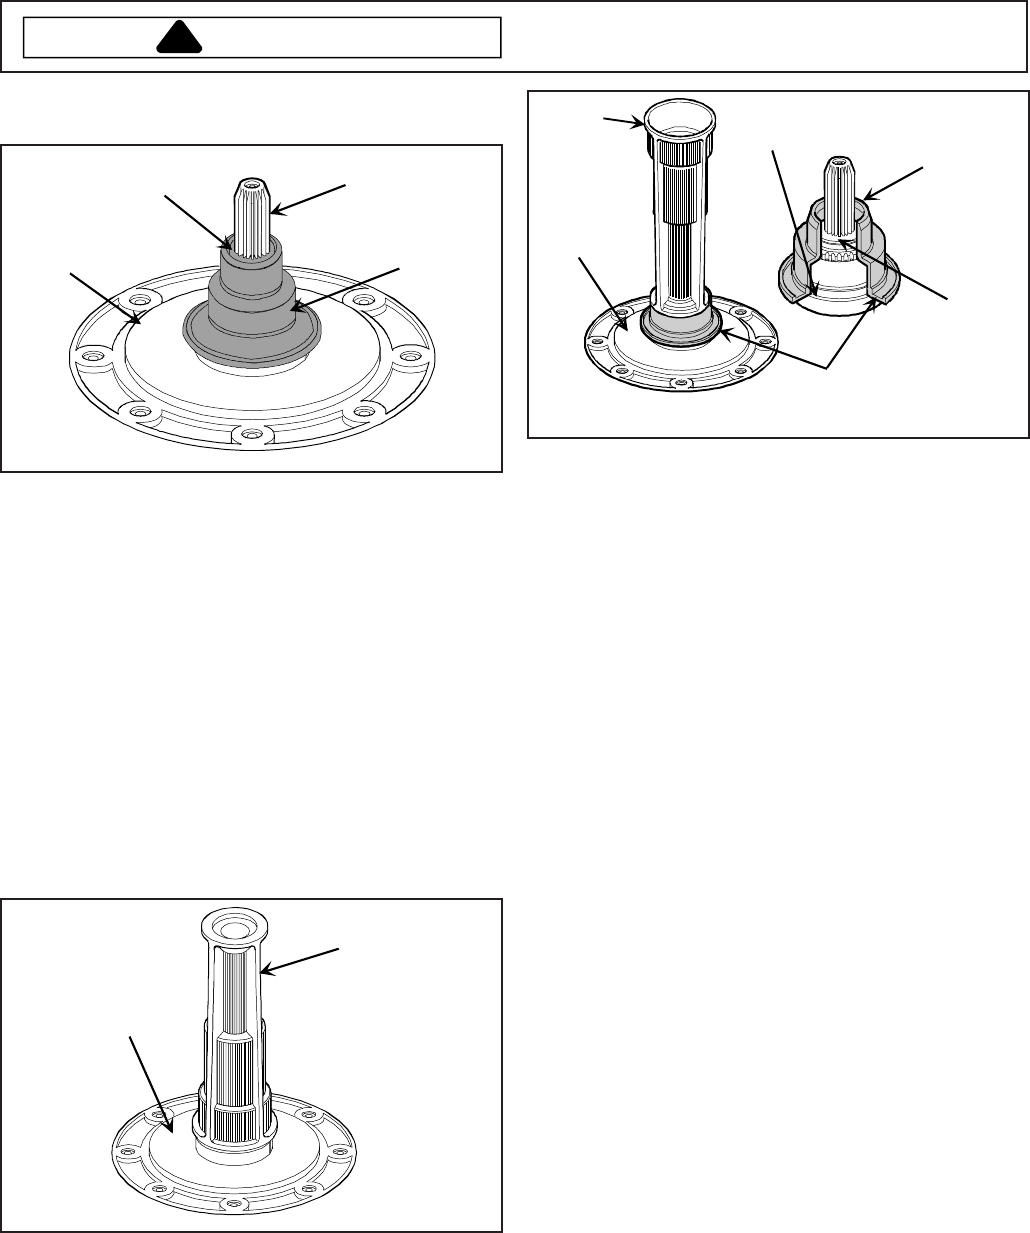
11.Push down on tool with a quick motion until it
bottoms out and the top of seal is fully seated.
Hub
assembly
293P4
Seal tool
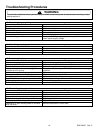
293P4
Seal tool
Hub
assembly
Hub
shoulder
Top of
seal
Apply
36765P
grease
Bottom
seal flange
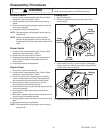
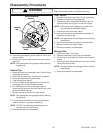
Installing Drive Bell
1. Position new drive bell over transmission output
shaft. Rotate drive bell until splines in drive bell line
up with splines on transmission output shaft.
2. Screw
7
/16" bolt into transmission output shaft until it
bottoms out.
3. Using a wrench or socket, tighten bolt CLOCKWISE
to force drive bell down onto transmission shaft until
drive bell bottoms out on shaft.
NOTE: Tighten new shoulder screw between 60 to 80
inch-pounds.
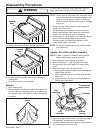
4. Place new plug over hole in drive bell and firmly
press into place using the palm of your hand.
NOTE: It may be necessary to insert the end of a paper
clip or thin blade screwdriver along side of plug
as it is pressed into drive bell to release
entrapped air.
NOTE: When fully seated plug should not extend above
drive bell more than 1/8 inch (3.2 mm).
5. Place agitator on top of drive bell. Slowly rotate
agitator until fingers on underside of agitator line up
with large slots on drive bell.
6. A sharp blow on top of agitator, with the palm of your
hand, will force agitator down onto drive bell,
allowing fingers on underside of agitator to lock
under bottom edge of drive bell.
NOTE: Do not push agitator onto drive bell any further
than necessary.