


© Copyright, Alliance Laundry Systems LLC – DO NOT COPY or TRANSMIT
Maintenance
F232201
28
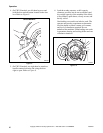
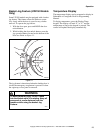
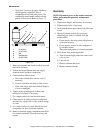
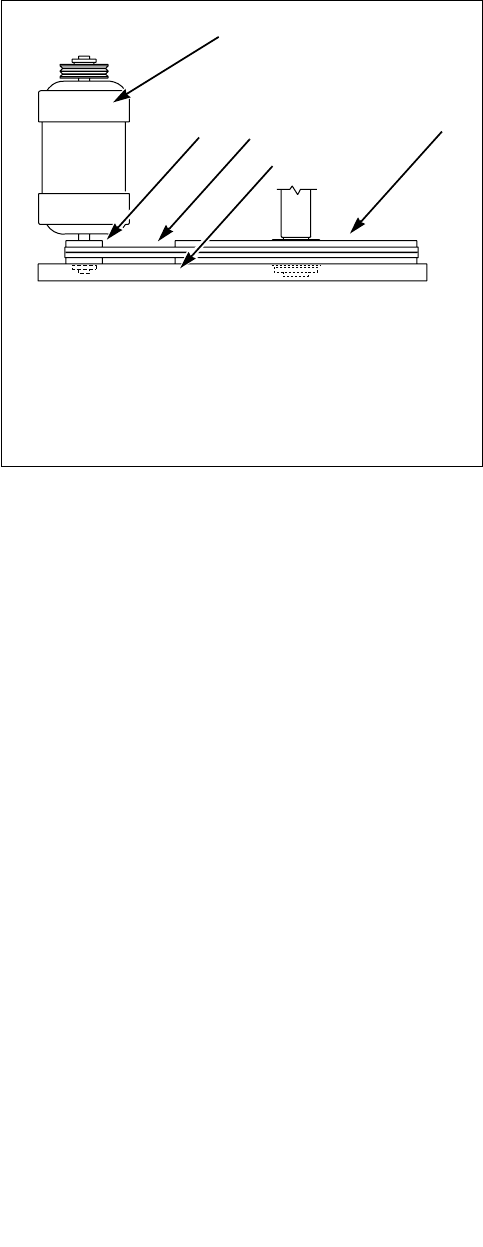
c. Verify that V-belts are properly aligned by
checking pulley alignment. Place a
straightedge across both pulley faces. The
straightedge should make contact with the
pulleys in four places. Refer to Figure 13.
Figure 13
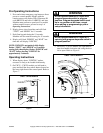
3. Remove back panel and check overflow hose and
drain hose for leaks.
4. Unlock the hinged lid and check the supply
dispenser hoses and hose connections.
5. Clean inlet hose filter screens:
a. Turn water off and allow valve to cool, if
necessary.
b. Unscrew inlet hose and remove filter screen.
c. Clean with soapy water and reinstall. Replace
if worn or damaged.
6. Tighten motor mounting bolt locknuts and
bearing bolt locknuts, if necessary.
7. Use compressed air to clean lint from motor.
8. Clean interior of washer-extractor, both basket
and shell, by wiping with a water-soaked sponge
or cloth.
9. Use compressed air to ensure that all electrical
components are free of moisture and dust.
10. Remove chemical supply components and check
for residual chemicals. Clean as necessary and
replace.
Quarterly
NOTE: Disconnect power to the washer-extractor
before performing the quarterly maintenance
procedures.
1. Tighten door hinges and fasteners, if necessary.
2. Tighten anchor bolts, if necessary.
3. Verify that the drain motor shield is in place and
secure.
4. Check all painted surfaces for bare metal.
(Matching gray paint is available from the
manufacturer.)
• If bare metal is showing, paint with primer or
solvent-based paint.
• If rust appears, remove it with sandpaper or
by chemical means.
Then paint with primer or solvent-based paint.
5. Clean steam filter, where applicable.
a. Turn off steam supply and allow time for the
valve to cool.
b. Unscrew nut.
c. Remove element and clean.
d. Replace element and nut.
P045I
1 Drive Motor
2 Drive Pulley
3 Belt
4 Straightedge
5 Driven Pulley
1
2
3
4
5