


18 American Dryer Corporation 450431-3
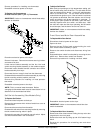
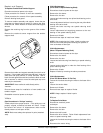
Basket and Support
To Replace Tumbler and Tumbler Support
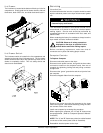
Discontinue electrical power to the dryer.
Follow procedure for removal of main door assembly.
Follow procedure for removal of front panel assembly.
Remove bearing back guard.
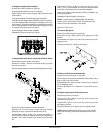
To remove tumbler assembly and support, loosen the two
setscrews on flange bearing models or remove the Allen
head bolt and Teflon
®
washer on models with shaft support
wheels.
Remove the retaining ring from the groove of the tumbler
shaft.
Remove the rotational sensor magnet from the tumbler
support shaft.
Remove the tumbler and support assembly from the front of
the dryer. If the tumbler cannot be removed freely, clean the
shaft area and spray WD-40 or similar lubricant. With a
block of wood against the shaft end, strike the block of wood
with a hammer or mallet to move the shaft past any burrs
made by the setscrews.
IMPORTANT: Never strike the shaft directly with a
hammer.
Reverse these steps for installation of new tumbler and
tumbler support.
Reestablish electrical power to the dryer.
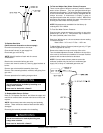
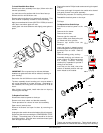
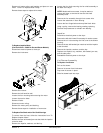
V-Belts
(See illustrations in “Pulleys” section)
V-Belts should have proper tension. If the pulleys are not
properly aligned, excessive belt wear will result. Proper
belt tension will allow 1/2” displacement under normal
thumb pressure at mid span of belt.
NOTE: Belts must always be replaced in pairs (matched
sets).
V-Belt Replacement
(Drive Shaft To Speed Reducing Shaft)
Discontinue electrical power to the dryer.
Remove the lint drawer.
Remove the lint door.
Loosen two bolts securing rear pillow block bearing on the
drive shaft.
Loosen adjustment bolt that is securing the rear pillow block
bearing of the drive shaft.
Loosen two bolts securing rear speed reducing shaft
bearing.
Loosen adjustment bolt supplying pressure to the rear
bearing on the speed reducing shaft.
Remove old V-belts.
Reverse these steps to install new V-belts.
NOTE: After tensioning the V-belts, check to make sure
both the drive shaft and speed reducing are parallel or
level to the base of the dryer.
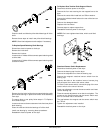
V-Belt Replacement
(Motor To Speed Reducing Shaft)
Discontinue electrical power to the dryer.
Remove the lint drawer.
Remove the lint door.
Loosen two bolts securing front bearing on speed reducing
shaft.
Loosen tension bolt that is under the front bearing of the
speed reducing shaft.
Remove the V-belts.
Replace V-belts by reversing the above procedures.
V-Belt Replacement
(From The Blower Motor To The Fan)
Loosen the four bolts securing the motor to the base of the
dryer.
Loosen the tension bolts.
Remove old V-belts.
Reverse these steps to replace V-belts.
NOTE: Always replace V-belts in pairs.
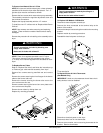
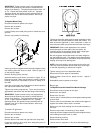
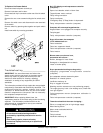
Motors
To Replace Drive Motor
Discontinue electrical power
to the dryer.
Remove the lint drawer.
Remove the lint door.
Remove the left lint wall.
Remove the drive V-belts. Follow V-belt replacement from
motor to speed reducing shaft.
Loosen the four bolts securing the motor to the base of the
dryer.
Disconnect the motor wiring.