


© Copyright, Alliance Laundry Systems LLC – DO NOT COPY or TRANSMIT
Installation
11
38970
Before You Start
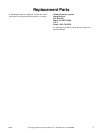
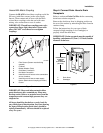
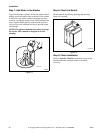
Tools
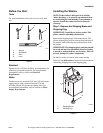
For most installations, the basic tools you will need
are:
Figure 2
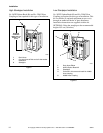
Electrical
Washer needs a 120 Volt, 60 Hertz, polarized three slot
effectively grounded receptacle. For more detailed
information, refer to section on Electrical
Requirements.
Water
Washer needs two standard 19,05 mm (3/4 inch) water
supply faucets with a pressure between 138 and
827 kPa (20 and 120 pounds per square inch). For
more detailed information, refer to section on Water
Supply Requirements.
Installing the Washer
NOTE: If the washer is delivered on a cold day
(below freezing), or is stored in an unheated room
or area during the cold months, do not attempt to
operate it until the washer has had a chance to
warm up.
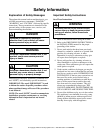
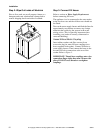
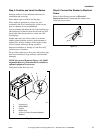
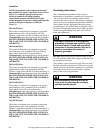
Step 1: Remove the Shipping Brace and
Shipping Plug
IMPORTANT: Install dryer before washer. This
allows room for attaching exhaust duct.
Remove the shipping brace from under the lid. The
plastic shipping plug will be released from the base of
the washer when removing the cardboard base from
the washer.
IMPORTANT: The shipping brace and plug should
be saved and must be reinstalled whenever washer
is moved or transported to a new location. This will
prevent damage to washer components.
Do not tilt washer to front or sides when moving.
Refer to User-Maintenance section for instructions on
reinstalling shipping brace and shipping plug.
Figure 3
D074I
1 Wrench
2 Screwdriver
3 Pliers
4 Level
D074I
1
2
4
3
TLW520N
1 Shipping Brace
2 Shipping Plug
TLW520N
1
2