


8
INSTALLATION INSTRUCTIONS
Inspection and Storage
1. Inspect carton for damage. Inspect
washer if carton shows signs of
damage. Do not remove washer
from pallet.
2. Verify model number and serial
number on the data plate with
your order.
3. Store inside in a temperature
controlled environment 33–130°F
(1–55°C). Do not expose washer to the weather.
Mechanical Installation
1. Move the washer near the point of installation with a lift truck
or fork lift. Remove packing material.
2. Remove rear panel and front service panel, if not already
removed. Remove the bolts attaching the washer to the pallet.
IMPORTANT: This washer is very heavy. Consider equipment
and manpower required to move this washer prior to
installation and be sure that all necessary preparations are
made. See page 16, “Technical Specications”.
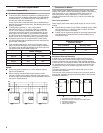
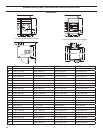
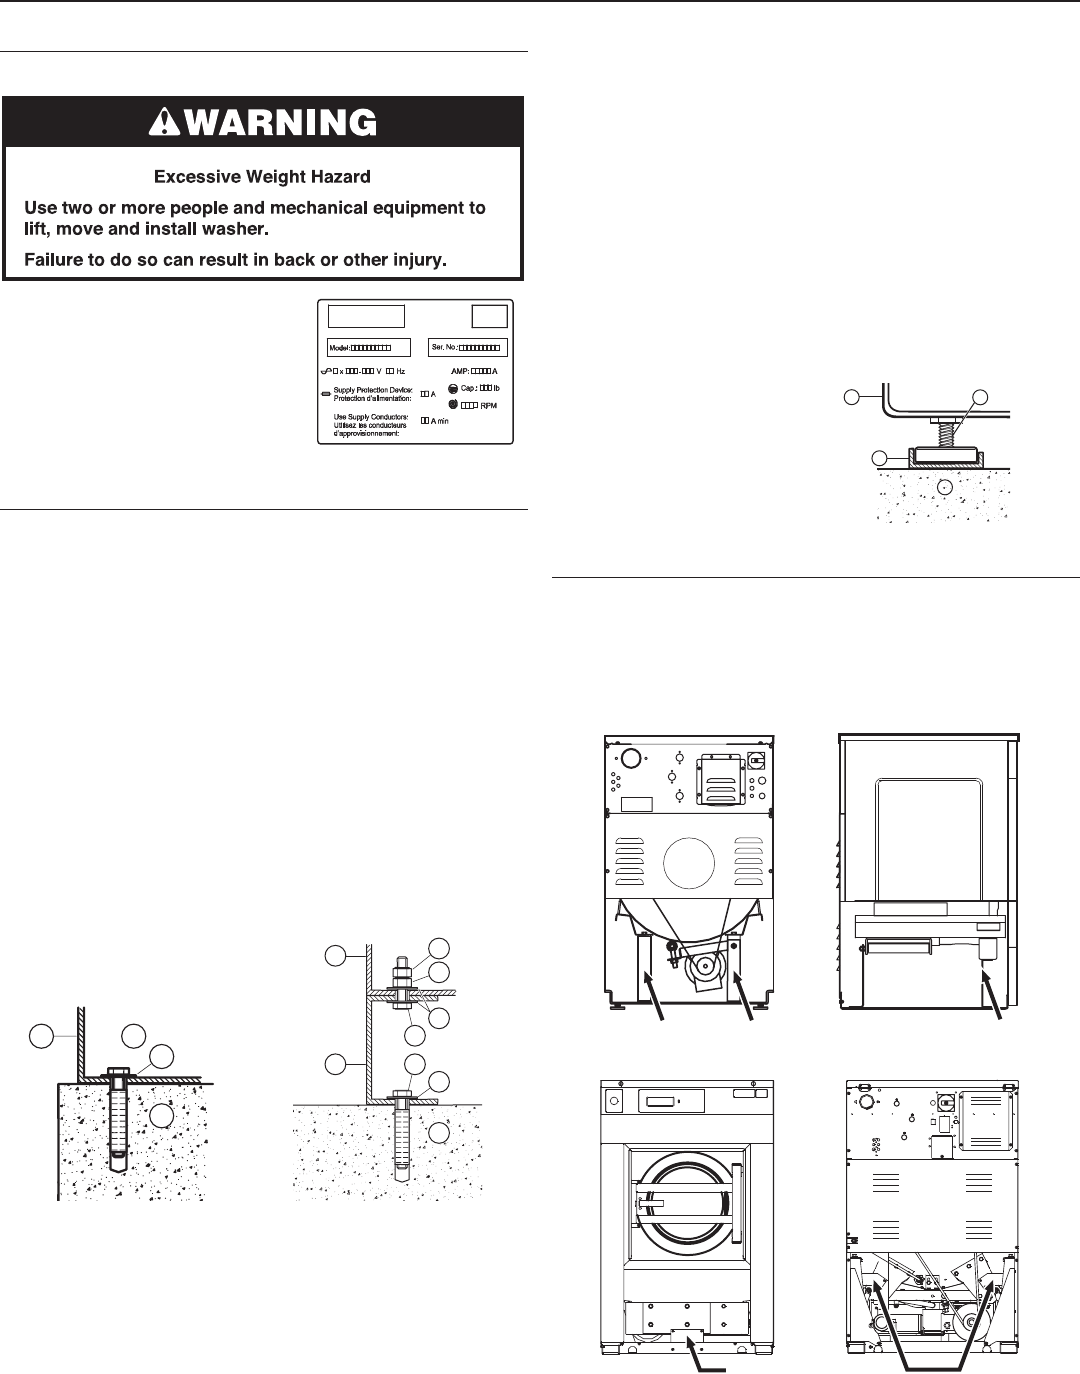
Fixed installation on concrete oor or elevated concrete pad
(all models):
1. Elevate washer and remove the rubber feet from the bottom
of the washer. Move the washer into its nal position. Thread
bolts into anchors to hold in place. Do not tighten bolts at this
time.
2. Level the washer rst side to side, then front to back; use
metal shims to level. Be sure that the washer does not tip in
any direction before tightening. Tighten the 4 anchor bolts.
Fixed installation on elevated metal base
(Models MFS18 and MFS25 only):
1. Be sure that base is secured to the oor.
2. Slide or lift the washer into its nal position. Thread bolts
from base to at washer to hold in place. Do not tighten bolts
at this time.
3. Level the washer rst side to side, then front to back using
metal shims. Be sure that the washer does not tip from side
to side. Tighten the anchor bolts. Thread on and tighten
the locking nuts.
Freestanding installation on level or elevated base
(Models MFS18 and MFS25 only):
1. Stand the washer upright. Slide or lift the washer into place.
NOTE: If mounting on a metal base or elevated slab, be sure
the front rubber feet are inside the metal channel.
2. With washer in nal position, place a level on top of the
washer, rst side to side; then front to back. If the washer
is not level, adjust the legs of the washer up or down with
a 1/2" (13 mm) wrench until the washer is level. Be sure
that the washer does not rock. Tighten the locking nuts.
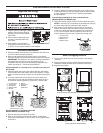
Remove Shipping Brackets
1. Remove rear panel and front service panel, if not already
removed.
2. Remove shipping brackets. Retain brackets and bolts if
needed to secure the washer for transport in the future.
3. Replace both panels.
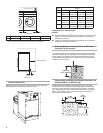
8
6
7
5
4
3
3
2
1
1
24
3
1. Concrete oor
2. Anchor bolt
3. Flat Washer
4. Washer frame
5. M8 bolt
6. M8 nut
7. M8 jam nut
8. Elevated
metal base
1. Concrete oor
2. Metal channel
3. Rubber foot
4. Washer frame
Concrete Floor or Pad
Elevated Metal Base
Metal Channel
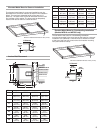
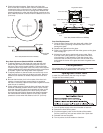
Shipping Brackets (Models MFS18, MFS25, and MFS35)
Front bracket Rear brackets
(2)
Shipping Brackets (Model MFS55)
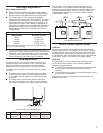
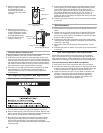
Data Plate
2
4
3
1