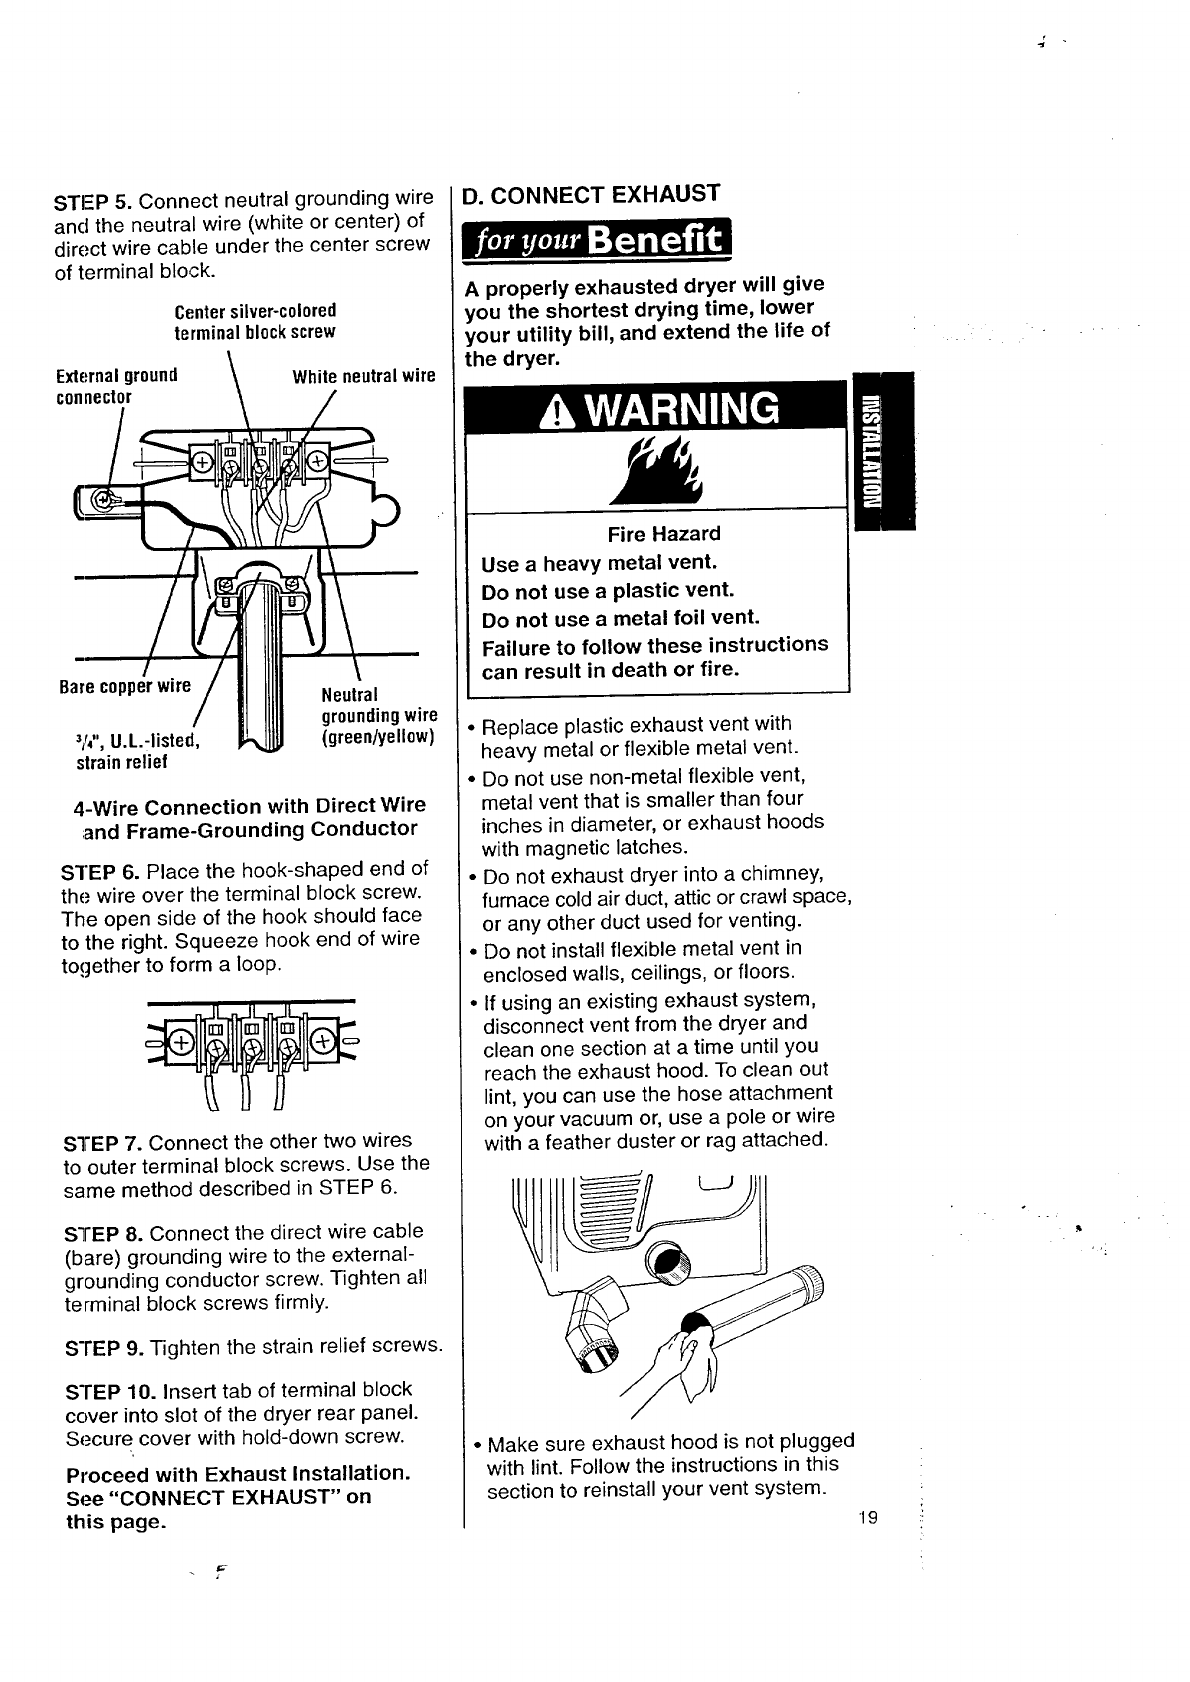
STI-P 5. Connect neutral grounding wire
and the neutral wire (white or center) of
direct wire cable under the center screw
of terminal block.
Centersilver-colored
terminalblockscrew
External ground
connector
Whiteneutralwire
Barecopperwire Neutral
groundingwire
3/_,,,U.L.-listed, (green/yell0w)
strainrelief
4-Wire Connection with Direct Wire
;and Frame-Grounding Conductor
STEP 6. Place the hook-shaped end of
the wire over the terminal block screw.
The open side of the hook should face
to the right. Squeeze hook end of wire
together to form a loop.
STEP 7. Connect the other two wires
to outer terminal block screws. Use the
same method described in STEP 6.
STEP 8. Connect the direct wire cable
(bare) grounding wire to the external-
grounding conductor screw. Tighten all
terminal block screws firmly.
STEP 9. Tighten the strain relief screws.
STEP 10. Insert tab of terminal block
cover into slot of the dryer rear panel.
Secure cover with hold-down screw.
Proceed with Exhaust Installation.
See "CONNECT EXHAUST" on
this page.
D. CONNECT EXHAUST
A properly exhausted dryer will give
you the shortest drying time, lower
your utility bill, and extend the life of
the dryer.
Fire Hazard
Use a heavy metal vent.
Do not use a plastic vent.
Do not use a metal foil vent.
Failure to follow these instructions
can result in death or fire.
• Replace plastic exhaust vent with
heavy metal or flexible metal vent.
• Do not use non-metal flexible vent,
metal vent that is smaller than four
inches in diameter, or exhaust hoods
with magnetic latches.
• Do not exhaust dryer into a chimney,
furnace cold air duct, attic or crawl space,
or any other duct used for venting.
° Do not install flexible metal vent in
enclosed walls, ceilings, or floors,
• If using an existing exhaust system,
disconnect vent from the dryer and
clean one section at a time until you
reach the exhaust hood. To clean out
lint, you can use the hose attachment
on your vacuum or, use a pole or wire
with a feather duster or rag attached.
• Make sure exhaust hood is not plugged
with lint. Follow the instructions in this
section to reinstall your vent system.
19


