


11
CARE and CLEANING
The housing and control panel should only be cleaned
with a soft cloth rinsed in soapy water, or with a solvent
free, non-scouring cleaning agent.
Other areas requiring periodic cleaning or maintenance
are listed below:
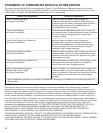
Lint Filter
The lint filter should be cleaned after each use or If the
‘‘Lint Filter’’ light becomes illuminated and the buzzer
sounds during operation of the dryer:
1. Immediately stop the dryer by depressing the
‘‘On/Off’’ button.
2. Depress the ‘‘Door’’ button and open the door.
3. Remove the filter.
4. Clean the filter.
5. Replace the filter.
6. Let the dryer cool down.
7. Close the door.
8. Press the ‘Start’’ button to restart the dryer.
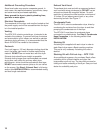
Heat Exchanger (WTL models only)
The heat exchanger should be cleaned 3–4 times a year;
more often if used frequently. To clean the heat
exchanger:
1. With the dryer turned off and disconnected from
the electrical supply. Disconnect the power cord
by grasping the plug, not the cord.
2. Depress the ‘‘Door’’ button and open the door.
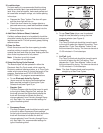
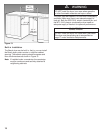
3. Press the button for opening the heat exchanger/inlet
panel, as shown in Figure 6.
Figure 6.
4. Open the panel fully.
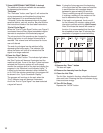
5. Turn the retainers on each side of the heat
exchanger towards each other, in the direction of the
arrows as shown in Figure 7.
6. Remove the heat exchanger by slowly pulling it
forward and out of the dryer.
7. Clean the heat exchanger thoroughly with water.
Allow the water to run freely through the heat
exchanger. See Figure 8.
Figure 7.
Figure 8.
8. Allow heat exchanger to dry thoroughly before
reinserting into the dryer.
9. Once the heat exchanger is completely dry, reinsert it
into the dryer. The handle must be underneath the
heat exchanger. Turn the retainers back to their
original position.
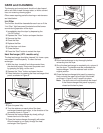
10. Close the heat exchanger/inlet panel by pressing
firmly on both the upper left and right hand sides,
as shown in Figure 9, until it snaps into place.
Note: The dryer door will only be able to be closed
if the heat exchanger/inlet panel is properly
closed and locked in place.
Figure 9.