


20 American Dryer Corp. 113610-1
!
!
Electrical Dryers
Check to ensure that electric oven/contactor assembly is
activating.
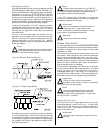
Safety Related Circuits
Make a complete operational check of all safety related
circuits:
• Door Switch(es)
• Hi-Limit Thermostats
• Sail Switch (for Gas and Electric Models Only)
Sail Switch Adjustment – To check for proper sail switch
operation (for gas and electric models only), open the main
door and while holding main door switch plunger in, start
dryer. Dryer should start but heat circuit should not be activated
(on). If the heat system is activated, the sail switch is
improperly adjusted and must be adjusted by bending the
actuator arm of the sail switch toward the burner box. If the
actuator arm is bent too far toward the burner box of the dryer,
the dryer may not have heat when needed. After any
adjustment to the sail switch, the above procedure must be
repeated to verify proper operation of the sail switch.
The dryer should be operated through 1 complete cycle to
ensure that no further adjustments are necessary and that
all components are functioning properly.
Make a complete operational check of all operating controls.
For microprocessor model check controller (computer)
programs/selections: each microprocessor controller
(computer) has been preprogrammed by the factory with the
most commonly used parameter (program) selections. If
computer program changes are required, refer to the
computer programming manual, which was shipped with
the dryer.
Tumbler Coating
The tumbler is treated with a protective coating. We suggest
dampening old garments or cloth material with a solution of
water and nonflammable mild detergent and tumbling them
in the tumbler to remove this coating.
3-Phase (3ø) Electric Service
Check the electric service phase sequence (3-phase [3ø]
models only). While the dryer is operating, check to see if the
blower/fan is rotating in the proper direction. Looking from
the front, the blower/fan should spin in the clockwise direction.
If it is, the phasing is correct. If the phasing is incorrect,
reverse 2 of the 3 leads at connections L1, L2, L3 of the
power supply to the dryer.
Impor tant
If the blower/fan is rotating in the wrong direction,
it will drastically reduce drying efficiency and it
can also cause premature component failure.
Spin and Dwell (Stop) Times Adjustment
Reversing tumbler dryers should never be operated with less
than a 33 lb (15 kg) load (dry weight), since the load’s weight
affects tumbler coast time during a direction reversal
command. It is important that the tumbler come to a complete
stop prior to starting in opposite direction.
Microprocessor Models – Spin and dwell (stop) times
are adjustable in the manual (timed) mode. Spin and dwell
(stop) times are not adjustable in the automatic mode and
have been preprogrammed into the microprocessor
controller (computer) for 150-seconds spin time in forward
direction, 120-seconds in the reverse direction and a
5-second dwell (stop) time.
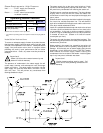
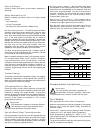
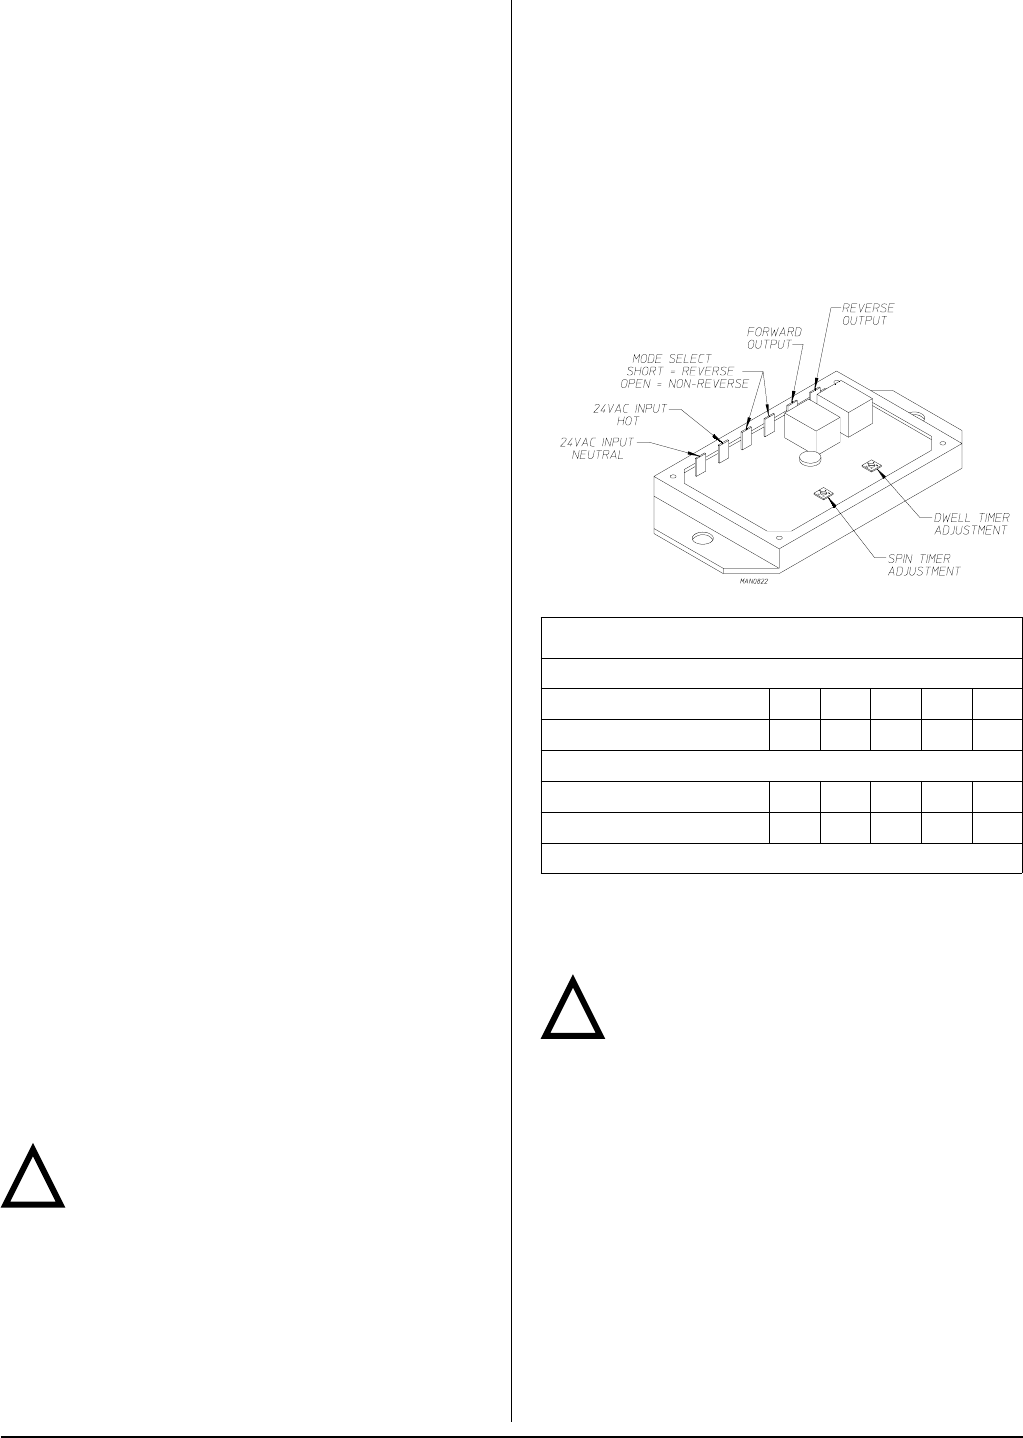
Mechanical Timer Models – Timer models have an
electronic reversing timer in the electrical service box, which
is located in the upper right front area of the dryer.
Both the dwell (stop) time and the tumbler spin time are
adjustable by mode selection switches located on the
electronic timer (as noted in the illustration below).
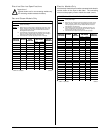
DNEGELGNIMIT
EMITNIPS
rebmuNnoitisoPtnemtsujdA12345
sdnoceSniemiT * 030609021051
EMIT)POTS(LLEWD
rebmuNnoitisoPtnemtsujdA12345
sdnoceSniemiT * 53.66.79.82.01
.dnoces-1-/+eranwohsseulaV*
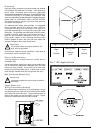
Preoperational Instructions __________
Important
For more detailed information regarding the
microprocessor controller (computer), refer to the
microprocessor user’s manual included with the dryer.
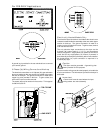
Coin Models
Microprocessor Controller (Computer)
When the microprocessor controller (computer) is in the ready
state, the L.C.D. screen will display “Ready, Insert $XX.XX
(amount) to Start”.
Insert coin(s). Once the correct “Amount to Start” has been
inserted, the L.C.D. will display “Select Temperature”.
Select temperature by pressing “HI”, “MED”, or “LO”. The
cycle will start and the L.C.D. will display the Dry Cycle selected
and the remaining time.
The dryer will continue through the drying and cooling cycles,
until the vended time has expired.