


30
SERVICE
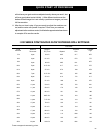
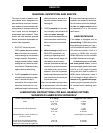
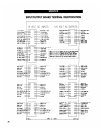
SUGGESTED LUBRICANTS
Insulation Class
A & B
A & B
F & H
Consistency
Medium
Medium
Medium
Type
Polyurea
Polyurea
Polyurea
Grease
Shell Dolium R
Shell Dolium R
Shell Dolium R
Frame Type
215T & Smaller
254 & Larger
All
Note: All of the auger and meter-
ing roll bearings are lifetime lubri-
cated and do not require service
relubrication.
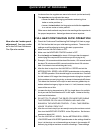
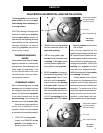
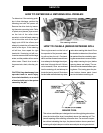
1. Remove and CLEAN the gas
line strainers. Make certain gas
valves are CLOSED and that
gas is purged from the system
before attempting disassembly.
2. Inspect the collector plate (at
the top of the burner casting)
and the burner cup for any ac-
cumulation of foreign material.
CLEAN if required. Foreign ma-
terial in the burner cup or cast-
ing will not burn out and will im-
pair burner operation.
3. If required, inspect ignitor plug
and CLEAN the electrodes.
Use an ignition point file to remove
carbon and rust between the
electrode surfaces. Ignitor gap
should be about 1/8 inch.
4. Inspect flame sensor for pos-
sible damage or poor connec-
tions. Flame sensor wire must
be in good condition.
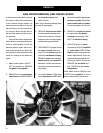
5. Inspect and manually ROTATE
the top auger paddle assem-
bly. The paddle unit must rotate
freely without any indication of
sticking or binding.
6. Inspect the top auger and bot-
tom auger drive lines for proper
adjustment and condition. Read-
just line tension as required.
Note: All of the auger and meter-
ing roll bearings are lifetime lubri-
cated and do not require service
relubrication.
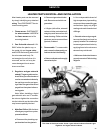
7. OPERATE dryer clean out le-
vers, and CHECK clean-out
hatch mechanism for proper op-
eration. With hatch open, in-
spect and remove any accumu-
lation of dirt, fines and foreign
material from the bottom au-
ger trough area.
Note: Do not allow high moisture
material to collect within the trough
area. It may adversely affect metal
parts.
8. Inspect entire dryer for loose,
worn or damaged parts. Include
CHECK of auger flighting, me-
tering rolls and other internal
parts. CHECK that temperature
sensors within air plenum cham-
ber are secured within insulated
clamps, and do not chafe on
other metal parts.
9. Make sure all dryer guards and
warning decals are securely in-
stalled. Guards should not inter-
fere with moving parts. If guards
or warning decals are missing,
contact your dealer for a free re-
placement.
10. TEST FIRE the dryer several
weeks ahead of the drying sea-
son. CHECK for possible gas
leaks. (See page 16 for burner
test fire.)
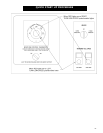
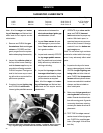
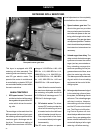
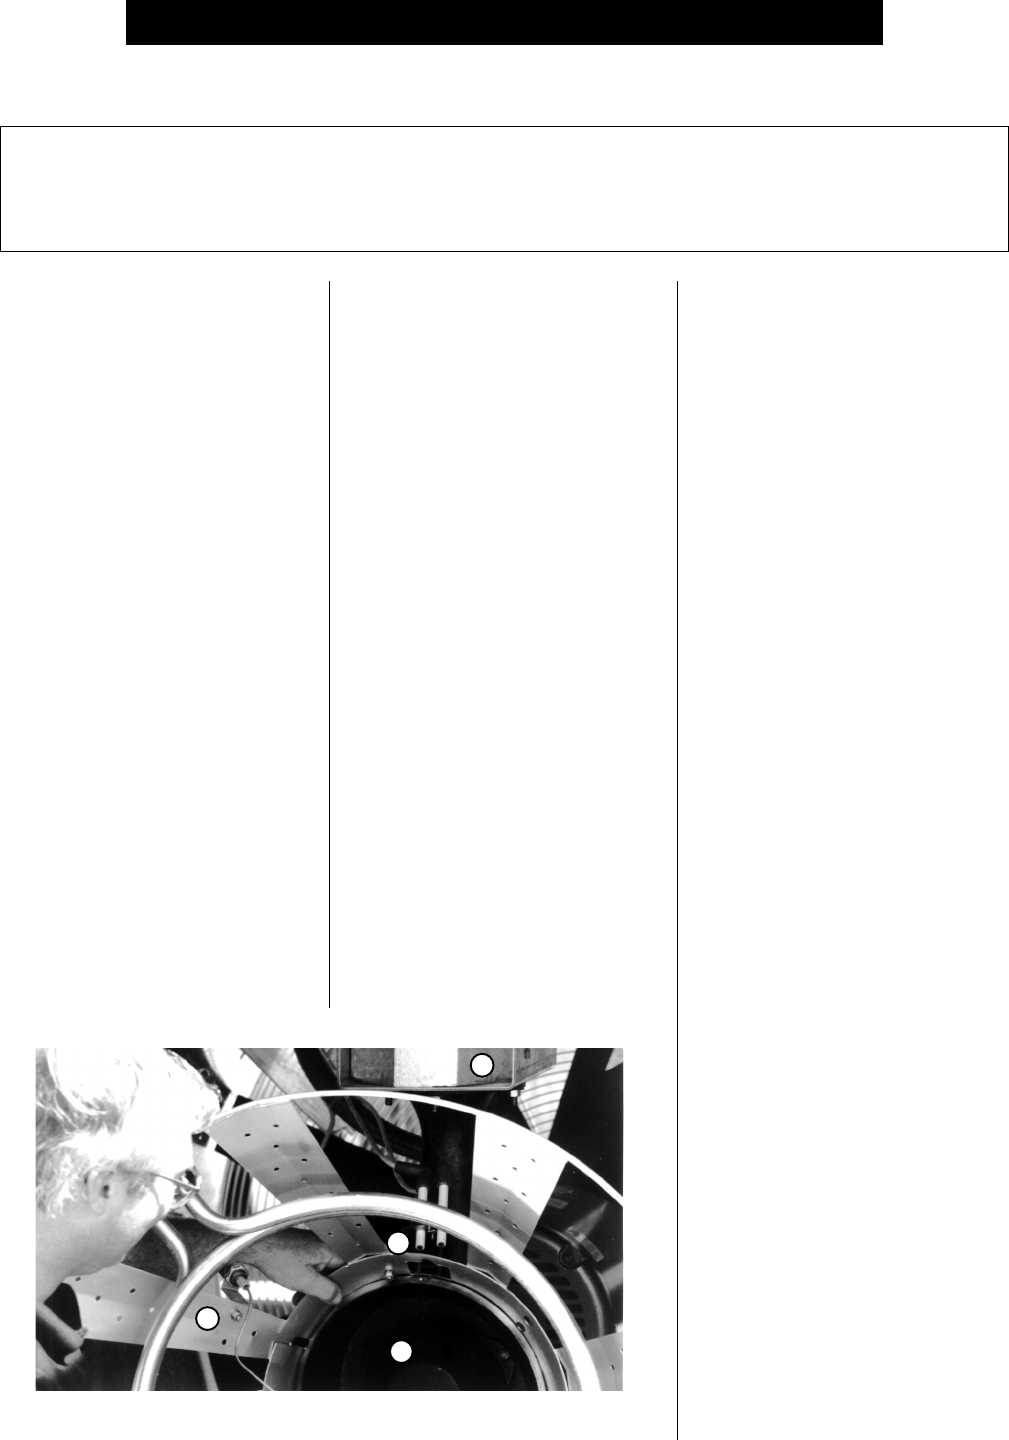
Remove the Blue Burn Optimizer Cone. Inspect 1-collector plate, 2-burner
cup, 3-ignitor plug and electrodes and 4-flame sensor on the heater.
4
2
1
3