Copier Functions
71
2
B
BB
B
Press [Stamp].
C
CC
C
Press [Preset Stamp].
D
DD
D
Select the message.
E
EE
E
Press [
All Pages
] or [
1st Page Only
] to
select the print page.
Note
❒ You can change the colour, po-
sition, size, and density of the
stamp. See p.71 “Changing the
stamp colour”. See p.71 “To
change stamp position, size,
and density”.
F
FF
F
After you have specified all nec-
essary settings, press [OK].
G
GG
G
Press [OK] twice.
H
HH
H
Place the originals, and then press
the {
{{
{Start}
}}
} key.
Changing the stamp colour
A
AA
A
Press [Stamp Colour].
B
BB
B
Select the stamp colour, then
press [OK].
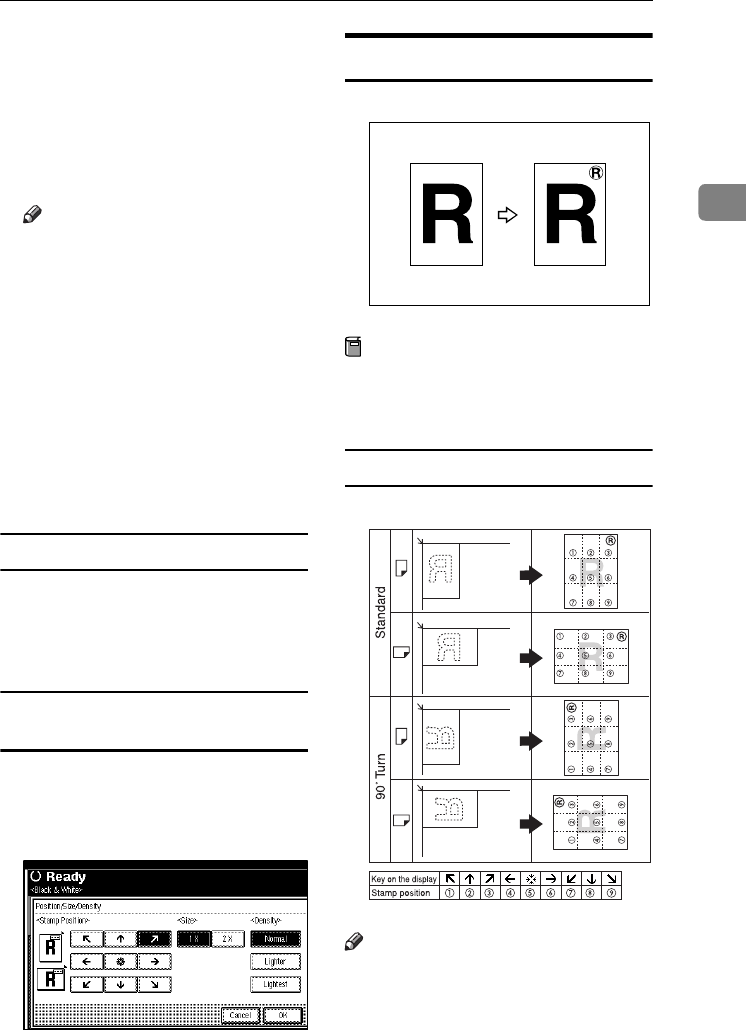
To change stamp position, size, and
density
A
AA
A
Press [
Change
].
B
BB
B
Select the position for print, size,
and density, and then press [
OK
].
User Stamp
Prints a registered stamp onto copies.
Preparation
You have to register a user stamp
before using this function. See p.72
“To program the user stamp”.
Stamp position and original orientation
Note
❒ You cannot use the bypass tray
with this function.
❒ Only one message can be stamped
at a time.
❒ The default stamp colour is black.
GCSTMP0E
GCSTMP6E
JupiterC2_GB_Copy_F_FM.book Page 71 Friday, January 20, 2006 7:37 PM


