


5
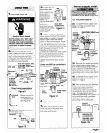
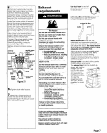
. Remove the center terminal
Ilock screw. Remove the neutral
lreen with yellow stripe grounding
Yire from external grounding
:onnector screw. Connect neutral
Ireen with yellow stripe grounding
Yire and the neutral wire (white or
:enter) of power supply cable
under the center screw of terminal
Yock. Place the hook-shaped end
)f the wire over the terminal block
#crew with open side of the hook
acing to the right. Squeeze hook
2nd of wire together to form a loop.
Connect the other two insulated
Mires under outer terminal block
crews. Attach wires using the some
nethod as the neutral wire.
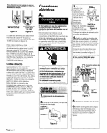
Connect the power supply cable
Ibare) grounding wire to the
external grounding connector
crew (see Figure 21).
‘ighten all terminal block screws
irmly.
external
neutral green
StrazOCI(* \urki+t3
relief
Figure 21
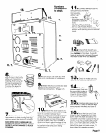
6
. Tighten strain relief screws.
7
. Insert tab of terminal block
zover into slot of the dryer rear
oanel (see Figure 19). Secure cover
,vith hold-down screw.
Exhaust
requirements
Fire Hazard
Do Not use non-metal, flexible duct.
Do Not use metal duct smaller than
four inches in diameter.
Do Not use exhaust hoods with
magnetic latches.
Improper air supply for exhausting
may result in a fire.
Check that exhaust system is not
longer than specified. Exhaust
systems longer than specified will:
- Accumulate lint.
- Shorten the life of the dryer.
- Reduce performance, resulting
in longer drying times and
increased energy usage.
Failure to follow specifications may
result in a fire.
Do Not exhaust dryer into a chimney,
furnace cold air duct, attic or crawl
space, or any other duct used for
venting.
Clean the exhaust system every year.
Do Not install flexible duct in
enclosed walls, ceilings or floors.
Accumulated lint could be fuel for a
fire or cause moisture damage.
Exhausting your dryer indoors is Not
recommended. The moisture and lint
indoors may cause:
- Lint to gather inside and
around the dryer and be a
fuel for fire.
- Moisture damage to
woodwork, furniture, paint,
wallpaper, carpet, etc.
- Housecleaning problems
and possible health problems.
Failure to follow these instructions
could result in a fire or serious injury
or health problems.
If using an existing exhaust system,
clean lint from entire length of exhaust
system. Make sure exhaust hood is not
plugged with lint.
The exhaust system should be
inspected end cleaned yearly.
Replace plastic exhaust duct with rigid
metal or flexible metal duct.
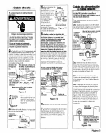
Use duct tape to seal all
joints. Do Not use screws
to secure duct.
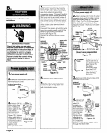
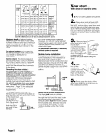
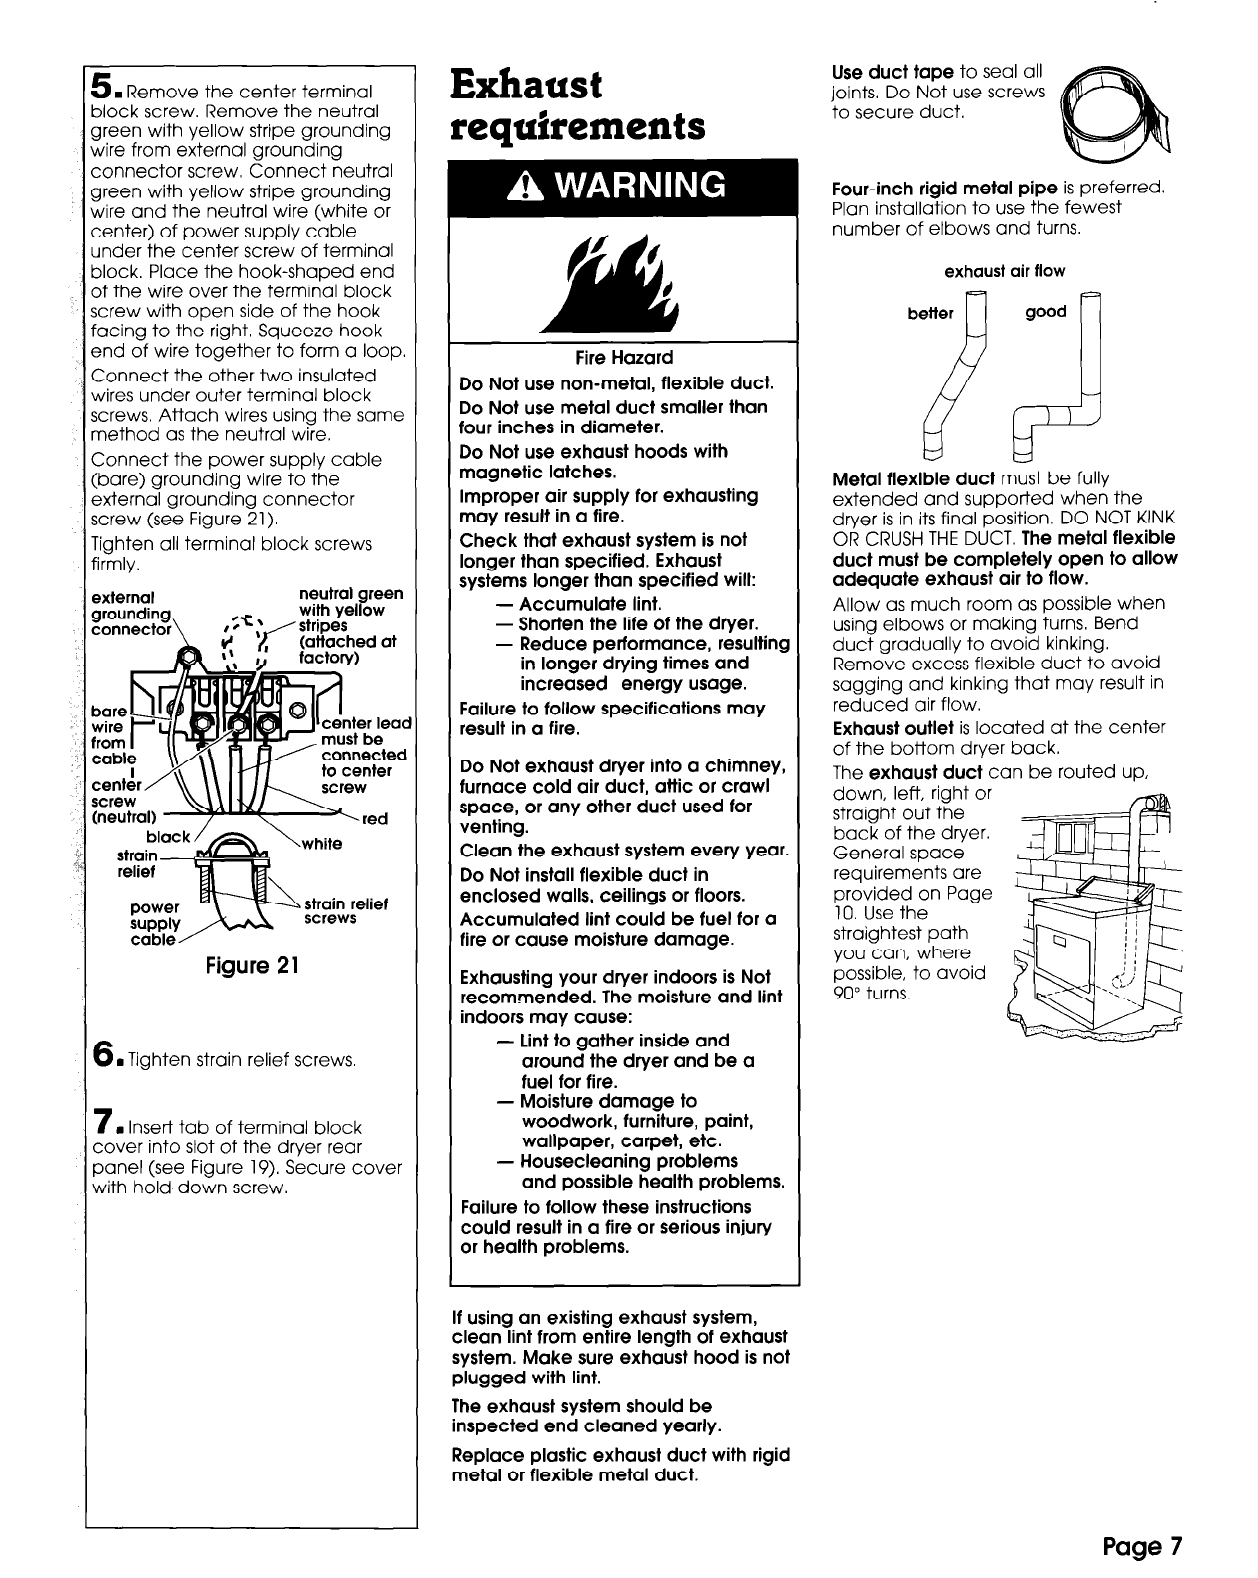
Four-inch rigid metal pipe is preferred.
Plan installation to use the fewest
number of elbows and turns.
exhaust air flow
better 1 good n
Metal flexible duct must be fully
extended and supported when the
dryer is in its final position. DO NOT KINK
OR CRUSH THE DUCT. The metal flexible
duct must be completely open to allow
adequate exhaust air to flow.
Allow as much room as possible when
using elbows or making turns. Bend
duct gradually to ovoid kinking.
Remove excess flexible duct to ovoid
sagging and kinking that may result in
reduced air flow.
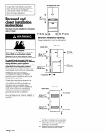
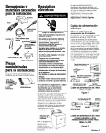
Exhaust outlet is located at the center
of the bottom dryer back.
The exhaust duct con be routed up,
down, left, right or
straight out the
bock of the dryer.
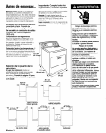
General space
requirements ore
provided on Page
10. Use the
straightest path
you con, where
possible, to ovoid
90” turns,
Page 7