


42 16022904 Rev. 0 ©2004 Maytag Appliances Company
WARNING
!
To avoid risk of electrical shock, personal injury or death;
disconnect power to unit before servicing.
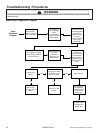
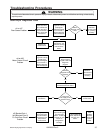
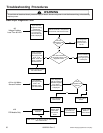
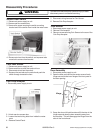
Disassembly Procedures
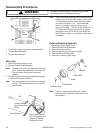
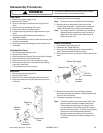
Locking
Tabs
Felt
Seal
Note: When reinstalling, the seal will be mounted to
the tumbler front in a counterclockwise rotation.
Start at the 3:00 position and place under the
locking tabs. The seal will overlap 1 1/4". The
coated side (which is the lighter of the two
colors) goes against the tumbler. The felt seal is
then looped in a "U-shape” so that the lighter-
colored side is against the tumbler front as it is
slid in place under the tabs. Bend tabs back
over the felt seal with a flat blade screwdriver.
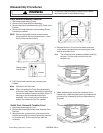
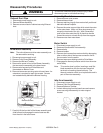
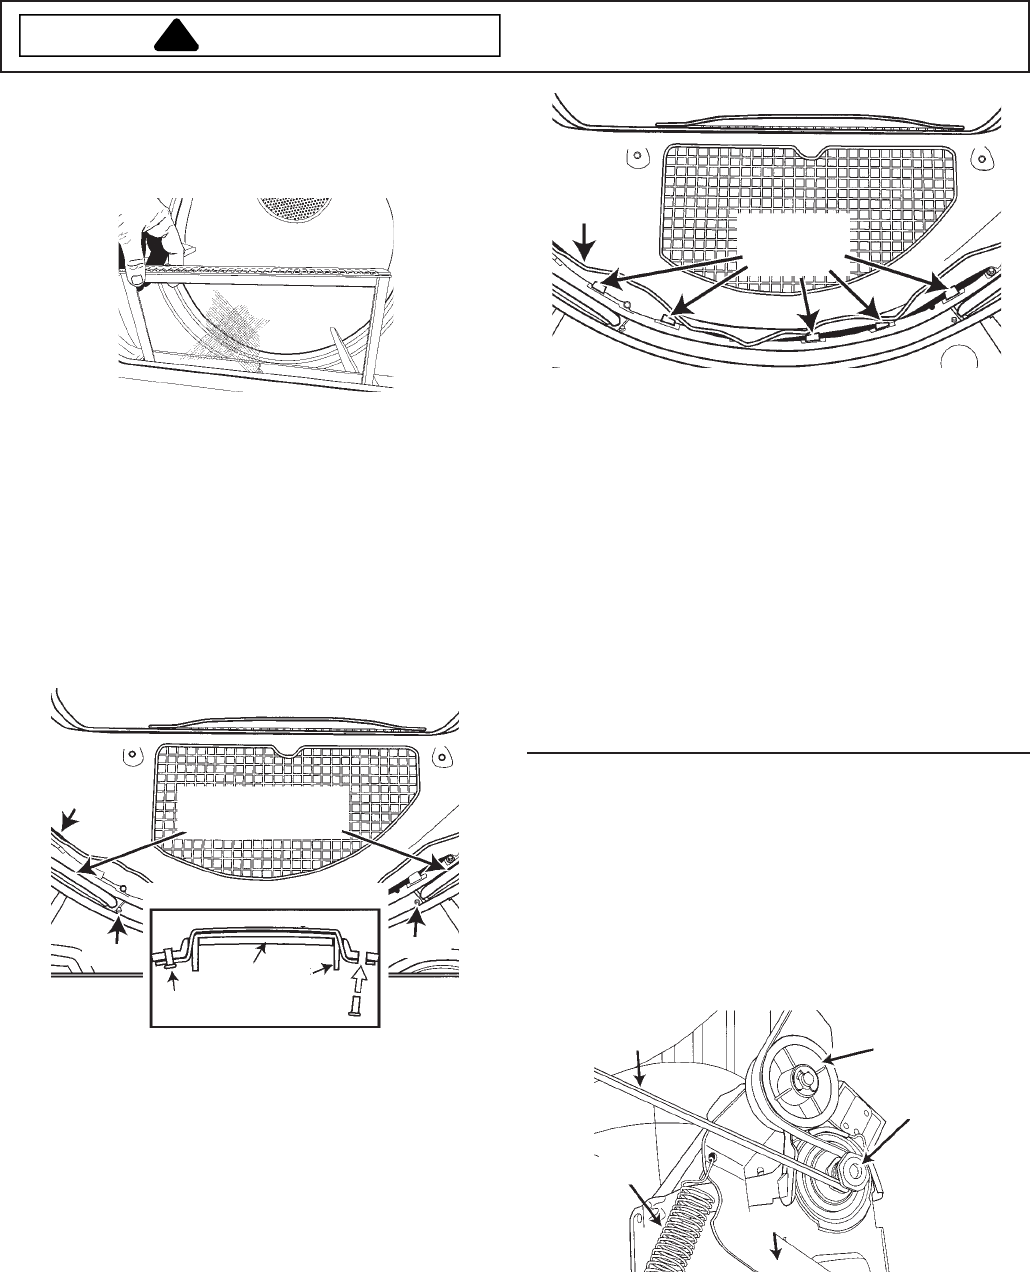
Belt
1. Disconnect power supply to unit.
2. Remove Shroud Assembly.
3. Insert left hand along side of tumbler at the 8 o'clock
position. Insert right arm under tumbler (as close to
blower as possible).
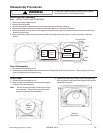
View From the Back of the Dryer
Idler
Pulley
Motor
Pulley
Drive
Belt
Idler
Spring
Idler Arm
Lint Filter
Note: Lint Filter is one piece and can be removed for
cleaning.
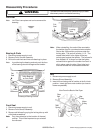
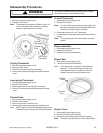
Bearing & Pads
1. Disconnect power supply to unit.
2. Remove Front Shroud Assembly.
3. Drill out the old rivets and rivet new bearings in place.
Note: In positioning the bearing and cork pad, the face
of the bearing should ride against the tumbler.
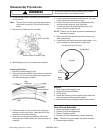
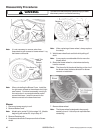
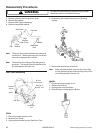
Front Seal
1. Disconnect power supply to unit.
2. Remove Front Shroud Assembly.
3. Remove old felt seal by prying the locking tabs up with
a flat-blade screwdriver.
Note: Pay close attention to the location of the seal
overlap. This will be important as you reinstall
the new seal.
Teflon Bearings
on Cork Pads
Felt
Seal
Rivet
Rivet
Cutaway of Bearing Surface
Teflon Bearing
Rivet
Steel
Bearing
Surface
Rivet
Cork
Pad