


© Copyright, Alliance Laundry Systems LLC – DO NOT COPY or TRANSMIT
Installation
802702
12
Step 3: (Non-Gravity Drain Models Only)
Connect Drain Hose to Drain Receptacle
Remove the drain hose from its shipping position on
the rear of the washer by removing the shipping tape.
IMPORTANT: Drain receptacle must be capable of
handling a minimum of 1 3/8 inch (3.5 cm) outside
diameter drain hose.
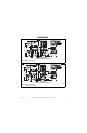
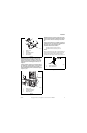
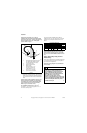
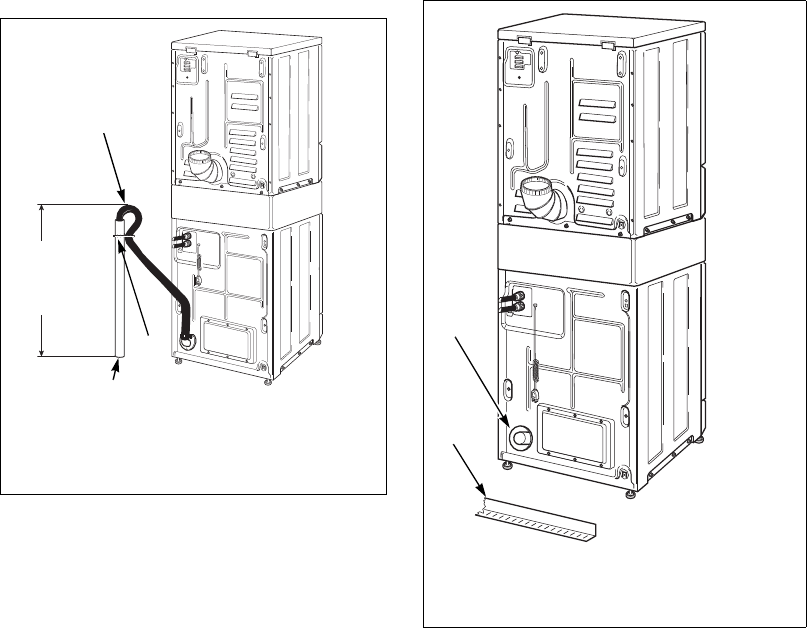
Standpipe Installation
Place the drain hose into the standpipe.
Remove the beaded strap from accessories bag and
place around standpipe and drain hose and tighten
strap to hold hose to standpipe. Refer to Figure 5. This
will prevent the drain hose from dislodging from drain
receptacle during use.
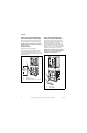
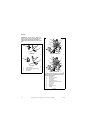
Step 4: (Gravity Drain Models Only)
Connect Drain Outlet to Drain System
Remove drain fitting (four inches long) and hose
clamp from accessories bag. Insert drain fitting into
drain outlet hose. Clamp hose and fitting.
Connect the drain fitting to a vented drain system
using a flexible connection (obtain locally). Inside
diameter of fitting is 1.53 in. (3.89 cm) and outside
diameter is 1.66 in. (4.22 cm). The drain system must
be vented to prevent an air lock or siphoning.
IMPORTANT: Increasing the drain hose length,
installing elbows, or causing bends will decrease
drain flow rates and increase drain times,
impairing machine performance.
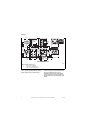
Figure 6
SWD835N
1 Drain Hose
2 Beaded Tie-Down Strap
3 Standpipe 2 in. (5.08 cm) or 1-1/2 in. (4 cm)
Figure 5
1
2
3
24 in. to 36 in.
(61 to 91.44 cm)
Recommended
Height
SWD745N
1 Drain Trough
2 Drain Outlet Hose
SWD745N
2
1