


© Copyright, Alliance Laundry Systems LLC – DO NOT COPY or TRANSMIT
Installation
19
512682
Models without Factory-Equipped Power
Cord
Use U.L. (Underwriters Laboratories) listed wire.
Allow sufficient slack in wiring so dryer can be moved
from its normal location when necessary.
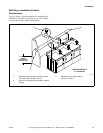
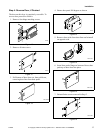
1. Remove the screw and terminal block access
cover from the rear of dryer cabinet.
2. Insert ends of direct wire through power supply
hole (containing proper strain relief) in rear of
dryer cabinet. Connect the power cord, or direct
wiring, to the two outer terminal block
terminals using the two wire-binding (10-32 x
3/8 in.) screws from the accessories pack in the
envelope shipped inside the dryer cylinder.
IMPORTANT: Use only a U.L. listed No. 10
(copper wire only) two conductor power supply
cord kit rated 240 Volts (minimum) 30 Amperes for
electric dryers or 10 Amperes for gas dryers, and
labeled as suitable for use in a clothes dryer.
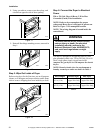
3. Tighten these wire-binding screws firmly.
IMPORTANT: Failure to tighten these screws
firmly may result in wire failure at the terminal
block.
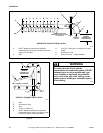
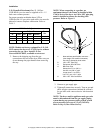
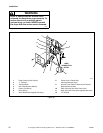
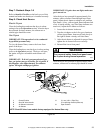
4. Attach ground (earth) wire to rear bulkhead as
shown in Figure 20 with grounding screw (obtain
locally).
5. Secure the strain relief to the power cord, or
wires, where they enter the dryer cabinet.
6. Reinstall access cover and screw.
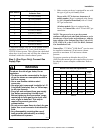
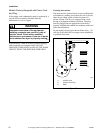
To reduce the risk of electric shock,
serious injury or death, earth (ground) the
dryer frame externally by connecting one
end of a grounding wire under ground
screw on cabinet rear and the other end
to a known effective ground.
W356
WARNING