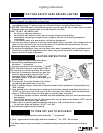
FO R Y O U R SA FETY R E A D B E FO R E LIG H TIN G
W A R N IN G :
If you d o no t follow these instru ctio ns exactly, a fire or explosion m ay res ult cau sin g
pro perty dam age , perso nal injury o r lo ss of life.
A . Th is app liance has a pilo t, w hich m ust b e lighted b y ha nd. W hen lig hting the pilot, fo llow these
in structions exactly. T o save en erg y, turn th e pilot off w hen not usin g the applian ce.
B . B EFO RE LIG HTIN G sm ell all arou nd the ap plian ce area for gas. B e sure to sm ell n ext to th e floo r
because som e gas is heavier th an air and w ill settle on the flo or.
W H AT T O D O IF YO U S M ELL G AS
• D o no t try to light any applian ce.
• D o no t tou ch any e lectric sw itch; d o not use any p ho ne in yo ur bu ilding.
• Im m ed iately ca ll you r gas supp lier from a neighb or’s p ho ne. F ollow th e gas su pp lier’s
in struction s.
• If you cann ot reach yo ur gas sup plier, ca ll the fire d epartm en t.
C . U se on ly yo ur h and to pu sh in o r turn the contro l knob s. N ever use tools. If the contro ls w ill n ot
push in or turn b y h and , don ’t try to rep air th em , call a qu alified s ervice tech nician . Force or
attem pted repair m a y resu lt in a fire or explosion.
D . D o no t u se th is applia nce if any p art has been und er w ater. Im m ediately call a qualified service
technician to inspec t the applian ce and to replace an y part of the control s ystem an d an y gas
contro l, w hich has been und er w ater.
LIG H TIN G IN STR U C TIO N S
1. S TO P! R ead the safety in form ation above.
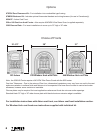
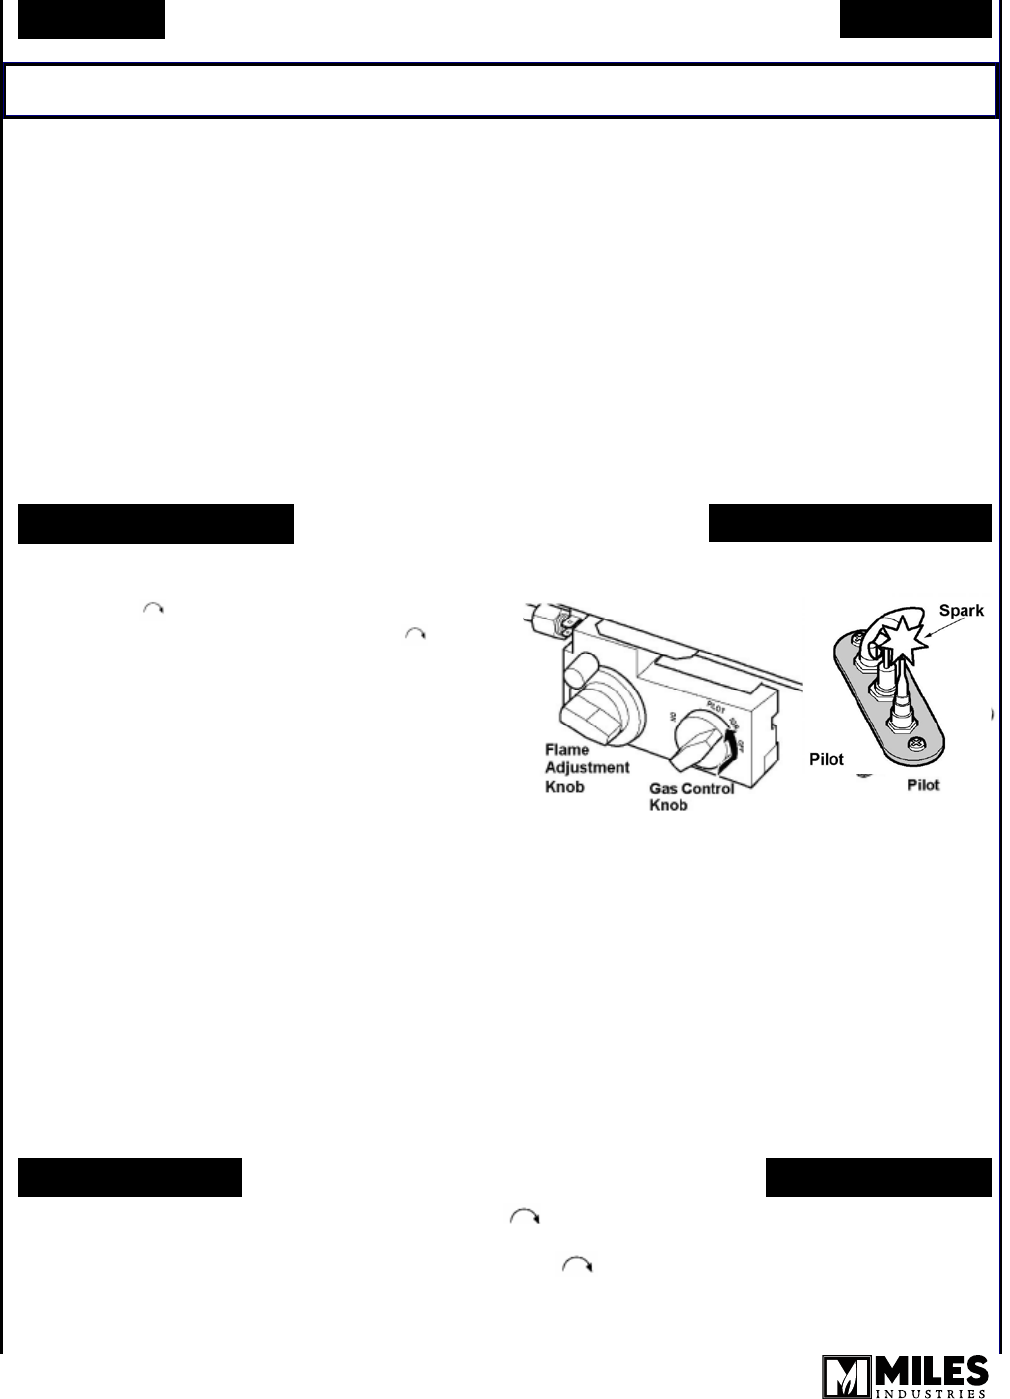
2. S et th e flam e a djustm ent k no b as far
clo ckw ise as po ssib le
*
.
3. Tu rn the gas co ntrol knob clockw ise to O FF .
N OT E: The kno b canno t b e tu rned fro m P IL OT to
O FF u nless it is p ush ed in p artially. D o not force.
4. W a it five (5) m in utes to clear ou t an y g as, then
sm ell fo r gas, in clu ding n ear the floor. If yo u
sm ell g as, S TO P! Fo llow “B” in the safety
in form ation abo ve . If you d on ’t sm ell g as, go to
the next step.
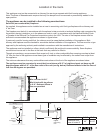
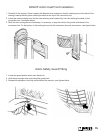
5. Find the p ilot. It is at th e left side of the firebo x
view ed th rou gh slotted hole in fron t log.
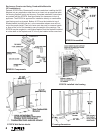
6. P ush in and turn the g as co ntro l kno b c oun terclockw ise u ntil resistance is felt just before the
“IG N” positio n.
7. K eep p ush ed in for a few seconds to allow gas to flow th en, keep in g knob dep ressed, tu rn to
“PILO T” to light pilo t. H old knob in for a furth er 5 seco nds then release. Th e kn ob sh ou ld po p
back out. P ilot sho uld rem ain lit. If p ilot go es o ut repeat steps 3 thro ugh 7.
· If knob d oes not pop o ut w hen released, sto p and im m ediately call your service tech nician o r
gas supp lier.
· If pilot ligh ts b ut w ill n ot stay lit after several tries, turn th e gas co ntro l knob to “O FF” an d call
your service tech nicia n or gas s up plier.
8. W h en pilo t is lit, p artially d epress the knob an d turn to “O N” po sition (B urner alight).
· D o no t leave kn ob set betw een “PILO T” an d “O N ”.
9. S et th e flam e h eight to d esired setting
*
.
TO TU R N O F F G A S T O A P P LIA N C E
1. S et th e flam e a djustm ent k no b as far clo ckw ise as p ossible
*
2. P ush in gas contro l kno b s lightly an d turn clockw ise to “O FF”. D o no t force.
*
T he flam e height can b e increased o r decreased b y dep ressing the rem ote contro l hand set
butto n.