28
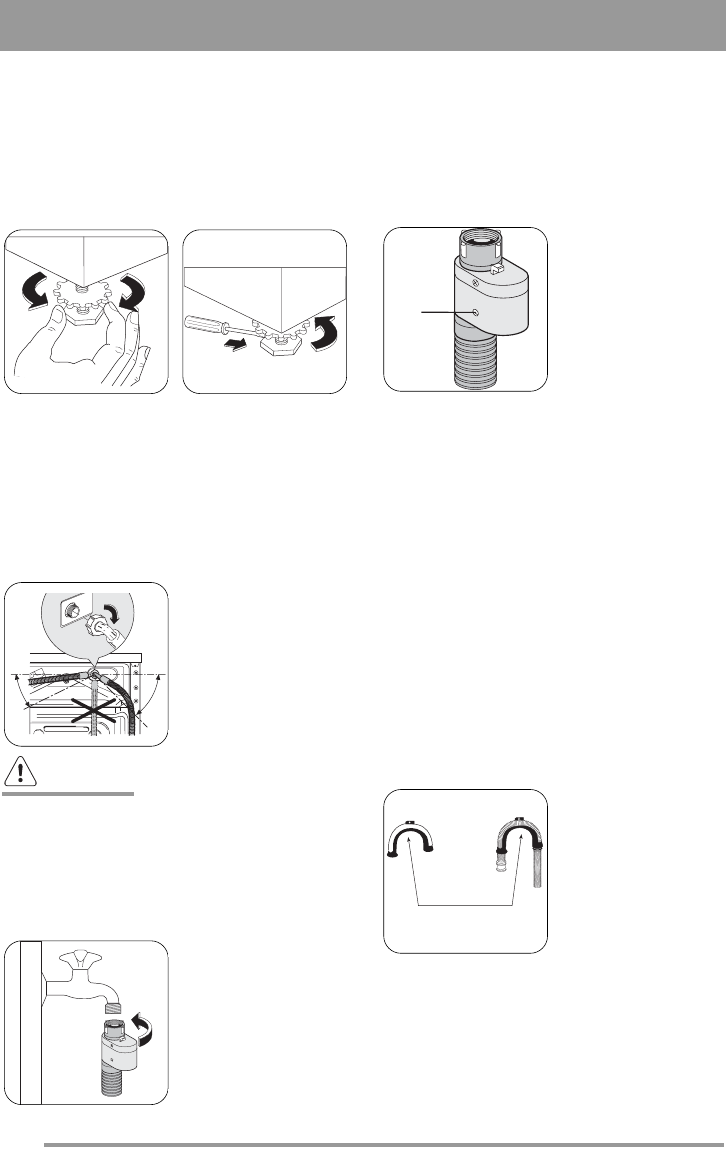
Carefully level by screwing the adjustable feet
in or out. Never place cardboard, wood or simi-
lar materials under the machine to compensate
for any unevenness in the floor. After having
levelled the machine, tighen the lock nuts.
Water inlet
An inlet hose is supplied and can been found
inside the machine drum.
Do not use the hose from your previous
machine to connect to the water supply.
1. Open the porthole and extract the inlet
hose.
2.Connect the hose
with the angled
connection to the
machine.
Attenzione!
Do not place the inlet hose downwards.
Angle the hose to the left or right depending
on the position of your water tap.
3. Set the hose correctly by loosening the ring
nut. After positioning the inlet hose, be sure to
tighten the ring nut again to prevent leaks.
4. Connect the hose to
a tap with a 3/4”
thread. Always use the
hose supplied with the
appliance.
45°
35°
Water-stop device
The inlet hose is provided with a water stop
device, which protects against damage
caused by water leaks in the hose which could
develop due to natural ageing of the hose.
This fault is shown by
a red sector in the
window “A”. Should
this occur, turn the
water tap off and refer
to your Service
Centre to replace the
hose.
The inlet hose must not be lengthened. If it is
too short and you do not wish to move the tap,
you will have to purchase a new, longer hose
specially designed for this type of use.
Water drainage
This appliance is designed to be permanently
plumbed into your home's drainage system
using one of the following methods.
1. Into a drainage standpipe.
Firstly form a hook in the end of the drain
hose using the «U» piece supplied. Place the
drain hose into your standpipe, which should
have an internal diameter of approximately
38mm thus ensuring there is an air break
between the drain hose and standpipe.
hen discharging into a standpipe ensure that
the top of the standpipe is no more than 90
cm (35.4'') and no less than 60 cm (23.6'')
above floor level.
U piece
supplied
A
132964330.qxd 19/06/2008 14.41 Pagina 28


