27
Installation instruction
Unpacking
All transit bolts and packing must be removed
before using the appliance.
You are advised to keep all transit devices so
that they can be refitted if the machine ever
has to be transported again.
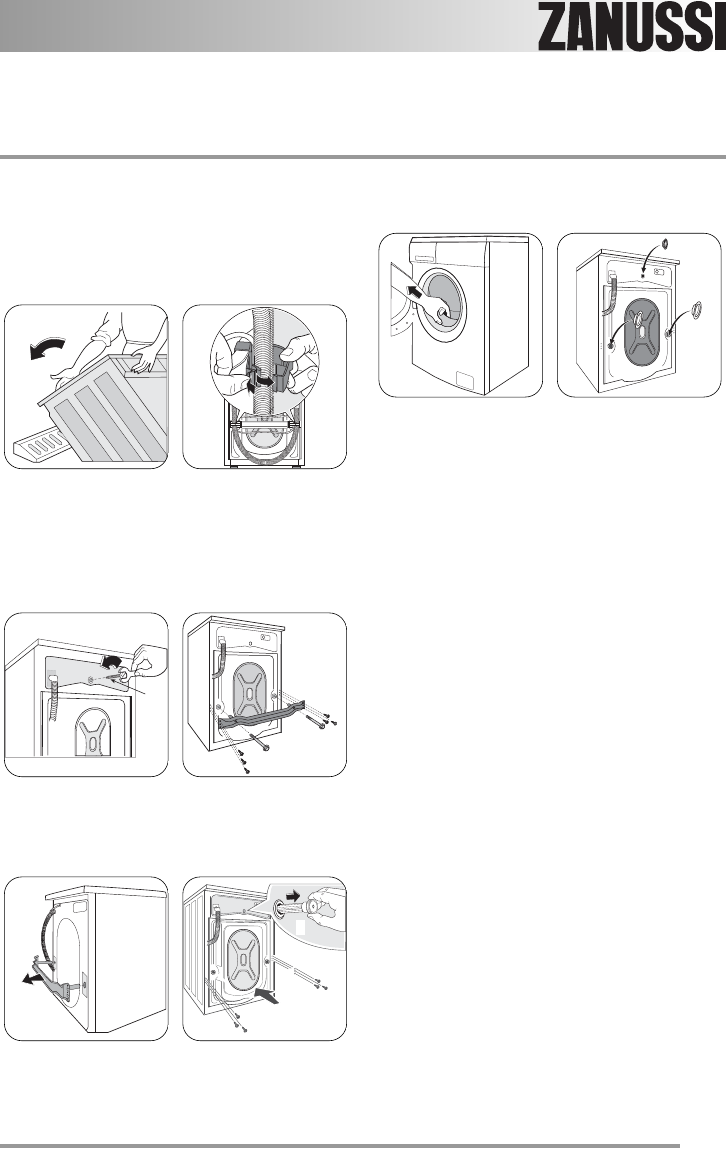
1. After removing all the packaging, carefully
lay machine on it’s back to remove the
polystyrene base from the bottom.
2. Remove the power supply cable and the
draining hose from the hose holders on the
rear of the appliance.
3. With a suitable spanner unscrew and
remove the central rear bolt A.
4. Unscrew and remove the two large rear
bolts B and the six smaller bolts C.
C
C
E
D
C
C
B
B
A
5. Remove the bracket D, refit the six smaller
bolts C and slide out the relevant plastic
spacer E.
6. Open the porthole, take out the inlet hose
from the drum and remove the polystyrene
block fitted on the door seal.
7. Fill the smaller upper hole and the two large
ones with the corresponding plastic plug
caps supplied in the bag containing the
instruction booklet.
Positioning
Install the machine on a flat hard floor.
Make sure that air circulation around the
machine is not impeded by carpets, rugs etc.
Before placing it on small tiles, apply a rubber
coating.
Never try to correct any unevenness in the
floor by putting pieces of wood, cardboard or
similar materials under the machine.
If it is impossible to avoid positioning the
machine next to a gas cooker or coal-burning
stove, an insulating panel covered with
aluminium foil on the side facing the cooker or
stove, must be inserted between the two
appliances.
The machine must not be installed in rooms
where the temperature can drop below 0.
The water inlet hose and the drain hose must
not be kinked.
Please ensure that when the appliance is
installed, it is easily accessible for the engineer
in the event of a breakdown.
132964330.qxd 19/06/2008 14.41 Pagina 27


