


10 CFM Compressed Air Dryer Chapter 3: Installation 15 of 30
Chapter 3: Installation
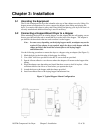
3-1 Uncrating the Equipment
The 10 cfm compressed air dryer has a handle at the top of the cabinet to use for lifting. For
hopper-mount configurations, be sure to support the hopper when lifting and placing the
dryer. Use caution and observe safety rules when lifting and placing your dryer. Be sure it is
securely attached and additional bracing is used if necessary.
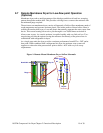
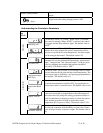
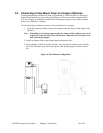
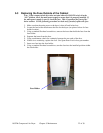
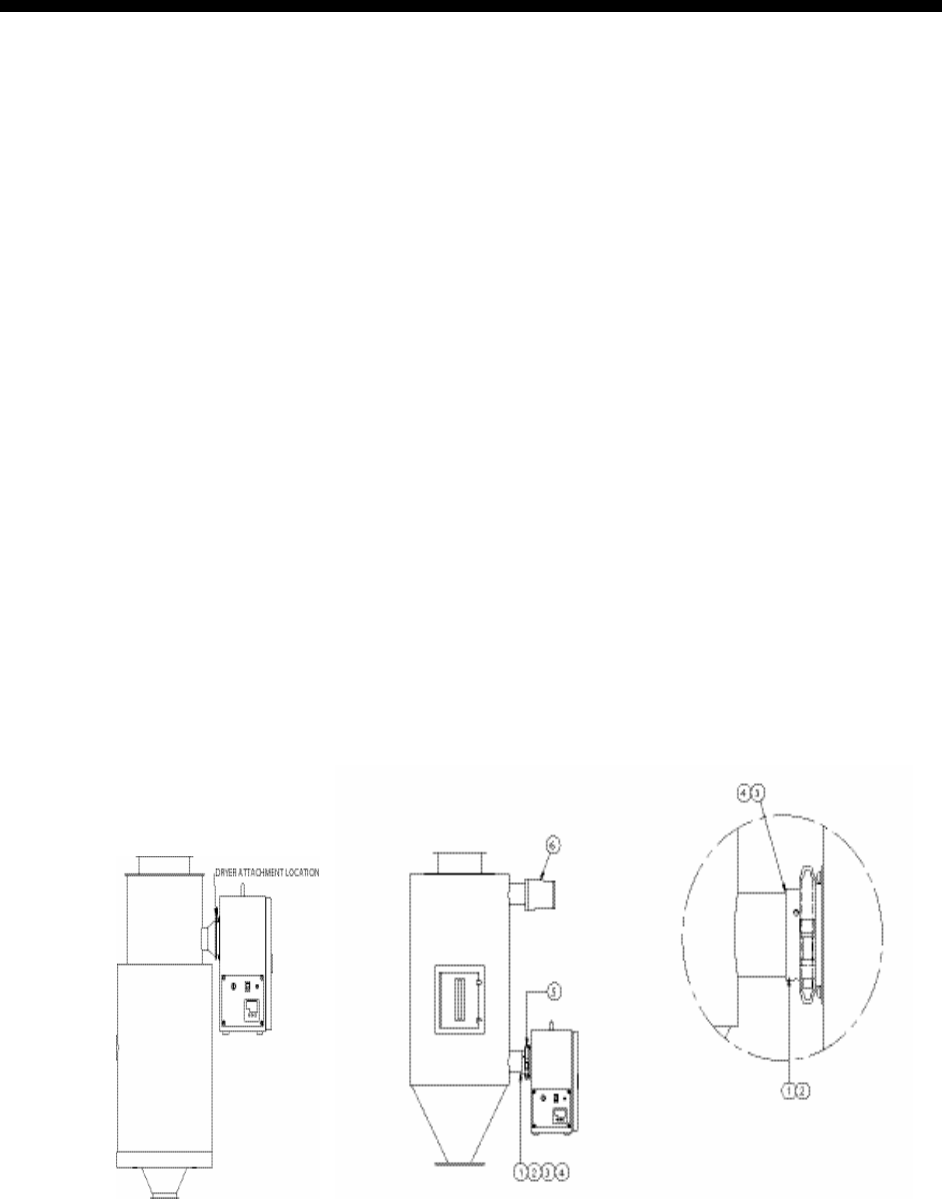
3-2 Connecting a Hopper-Mount Dryer to a Hopper
When mounting the dryer to an existing hopper, use the adapter and the self-tapping screws
that are provided with the unit to mount the dryer to the inlet of the hopper. The adapter is
pre-drilled with three holes that are used to mount it to the hopper.
Note: In some cases, depending on the drying hopper model, an adapter may not be
required. If an adapter is not required, attach the dryer to the hopper with the
clamps provided, and install the exhaust filter to the drying hopper
outlet/return line.
Use the following procedure to mount the dryer to a hopper using an adapter (See Figure 3):
1. Mark the holes in the inlet tube of the hopper for drilling.
2. Use a 9/64” drill bit to pre-drill for the #8-32 screws that are provided.
3. Spread silicone adhesive over the area where the adapter will mount to the hopper inlet
tubing.
4. Place the adapter onto the tubing and install the three screws to hold it in place. Allow
sufficient time for the silicon to cure before you operate the dryer.
5. Attach the dryer to the hopper with the clamps provided.
6. Install an exhaust filter to the drying hopper outlet/return line.
Figure 3: Typical Hopper-Mount Configuration