


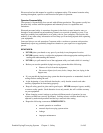

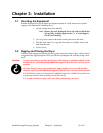
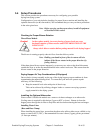
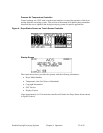

Figure 3: Suggested Lift Rigging for Cart Mounted Dryers
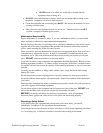
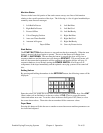
ON
O
F
F
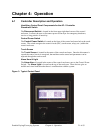
PROCESS
TEMPERATURE
DEW POINT
CONTROL POWER
ON OFF
ALARM
ALARM Silencer
ALARM HORN
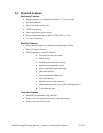
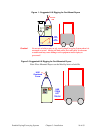
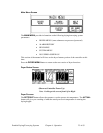
Mounting flange
Hopper mounting flanges on 0.75 and
can drill to match existing machine throat.
Diameter hole:
Notes:
and 1.5 cu. ft. (20 & 40 liter) hoppers
are supplied blank so the customer
3.0 cu. ft. (80 liter) hoppers and larger
are not supplied with a cast flange
(
as shown
)
.
E
E
F
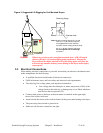
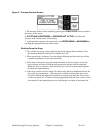
Caution! When using a hoist to move a machine mounted dryer, ALWAYS attach
chains to the three (3) locations/lifting points on the unit! Moving the
Dryer without the chains attached to all of the lifting points will cause the
unit to become unstable and may cause damage to the Dryer and/or injury
to personnel!
3-3 Electrical Connections
When making electrical connections to your unit, ensure that you take into consideration and
make arrangements for the following:
• A qualified electrician should make all electrical connections.
• Fulfill all national, state, and local safety and electrical code requirements.
• The serial tag lists voltage, phase, and amp draw information:
• Line voltage must be within plus or minus ten percent (±10%) of the
voltage listed on the serial tag, or damage may occur. Phase imbalance
must be less than two percent (2%).
• Connect main power to the dryer at the disconnect or terminals in the upper right
corner of the control enclosure.
• Install a fused disconnect with a lockout feature in the power main leading to the dryer.
• The power drop must include a ground wire.
• Make sure all electrical connections are tight.
Portable Drying/Conveying Systems Chapter 3: Installation 17 of 63