


INSTALL THE WASHER
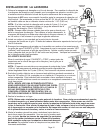
1. Place the drain hose in the drain facility. To change drain hose direction or prevent
hose from collapsing or becoming damaged, turn the end of the hose while holding the
base of the hose stationary.
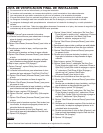
Be sure an air-tight connection is NOT made between the drain hose and the stand-
pipe. A Standpipe height of 36” is recommended. Standpipe must also be a minimum
of 1-1/8 in. inside diameter.
NOTE: If drain standpipe is in excess of 5 feet above floor level, a drain
hose extension kit (Part #12001660) will need to be installed.
NOTE: Caution must always be exercised to avoid collapsing or
damaging the drain hose. For best performance the drain hose
should not be restricted in any way, through elbows, coupling's or
excessive lengths.
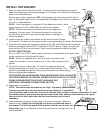
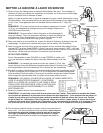
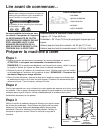
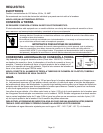
2. Install one screen strainer and washer on the inside of each fill hose
at the faucet. The dome on the screen strainer must point towards the faucet. See illustration.
3. Thread the inlet hoses with the screen washer to the HOT and COLD faucet connections.
Make sure the hose marked “HOT” is attached to the HOT faucet. Tighten by hand until
snug and then 2/3 of a turn with pliers. Verify hose connections to machine are tight.
DO NOT OVER TIGHTEN.
Turn on “HOT” and “COLD” water supply and check all connections at the water valve
on the machine and at the faucet for leaks.
NOTE: Machine is supplied with 4 feet inlet hoses. Accessory inlet
hoses are available in various lengths up to 10 feet. See accessory parts
section.
4. Plug power cord into a grounded 120 volt 60 Hz approved electrical
service protected by a 15 amp fuse or comparable circuit breaker. This
washer is grounded through the third prong of the power cord when plugged into a
three prong grounded receptacle.
NOTE: NEVER USE AN EXTENSION CORD. NEVER MODIFY WITH AN ADAPTER
THAT MAY ELIMINATE THE GROUND CONNECTION ON THE PLUG. IF A THREE
PRONG GROUND RECEPTACLE IS NOT AVAILABLE, SEE
ADDITIONAL GROUNDING CONNECTIONS SECTION.
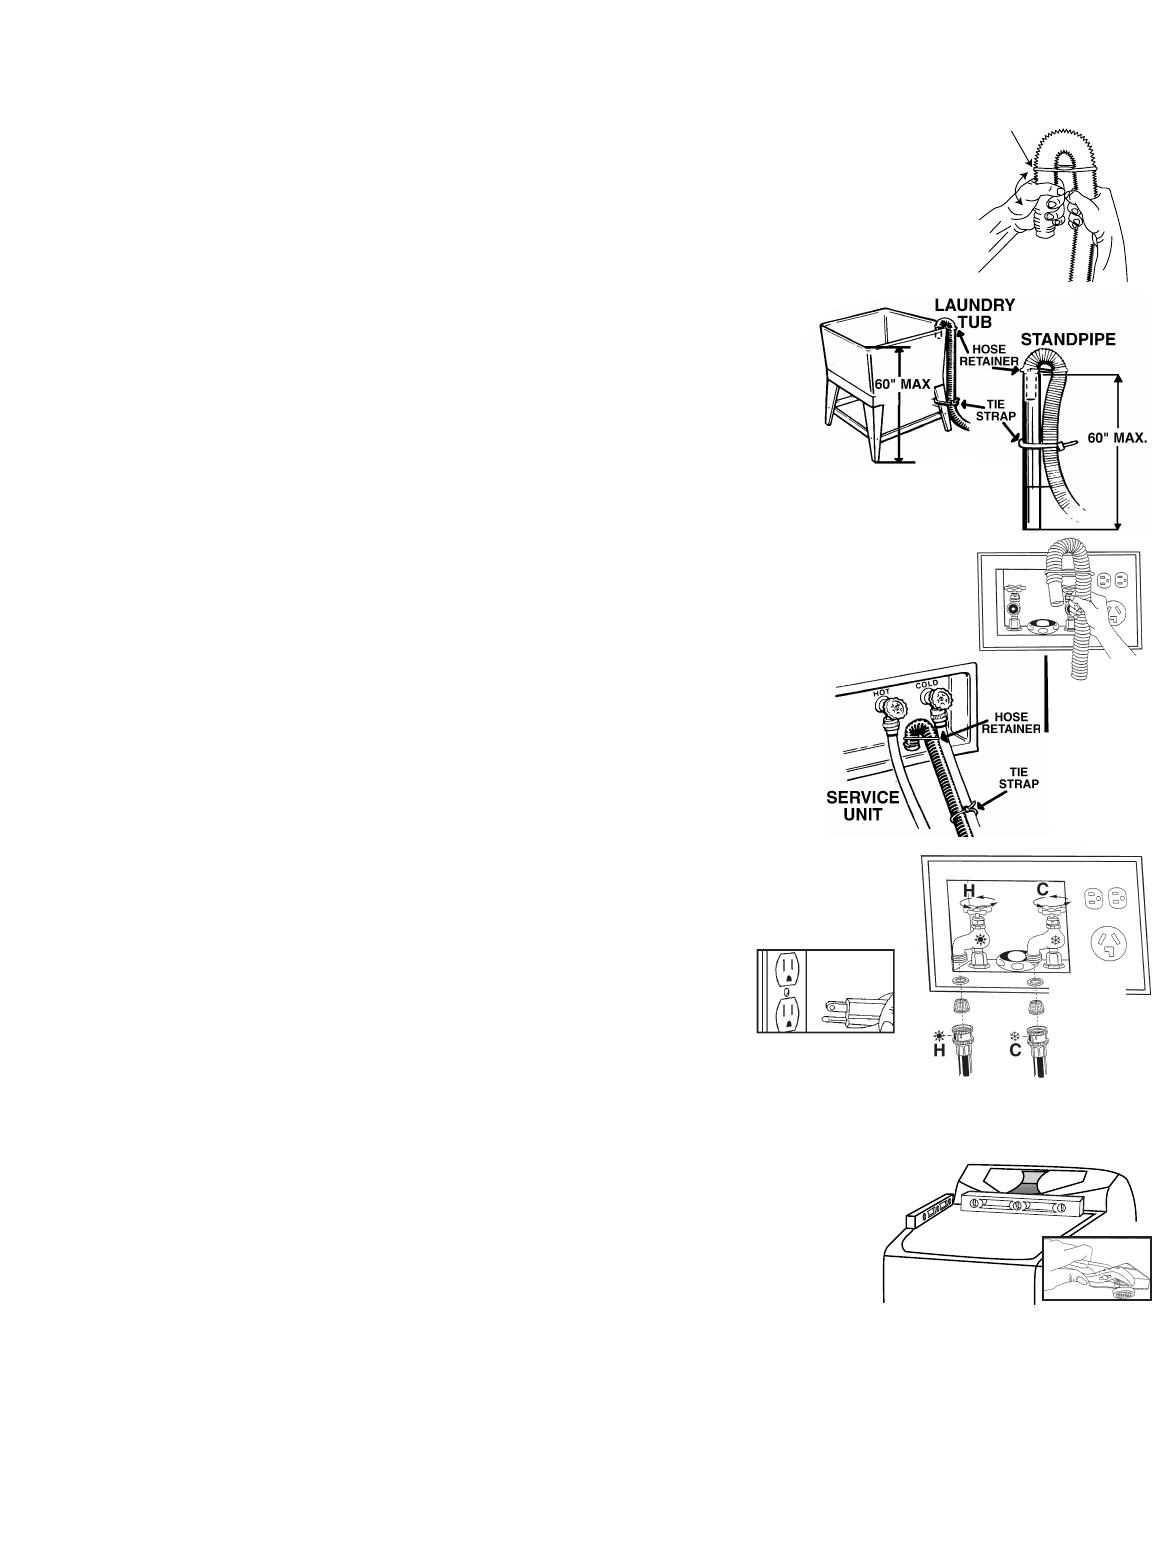
5. Slide washer into position.
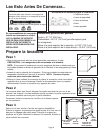
NOTE: The washer must be leveled on all 4 legs. To properly level a machine,
the top cover and the front panel must be securely fastened. A carpenter’s
level should be used on top cover to level the machine front to back, as shown in illustration. To level
the machine side to side, place level on back edge of the lid as shown in the illustration. It’s a good
idea to check for level again after the first dozen washes and re-level if
necessary.
6. Level washer by turning the leveling legs in or out as necessary. When the
washer is level, tighten the leveling leg lock nuts up against the base of
the washer. This will help prevent the machine from an out of level con-
dition after use. It is preferable to level the machine with the legs only min-
imally extended.
HOSE
RETAINER
-washer
-screen
Page 2