45
English
QR34642
Basic Techniques
This section explains about recording of movies and still images, and also basic settings on DVD video
camera/recorder.
Basic Handling of DVD Video Camera/Recorder
TURNING DVD VIDEO CAMERA/RECORDER ON AND OFF
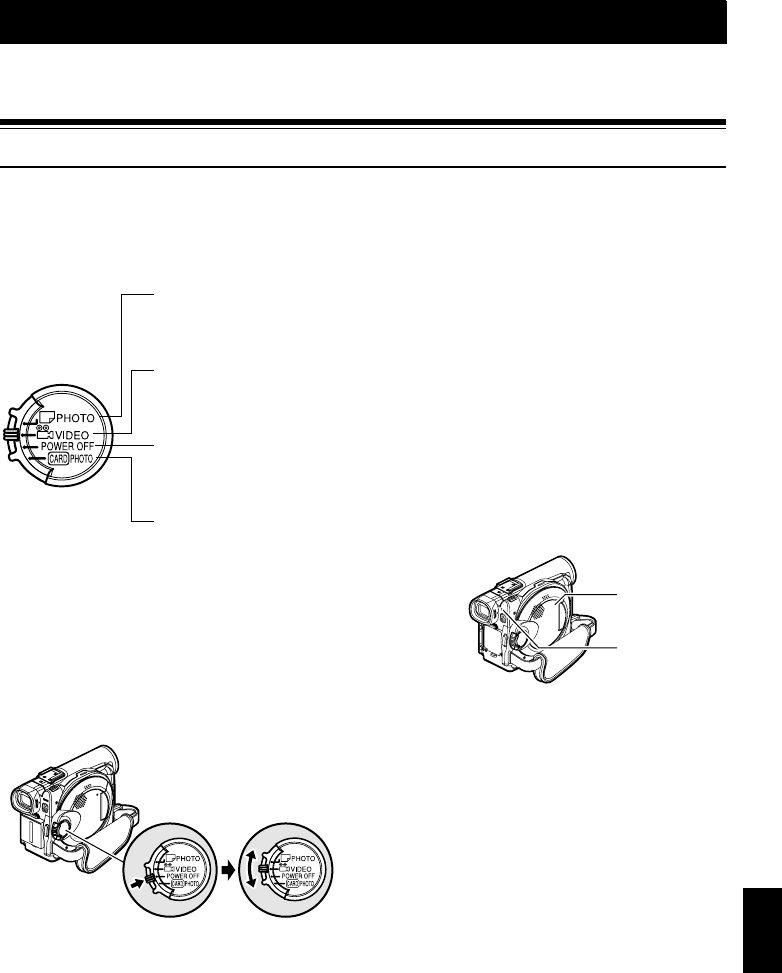
While holding down the red button at the center of
power switch, set the switch according to each
recording function:
Power ON status
During playback, set the power switch to “
VIDEO” or “ PHOTO” when using disc, or set it
to “ PHOTO” when using card.
Turn the switch while holding down the red button
at the center of switch.
Note:
• OnceyouturntheDVDvideocamera/recorderontolet
it recognize thedisc, youcanimmediately record or play
back by turning the DVD video camera/recorder on
again.However,ifyouremovethedisc,replaceit,orifthe
date changes after power is turned on, it will take some
timeforthe DVDvideocamera/recorder tostartbecause
it must recognize the disc again (See page 147).
• Itwilltakesometimeforthe DVDvideocamera/recorder
to display the Disc navigation screen after power is
turned on.
• If you turn the DVD video camera/recorder on, the
ACCESSindicatorwilllightor blinkto showthattheDVD
video camera/recorder is recognizing the disc or card:
During thistime,no operation,suchas recording, canbe
performed.
After several seconds, the ACCESS indicator will go
out, andoperating the DVDvideo camera/recorder will
be possible.
• When the DVD video camera/recorder is turned on, the
self-diagnosis function will work and a message may
appear. In this case, refer to “Trouble Messages” on
page 149 and take corrective action.
• WhiletheACCESS/PCorCARDACCESSindicatorislit
or blinking, do not violently open or close the LCD
monitor.
Set to “ PHOTO”:
To record still on DVD-
RAM disc
Set to “ VIDEO”:
To record movie on DVD-
RAM or DVD-R disc
Set to “POWER OFF”:
The DVD video camera/
recorder will turn off.
Set to “ PHOTO”:
To record still on SD
memory card or
multimedia card
Power switch
ACCESS/PC
indicator
CARD ACCESS
indicator
