,167$//$7,21,16758&7,216
,PSRUWDQW
7KHDSSOLDQFHPXVWEHLQVWDOOHGE\DVSHFLDOLVHGWHFKQLFLDQDFFRUGLQJWRFXUUHQWUHJXODWLRQV
7KHZDVKLQJPDFKLQHLVYHU\KHDY\7DNHFDUHZKHQOLIWLQJLW
813$&.,1*
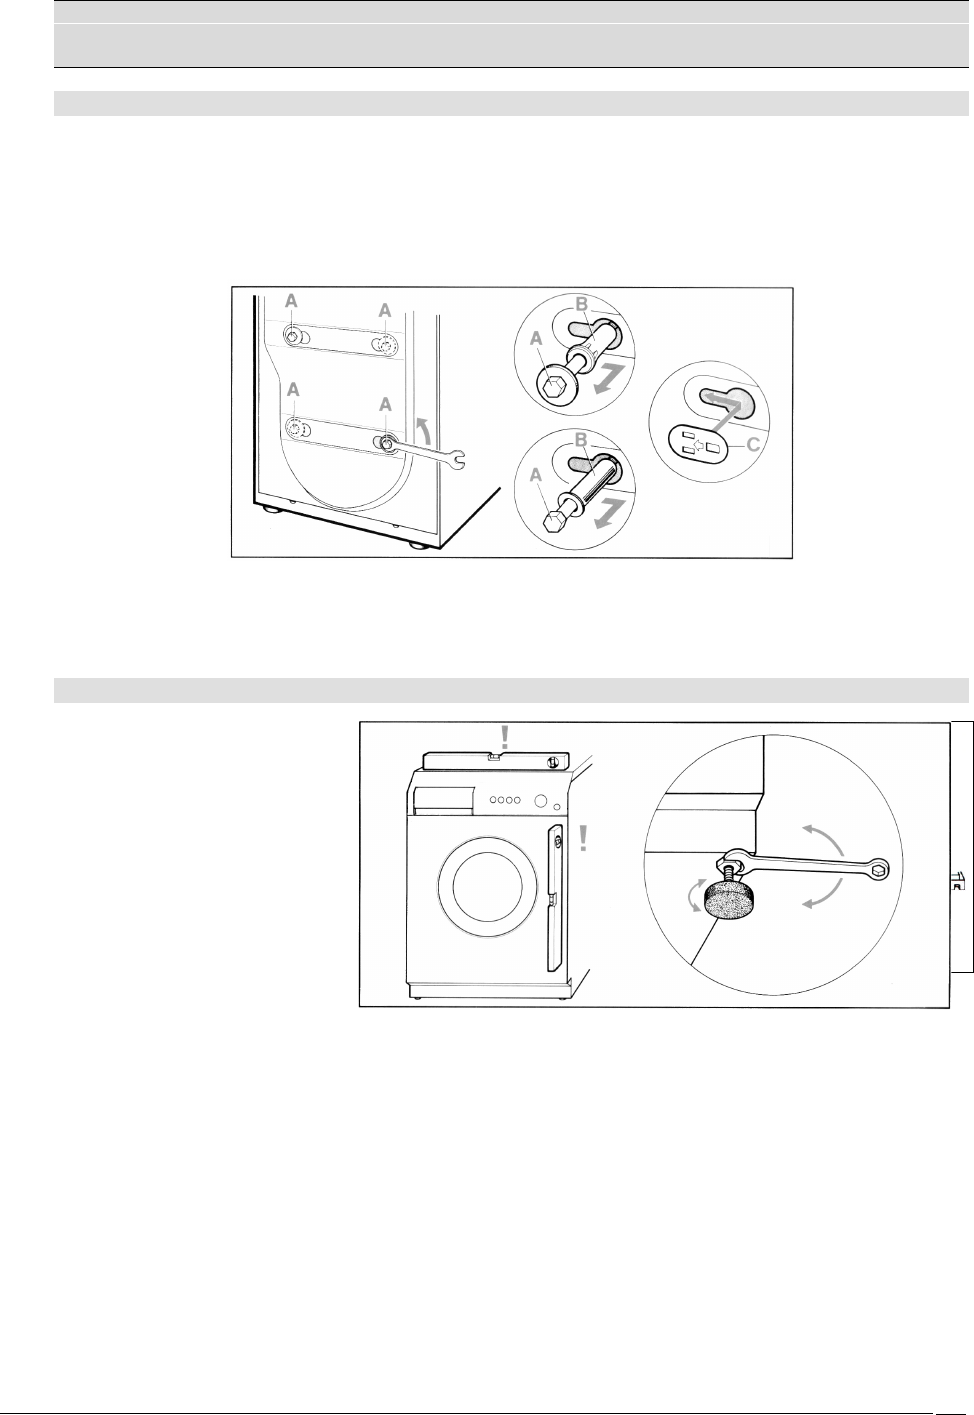
The inside of the machine comprises a moving assembly which is blocked for transport purposes by the screws
($ located at the rear of the washing machine.
1. Release the assembly by removing these screws with a 13 mm wrench.
2. Remove the screws ($ and relative spacers (%from the back of the washing machine.
3. To prevent water from entering the machine or people from touching live components with their fingers, FORVH
WKHIRXUKROHVOHIWRSHQE\WKHVFUHZVZLWKWKHVXSSOLHGSODVWLFSOXJV&
$WWHQWLRQ
• Do not turn the machine upside down and do not place it on its side.
• Keep all the components used to block the drum assembly as they will be needed if you decide to move the
appliance in future.
326,7,21,1*$1'/(9(//,1*
1. Place the appliance in the
required position.
2. Carefully level the machine
in all directions using a spirit
level and adjusting the
height of the feet if neces-
sary. After adjusting the
machine, lock the feet with
the relative lock nuts.
The water inlet and drain hoses can be turned to the right or left depending on installation requirements.
$WWHQWLRQ
• &DUU\RXWWKLVRSHUDWLRQFDUHIXOO\WRSUHYHQWWKHZDVKLQJPDFKLQHIURPYLEUDWLQJJHQHUDWLQJQRLVHRU
PRYLQJGXULQ JRSHUDWLRQ
• ,IWKHDSSOLDQFHLVLQVWDOOHGRQDFDUSHWHGIORRUHQVXUHWKDWWKHRSHQLQJVRQLWVXQGHUVLGHDUHQRWRE
VWUXFWHG
• Make sure the washing machine does not touch walls, furniture, etc., while it is working.
• The appliance must not be installed behind a lockable door, or sliding door, or a door with hinge on the oppo-
site side to the tumble dryer


