


15
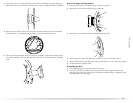
3. Lay the dryer door on a flat, protected surface with the inside door assembly facing up.
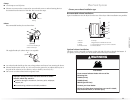
Remove the last screw from Step 1. Remove the 2 screws holding the handle to the door.
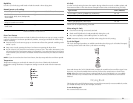
4. Remove the 6 screws to release the outer door assembly from the inner door assembly
(see illustration). It is important that you remove only the 6 indicated screws.
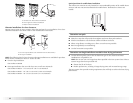
5. Lift the inner door assembly off of the outer door assembly. Unsnap the handle from the
outer door assembly, move it to the other side, and snap in. Set the outer door assembly
aside.
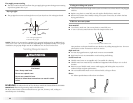
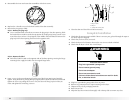
Reverse the hinge and hinge bracket
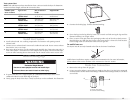
1. Place the inner door, screw head side up, on the work surface.
2. Remove the 4 screws that hold the hinge to the door.
3. Remove the 2 screws that hold the handle bracket to the door.
4. Move hinge to the other side and reattach with the 4 screws removed in Step 2.
5. Move handle bracket to the other side and reattach with the 2 screws removed in Step 3.
6. Set the inner door assembly aside.
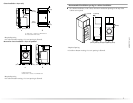
Reinstalling the door
1. Check for fingerprints on the glass. Clean if necessary.
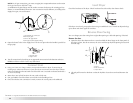
2. Place the inner door assembly into the outer door assembly. Align the hinge in the
opening on the side. To fit correctly, the inside door assembly edge is completely inside
the outside door assembly edge.