


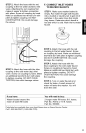
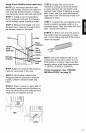
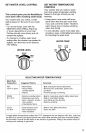
Using 4-inch flexible heavy metal vent:
NOTE: Do not secure exhaust vent
joints with screws, Screws can catch lint
and slow the drying process. Instead,
use clamps to secure exhaust vent joints.
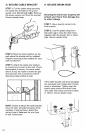
STEP 1. Install a 4-inch metal elbow
on the exhaust hood and, if necessary,
on the laundry center's exhaust outlet.
STEP 2. Measure the length of 4-inch
flexible heavy metal vent needed from
the laundry center to the hood.
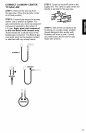
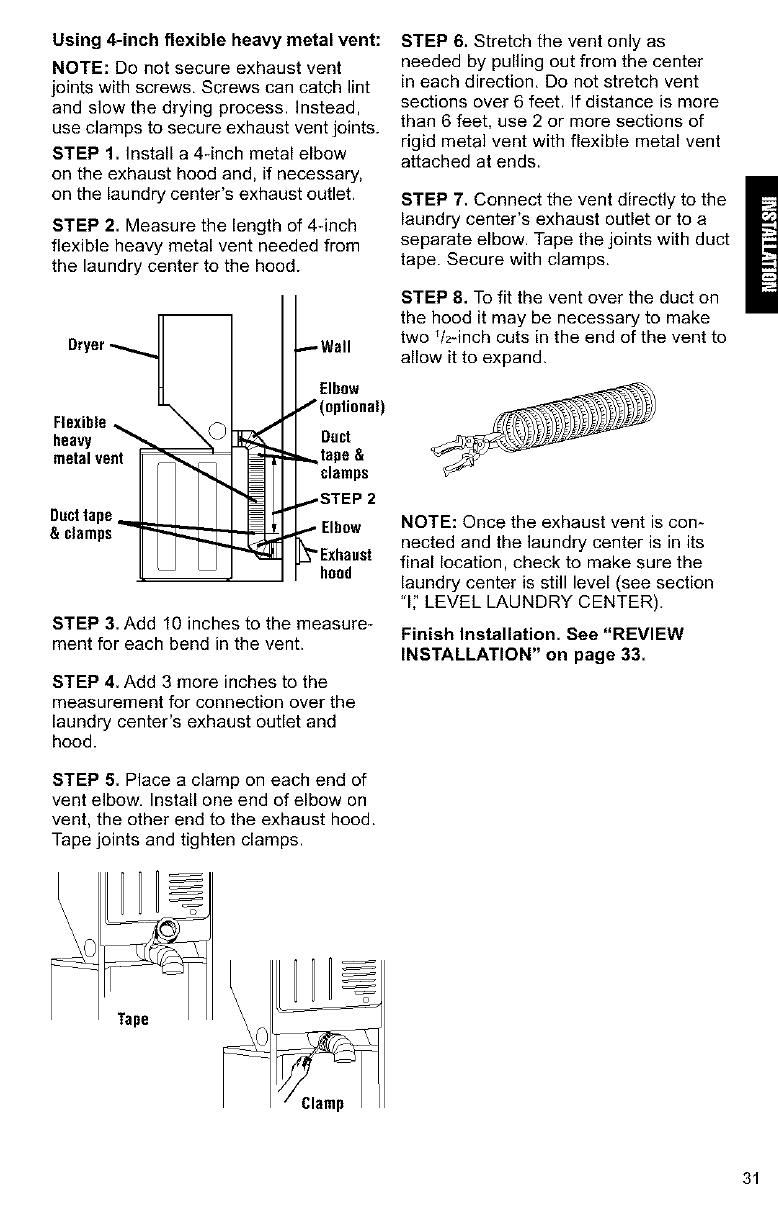
Dryer_
Flexible_ _
,..2])
& clamps_
_,Wall
Elbow
f (optional)
I Duct
,,,,,,tape &
clamps
-STEP 2
• Elbow
"Exhaust
hood
STEP 3. Add 10 inches to the measure-
ment for each bend in the vent.
STEP 4. Add 3 more inches to the
measurement for connection over the
laundry center's exhaust outlet and
hood.
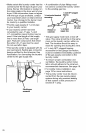
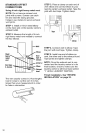
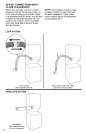
STEP 5. Place a clamp on each end of
vent elbow, Install one end of elbow on
vent, the other end to the exhaust hood.
Tape joints and tighten clamps.
Tape
STEP 6. Stretch the vent only as
needed by pulling out from the center
in each direction, De not stretch vent
sections over 6 feet. If distance is more
than 6 feet, use 2 or more sections of
rigid metal vent with flexible metal vent
attached at ends.
STEP 7. Connect the vent directly to the
laundry center's exhaust outlet or to a
separate elbow. Tape the joints with duct
tape. Secure with clamps.
STEP 8. To fit the vent over the duct on
the hood it may be necessary to make
two V2Anch cuts in the end of the vent to
allow it to expand.
NOTE: Once the exhaust vent is con-
nected and the laundry center is in its
final location, check to make sure the
laundry center is still level (see section
"If' LEVEL LAUNDRY CENTER).
Finish Installation. See "REVIEW
INSTALLATION" on page 33.
31